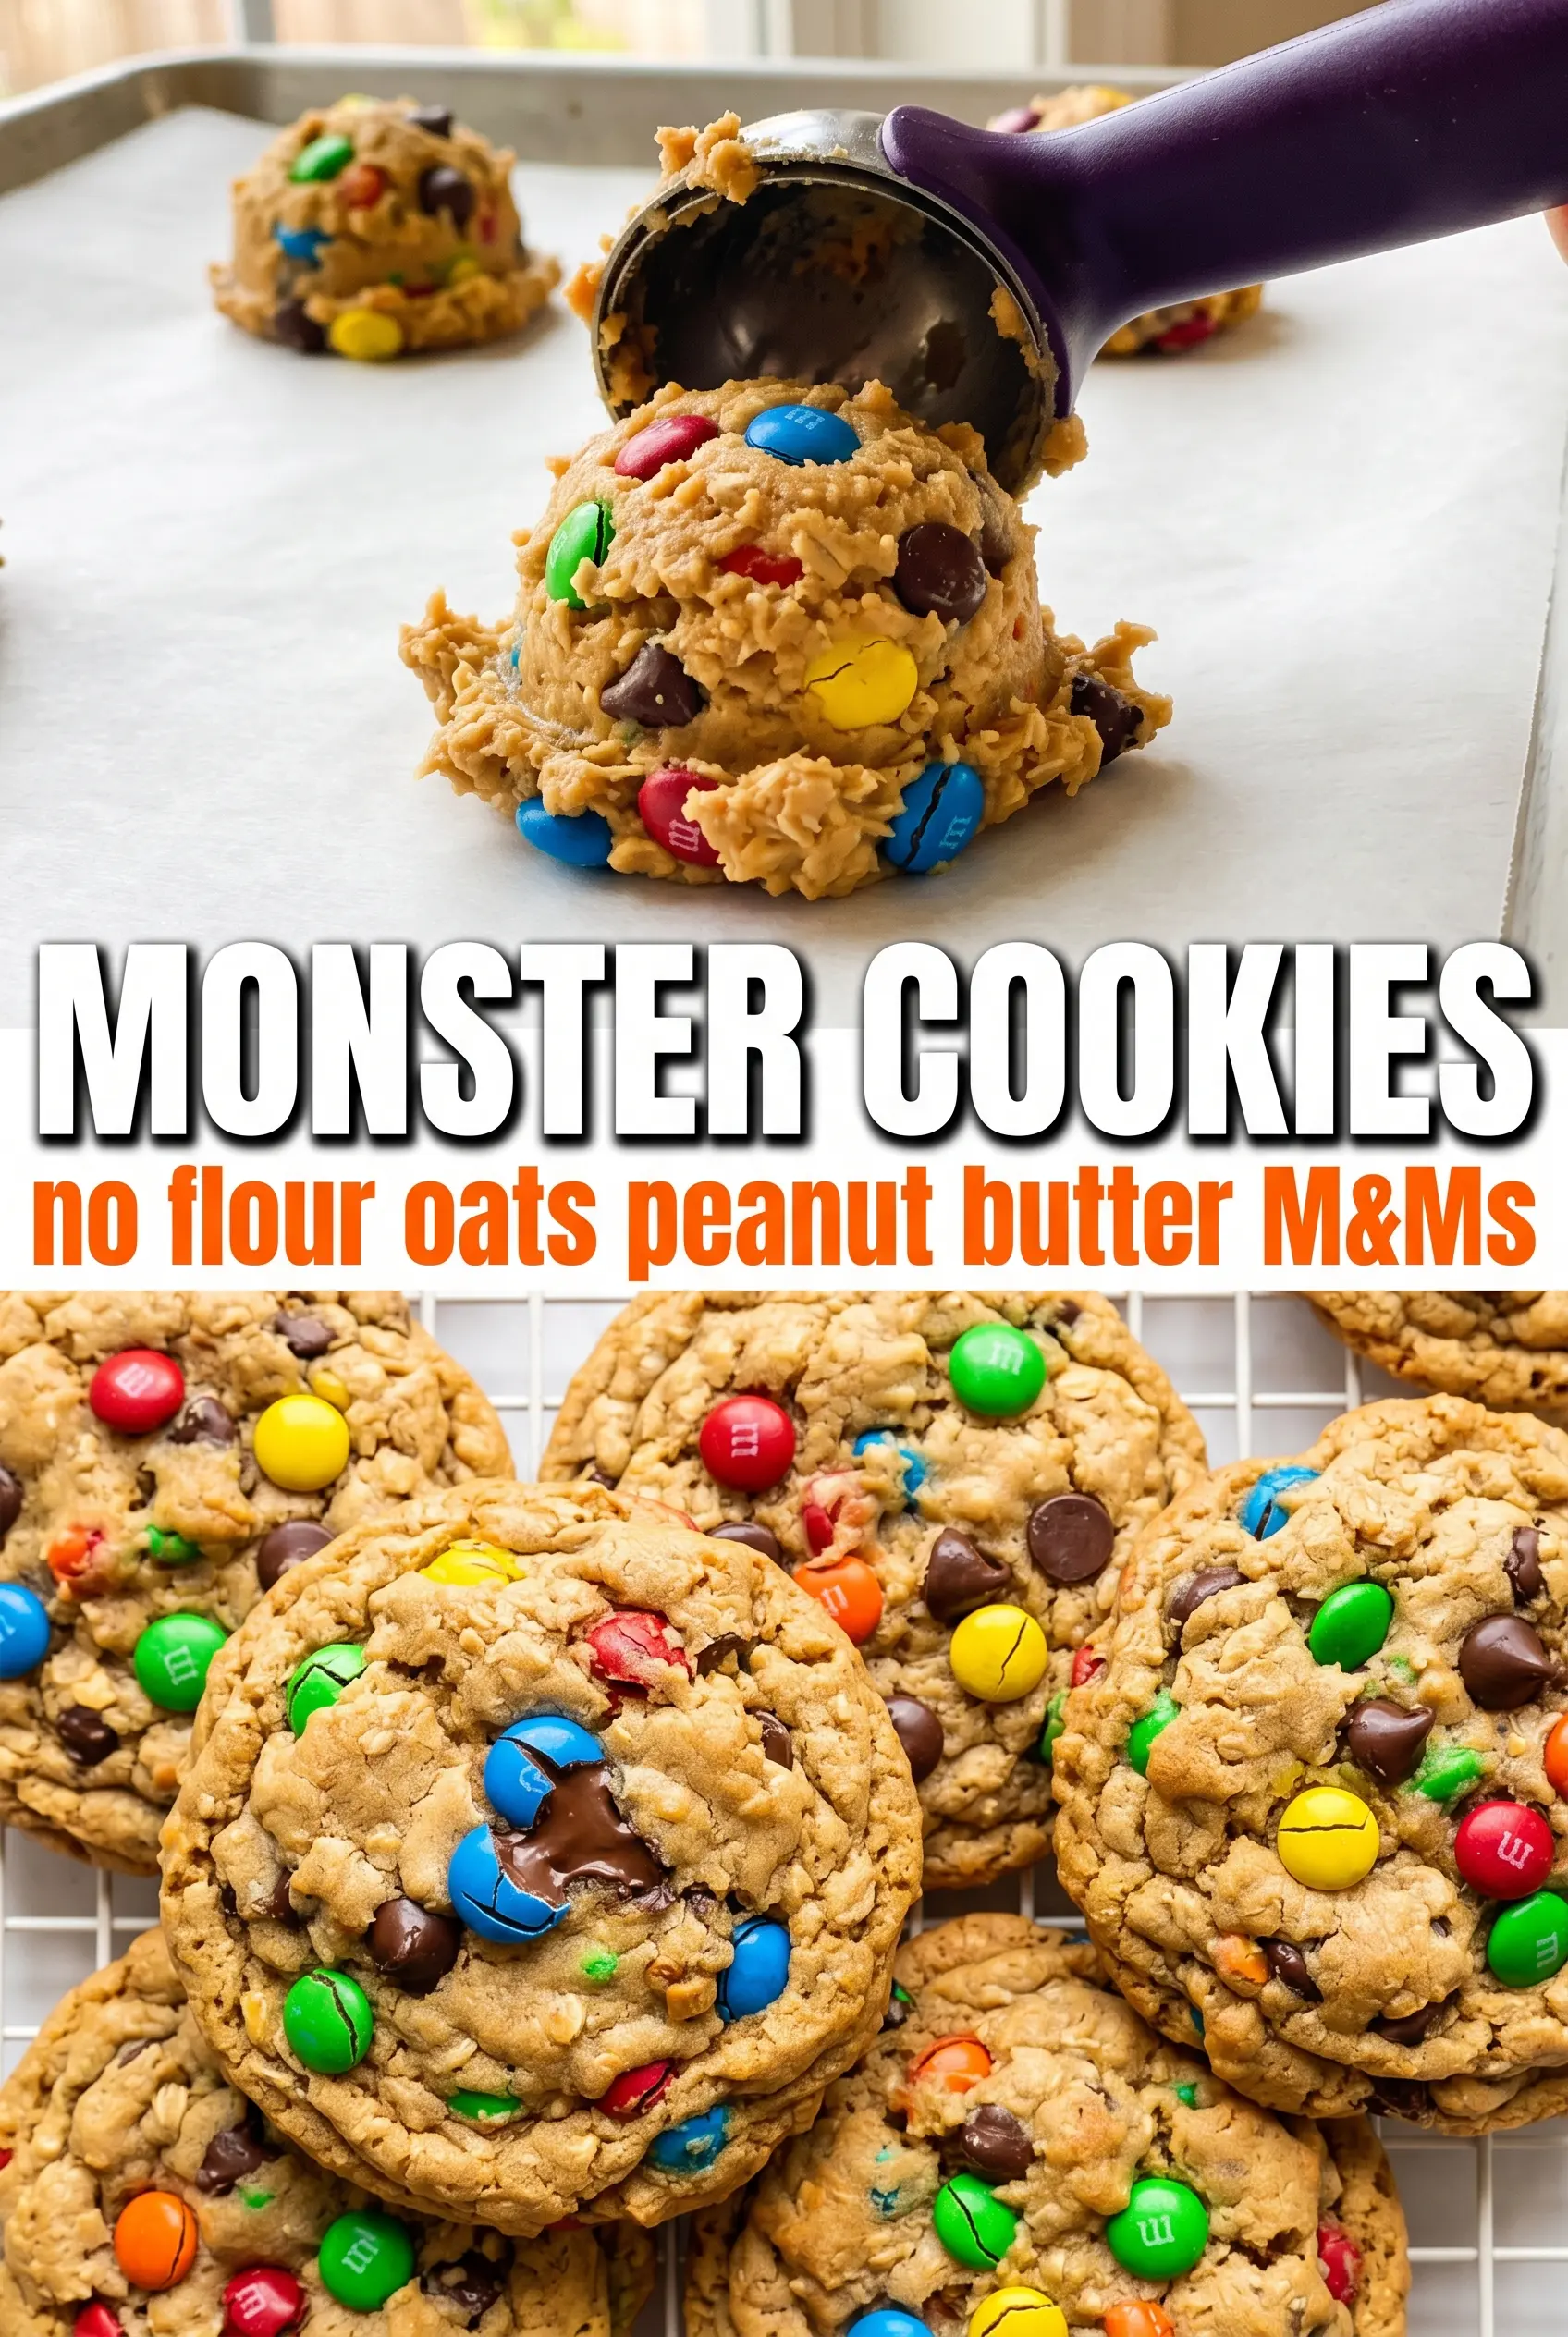
Monster cookies hit that sweet spot between a peanut butter cookie, an oatmeal cookie, and a candy-studded treat that disappears faster than you expect. They bake up thick and chewy with crisp edges, soft centers, and enough oats to keep every bite substantial. The M&Ms stay colorful, the chocolate chips melt into little pockets, and the peanut butter gives the cookies that rich, salty backbone that keeps them from tasting one-note.
What makes this version work is the balance. Quick-cooking oats give the dough structure without making the cookies dense or dry, and the mix of brown sugar plus granulated sugar keeps the centers chewy while the edges set up nicely. The dough is built without flour, which means the eggs and peanut butter have to carry the texture; that’s why the mixing order matters and why you don’t want to overbake them. Pull them when the centers still look a little soft, and they’ll finish on the pan.
Below, I’ve included the detail that matters most for monster cookies: how to keep them thick instead of spreading into flat crisps, plus the small ingredient swaps that still give you that classic bakery-style look.
The cookies came out thick and chewy, and the centers stayed soft even after cooling. I loved that the M&Ms didn’t bleed all over the dough, and my kids said they tasted like the ones from a bakery.
Thick, chewy Monster Cookies loaded with M&Ms, chocolate chips, and oats are made for saving when you want a no-flour cookie that bakes up soft in the middle.
The Trick to Keeping Monster Cookies Thick Instead of Spreading
Monster cookies can flatten fast if the dough is too loose or the oats are too coarse. The fix is in the balance of fat, sugar, and add-ins. Peanut butter gives these cookies their body, but it also makes them prone to spreading if you overmix or if the dough sits warm for too long before baking.
Quick-cooking oats matter here because they soften enough to hold the dough together without making each cookie feel bulky or dry. If you swap in old-fashioned oats, the texture turns chunkier and the cookies don’t spread quite the same way. That isn’t wrong, but the bite changes. For the thickest cookies, scoop the dough, flatten it just slightly, and bake them while the oven is fully hot.
What Each Ingredient Is Doing in These Cookies

- Creamy peanut butter — This is the base of the dough, so use a standard creamy peanut butter rather than a natural style that separates in the jar. Natural peanut butter can work, but the cookies are more likely to spread unevenly unless you stir it very well and chill the dough.
- Quick-cooking oats — These soften quickly and help the cookies hold together while still tasting chewy. Old-fashioned oats can be used in a pinch, but the cookies will be a little rougher and less uniform.
- Brown sugar — It adds moisture and that deep caramel note that keeps the centers soft. Packed brown sugar also helps the cookies stay chewy after cooling.
- M&Ms and chocolate chips — The M&Ms give the classic monster cookie look and a little crunch, while the chocolate chips melt into the dough for extra pockets of chocolate. Mini chips help distribute chocolate more evenly, especially if you want every bite loaded.
- Eggs — Since there’s no flour here, the eggs are doing a lot of the structural work. Add them one at a time if your bowl looks crowded, and stop mixing as soon as the dough turns smooth.
Mixing the Dough, Baking the Centers, and Knowing When to Stop
Building the Peanut Butter Base
Beat the peanut butter and both sugars until the mixture looks thick and slightly lighter in color. You don’t need to whip in a ton of air, but the sugars should disappear into the peanut butter instead of staying grainy. If you rush this part, the dough can look separated later when the eggs go in.
Adding the Eggs Without Breaking the Dough
Add the eggs, vanilla, and baking soda and mix just until the batter looks smooth and glossy. At first it may look loose or a little slippery; keep mixing and it will come together. The main mistake here is overbeating once the eggs are in, which can make the dough looser than you want.
Folding in the Oats and Candy
Stir in the oats until the dough looks evenly thick, then fold in the M&Ms and chocolate chips. The dough should be heavy enough to hold its shape on a spoon. If it feels sticky and slack, let it sit for a few minutes so the oats can absorb some moisture before scooping.
Baking Until the Edges Set
Scoop 2-tablespoon portions onto lined baking sheets and flatten them just a little with your palm. Bake until the edges look set and the centers still look soft and slightly underdone. That underbaked center is what gives monster cookies their chew, and they firm up on the hot pan during the five-minute rest.
Use Old-Fashioned Oats for a Heartier Bite
Old-fashioned oats give these cookies a more rugged, chewier texture and a slightly less uniform shape. The cookies won’t spread as evenly, so expect a thicker, more rustic finish. If you like a bakery-style cookie with a bigger oatmeal texture, this swap works well.
Make Them Gluten-Free Without Changing the Recipe
These are naturally gluten-free as long as your oats are certified gluten-free. That’s the part people miss, since oats are often processed alongside wheat. The texture stays the same, so this is one of the easiest gluten-free cookie wins.
Swap the M&Ms for a Different Candy Mix
Mini peanut butter cups, chopped chocolate bars, or seasonal candy pieces all work here. Keep the total mix-in amount about the same so the cookies don’t crumble apart. The result changes the look more than the texture, which makes this an easy way to tailor them for a holiday tray.
Storage and Reheating
- Refrigerator: Store in an airtight container for up to 5 days. They stay chewy, though the candy coating may lose a little shine.
- Freezer: Freeze baked cookies for up to 2 months, or freeze scooped dough balls and bake from frozen with 1–2 extra minutes.
- Reheating: Warm a cookie for 8–10 seconds in the microwave if you want the chocolate soft again. Don’t overheat them or the peanut butter base turns oily and the centers dry out.
Questions I Get Asked About This Recipe
Monster Cookies
Ingredients
Equipment
Method
- Preheat oven to 350°F and line two baking sheets with parchment paper.
- Beat creamy peanut butter, brown sugar, packed, and granulated sugar together in a large bowl until combined.
- Add large eggs, vanilla extract, and baking soda and mix until smooth.
- Stir in quick-cooking oats until fully incorporated.
- Fold in M&Ms (red, white, and blue for patriotic version), chocolate chips, and mini chocolate chips until evenly distributed.
- Scoop dough into 2-tablespoon balls and place 2 inches apart on prepared baking sheets, flattening slightly with your palm (visual cue: thicker centers).
- Bake for 10–12 minutes at 350°F until edges are set but centers still look slightly underdone (visual cue: soft middle).
- Let cool on the baking sheet for 5 minutes before transferring to a wire rack (visual cue: cookies firm up as they cool).