Juicy chicken with a thick, glossy queso sauce is one of those dinners that disappears fast because it hits every note at once: savory, creamy, a little spicy, and substantial enough to stand on its own. The chicken gets a hard sear so it stays flavorful under the sauce instead of turning bland, and the cheese sauce clings in the right way instead of pooling thinly on the plate.
The texture works because the sauce starts with a proper roux, then gets milk added gradually before the cheese goes in. That keeps it smooth. The Rotel, jalapeño, and cumin don’t overpower the cheese; they give the sauce the same bright, Tex-Mex edge you’d expect from a good restaurant skillet dinner, only without the extra grease or mystery ingredients.
Below, I’ll walk through the one spot where people usually rush and end up with grainy sauce, plus a few smart swaps for making this work with what’s already in your kitchen.
The chicken stayed juicy and the queso sauce thickened up beautifully without turning greasy. I added the lime at the end like you suggested and it made the whole dish taste brighter instead of heavy.
Love a skillet dinner with juicy chicken and silky queso? Save this Mexican Chicken with Cheese Sauce for the night you want something bold, fast, and full of melty, spoonable sauce.
The Secret to Keeping the Queso Smooth After the Cheese Goes In
The part that trips people up here is heat. Once the milk has thickened with the roux, the sauce needs to stay on gentle heat when the cheese goes in. If the pan is too hot, the cheese can tighten and turn grainy, and the sauce loses that glossy, pourable finish.
The other thing that matters is the order. The flour and butter need a full minute together before the milk is added, which keeps the sauce from tasting raw and helps it thicken evenly. After that, the cheese melts into a stable base instead of fighting with liquid that hasn’t thickened yet.
- Taco seasoning — This gives the chicken its main flavor fast. A store-bought blend works fine here because it’s doing the heavy lifting on the outside of the chicken, where searing will deepen it.
- Whole milk — You need the fat content for a sauce that tastes creamy instead of thin. Lower-fat milk will work in a pinch, but the sauce won’t have the same body.
- Mexican cheese blend — This melts well and brings the familiar Tex-Mex flavor. Pre-shredded is convenient, though freshly shredded melts a little smoother because it doesn’t have the anti-caking coating.
- Velveeta — This is the insurance policy for texture. It melts into the sauce and helps keep it stable, which is why the queso stays silky instead of separating.
- Rotel and jalapeño — Drain the tomatoes well so the sauce doesn’t water out. The jalapeño adds fresh heat, but if you want a milder sauce, remove every seed and bit of white membrane.
What Each Ingredient Is Actually Doing in This Recipe

- Primary ingredient (the star) — Quality matters most. Choose the best you can find.
- Cooking medium (oil, butter, or broth) — This carries flavors and prevents dryness.
- Seasonings (salt, pepper, spices, herbs) — Layer flavors so nothing overpowers. Build depth gradually.
- Aromatics (garlic, onion, herbs) — Cook with fat to bloom flavors. Become the foundation.
- Supporting ingredients — Complement the main ingredient without overpowering it.
- Sauce or liquid (if applicable) — Brings flavors together. Balance richness with acid.
- Acid (lemon, vinegar, wine, or other) — Brightens and prevents flat-tasting results.
- Final finish (garnish, glaze, or sauce) — Prevents one-dimensional taste and adds visual appeal.
Building the Chicken and Sauce in the Right Order
Seasoning and Searing the Chicken
Rub the chicken breasts evenly with taco seasoning so every bite has flavor, not just the edges. Heat the oil until it shimmers, then lay the chicken in and leave it alone long enough to get a deep, browned crust. If you move it too early, it can stick and tear before it releases. Cook until the center reaches 165°F, then rest it before slicing so the juices stay in the meat instead of running onto the cutting board.
Making the Roux Base
Melt the butter and whisk in the flour for a full minute. It should look smooth and smell a little nutty, but it shouldn’t brown much. That short cooking time takes the raw edge out of the flour and gives the sauce the structure it needs. If you rush this part, the sauce can taste pasty later.
Whisking in the Milk
Add the milk gradually while whisking, not all at once. That keeps the sauce smooth and prevents little flour lumps from hiding in the corners of the pan. Let it warm and thicken before adding the cheese; it should lightly coat a spoon. If it still looks thin at this point, give it another minute or two before moving on.
Melting the Cheese and Finishing the Queso
Turn the heat down and stir in the Mexican cheese blend and Velveeta until melted. Then add the drained Rotel, jalapeño, and cumin, and let the sauce simmer just long enough to come together. If it starts to look oily or grainy, the heat was too high; pull it off the burner and stir gently until it smooths back out. Spoon the sauce over the sliced chicken while it’s still warm and glossy.
How to Adapt This for a Milder, Dairy-Free, or Bolder Plate
Make it milder for kids or heat-sensitive eaters
Skip the jalapeño and use mild diced tomatoes with green chiles if that’s what you have. The sauce will still taste like queso chicken, but the heat drops back and the cheese comes through more clearly.
Use rotisserie chicken for a faster weeknight version
Shred or slice cooked rotisserie chicken and warm it in the finished sauce instead of searing raw chicken. You lose the blackened crust, but you cut the cook time way down and still get the same creamy, Tex-Mex finish.
Make it gluten-free
Swap the all-purpose flour for a gluten-free 1:1 blend with xanthan gum, or use cornstarch slurry if that’s what you keep on hand. The sauce will still thicken, though the texture is a touch lighter than a classic roux-based version.
Turn up the smoky edge
Add a pinch of smoked paprika or a little chipotle powder with the cumin. That pushes the sauce toward a deeper, more restaurant-style flavor without changing the creamy texture.
Storage and Reheating
- Refrigerator: Store chicken and sauce separately for up to 3 days. The sauce thickens as it chills, which is normal.
- Freezer: The chicken freezes well, but the cheese sauce can turn grainy after thawing. If you freeze it, expect a softer texture and reheat it only if you don’t mind a less silky result.
- Reheating: Warm the sauce slowly over low heat with a splash of milk, whisking often. High heat is what breaks queso-style sauces, so don’t rush it in the microwave if you want the texture to stay smooth.
Answers to the Questions Worth Asking
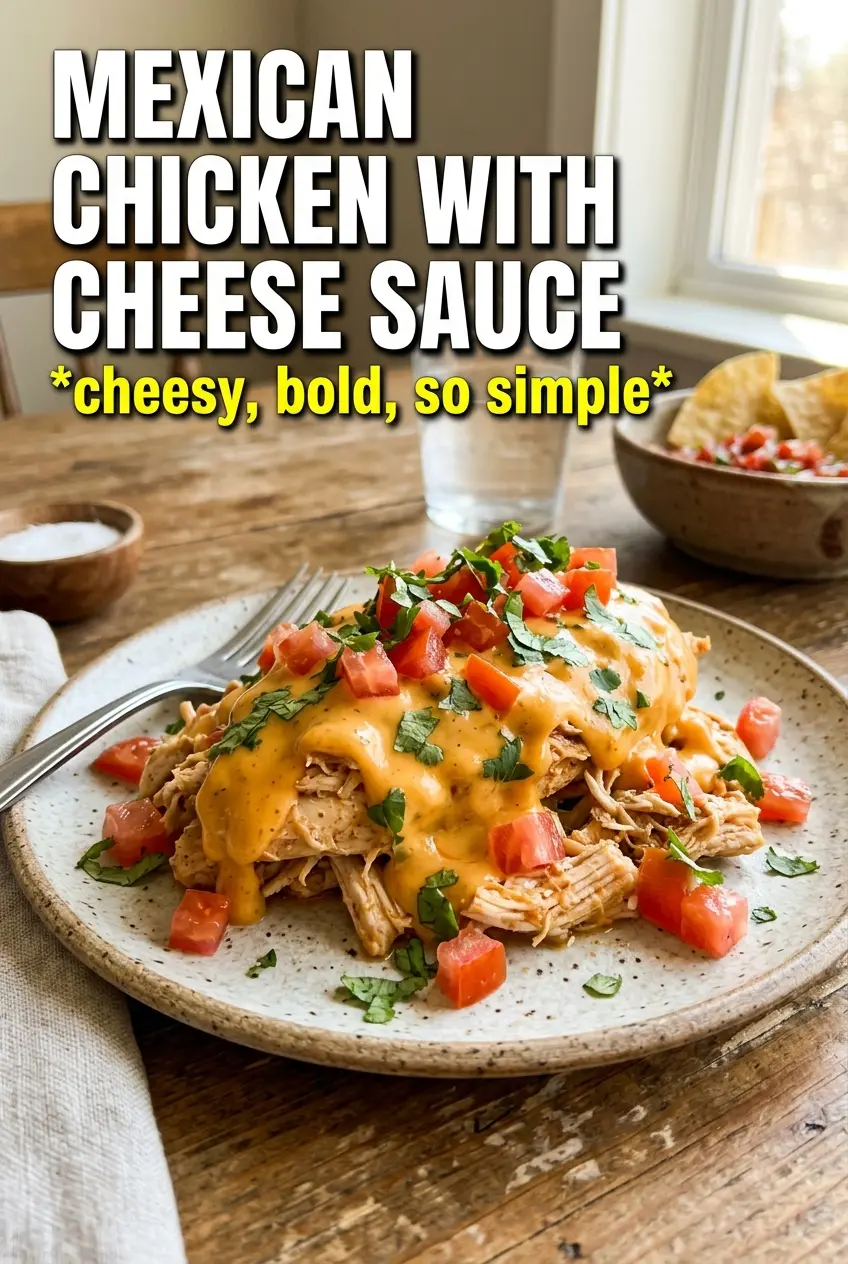
Mexican Chicken with Cheese Sauce
Ingredients
Equipment
Method
- Rub the boneless skinless chicken breasts with taco seasoning. Heat olive oil in a skillet over medium-high heat, then sear for 5-6 minutes per side until cooked through to 165°F, with a darkened exterior and clear juices.
- Rest the seared chicken briefly, then slice it. Keep the slices warm as the edges stay lightly browned for a juicy bite.
- Melt butter in a saucepan over medium heat. Whisk in all-purpose flour for 1 minute until it looks smooth and lightly foamy.
- Gradually add whole milk while whisking until the mixture is smooth. Continue whisking until it thickens slightly and coats the back of a spoon.
- Stir in shredded Mexican cheese blend and Velveeta cheese, cubed until fully melted. Turn the heat as needed so the sauce becomes glossy and creamy.
- Add diced tomatoes with green chiles (Rotel), jalapeño, and cumin, then simmer for 3-4 minutes. Watch for a thick, smooth queso that looks like a vibrant orange pool.
- Plate the sliced chicken and pour the queso sauce generously over the top. Make sure the sauce fully coats the surfaces so jalapeño and tomato are visible.
- Garnish with fresh cilantro and lime wedges for serving. Serve right away for the thickest sauce texture.