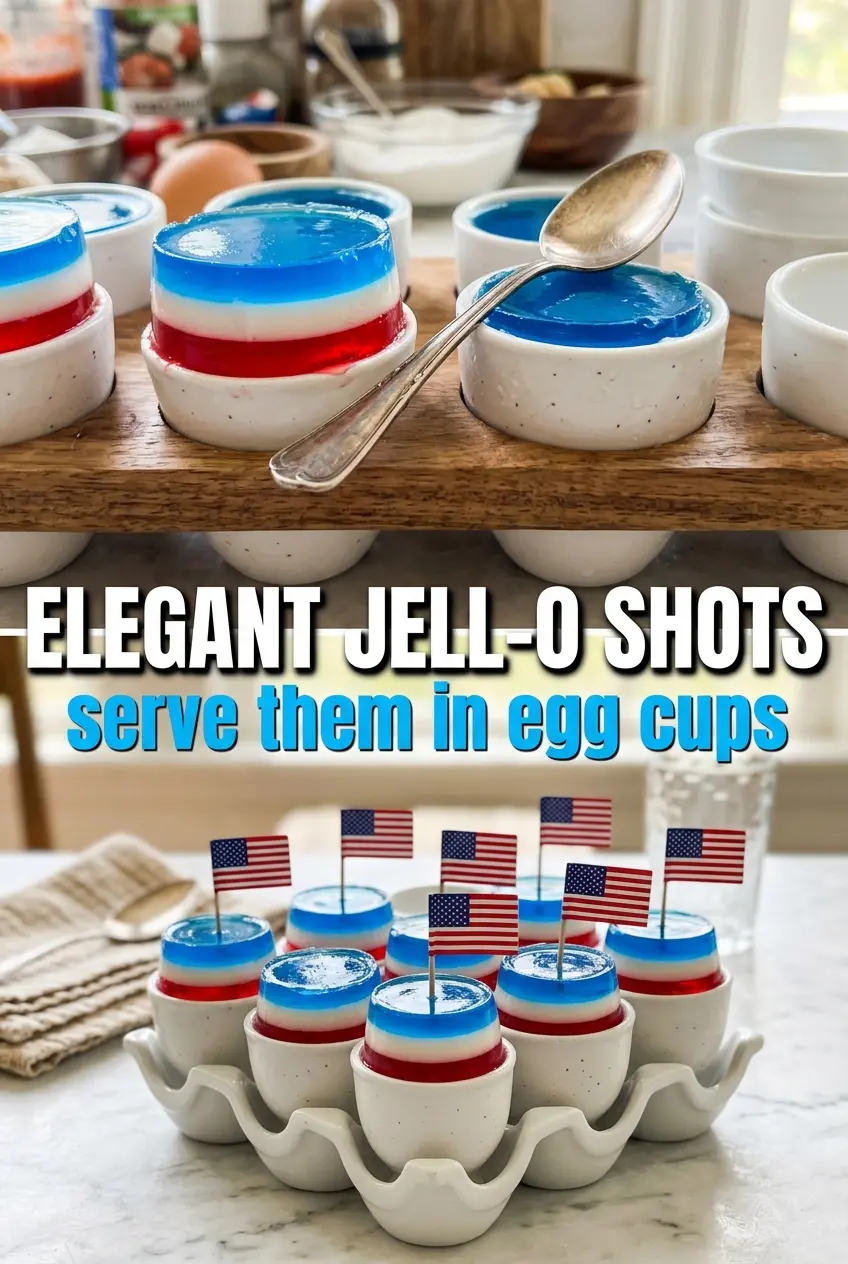
Rows of red, white, and blue Jell-O shots look playful on the table, but the real payoff is the clean layers and the cold, glossy wobble when you lift a cup. The cherry, creamy middle, and berry blue top each hold their shape, so every bite starts bright and ends smooth instead of turning into one muddled cup of color.
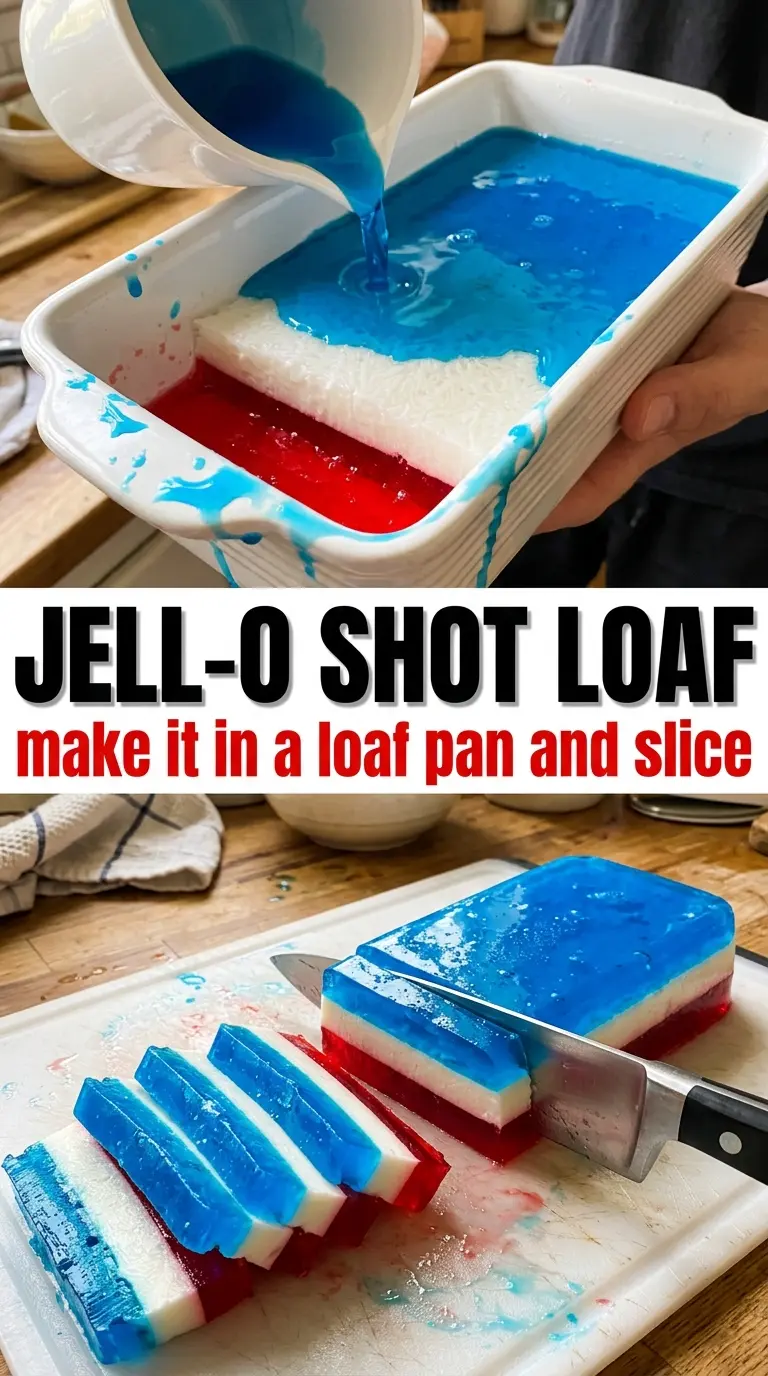
The trick is controlling temperature and patience. The first layer has to be fully set before the next one goes in, and the second layer needs to cool down before you pour it or it can melt the layer underneath. The white layer works because sweetened condensed milk gives it body and a little richness, while unflavored gelatin keeps it firm enough to stack without sliding.
Below, you’ll find the layering order that keeps the colors sharp, the easiest way to avoid cloudy edges, and a few swaps if you want to change the flavors without losing that patriotic look.
The layers stayed crisp and the white one actually set up opaque instead of turning watery. I followed the cooling times exactly and the cups came out perfect for our cookout.
Save these red, white, and blue Jell-O shots for your next patriotic party when you want clean layers and an easy make-ahead dessert drink.
Why the Layers Stay Sharp Instead of Slumping Together
The most common mistake with layered Jell-O shots is pouring the next layer while the one underneath is still soft in the middle. That gives you soft seams, color bleed, and a cup that looks good for an hour before it starts to slide. This version works because each layer is treated like its own project: mixed, cooled, and set before the next one touches it.
Temperature matters just as much as timing. If the blue Jell-O goes in while it’s still hot, it can melt the white layer and blur the line between them. If the creamy layer is poured in too warm, it can sink into the red. Cooling each mixture to room temperature before it meets the set layer keeps the edges clean and the texture bouncy instead of slushy.
What Each Layer Is Actually Doing Here
Each layer has a different job, and the recipe only works if you let each one play its part. The cherry or strawberry Jell-O gives you the first bright base and sets fastest because it has the simplest structure. Berry blue does the same on top, but it needs to be cooled before pouring so it doesn’t soften the white layer below.
- Unflavored gelatin — This is what turns the middle layer from creamy liquid into a firm, sliceable-looking layer that still jiggles. Don’t skip it and try to rely on the condensed milk alone; the layer will stay loose and won’t stack cleanly.
- Sweetened condensed milk — It gives the white layer body, sweetness, and that opaque look that makes the red and blue colors pop. Evaporated milk won’t give the same thickness or richness, so the layer will look thinner and set less firmly.
- Vodka — Cold vodka helps keep the texture smooth and keeps the alcohol from throwing off the set too much. You can swap in flavored vodka if it matches the fruit flavor, but don’t increase the amount or the shots may stay soft.
- Boiling water — Hot enough water matters here because it dissolves the gelatin completely. If the granules don’t fully disappear, you’ll end up with grainy bits and a cloudy layer that never sets evenly.
Building the Shots So the Colors Don’t Bleed
Mixing the Fruit Layers
Stir each flavored Jell-O into boiling water for the full two minutes so the granules disappear and the liquid turns smooth. Then add the cold vodka and stir again before pouring into the cups. If you leave undissolved powder in the bowl, it settles into a grainy layer at the bottom and the set becomes uneven.
Setting the First Layer
Fill the cups only about one-third of the way so you leave enough room for the white and blue layers. Move the tray to the refrigerator and leave it alone for about 45 minutes, until the surface is fully firm and doesn’t ripple when you nudge the cup. If it still feels tacky in the center, the next layer will sink instead of floating on top.
Making the Creamy Middle
Whisk the sweetened condensed milk, boiling water, and unflavored gelatin until the gelatin dissolves completely, then let the mixture cool slightly before adding the cold water. The goal is warm, not hot. Spoon it gently over the red layer instead of dumping it in one spot, because a hard pour can punch through the set layer and leave a red streak in the middle.
Finishing with the Blue Top
Let the white layer set fully before adding the blue mixture, and cool the blue mixture to room temperature first. Pour it slowly over the back of a spoon or down the side of the cup to keep the edge crisp. Then refrigerate long enough for the whole shot to set all the way through; if you rush it, the top can look firm while the center is still loose.
How to Change the Flavor Without Losing the Patriotic Look
Swap the Cherry for Strawberry or Raspberry
Cherry gives the strongest red color, but strawberry or raspberry will work if that’s what you have. The flavor gets a little softer and less candy-like, while the color may be slightly lighter, so don’t expect quite the same bold red unless you use a deep red gelatin.
Use Flavored Vodka for a Sweeter Finish
Whipped cream vodka, cherry vodka, or berry vodka can make the shots taste a little smoother and more dessert-like. Keep the amount the same, though, because extra alcohol softens the set and makes the layers harder to keep clean.
Make Them Non-Alcoholic
Replace the vodka with cold water or chilled white grape juice if you want a family-friendly version. The texture stays firm, but the flavor reads a little sweeter and less sharp, so the fruit flavors stand out more.
Keep the Layers Clear for a Crowd
If you want the cleanest possible stripes, chill the cups on a level tray and work with room-temperature mixtures only. Uneven trays and warm fillings are what cause slanted layers and cloudy edges.
Storage and Make-Ahead Timing
- Refrigerator: Keep covered and chilled for up to 3 days. The layers stay firm, though the top can pick up a little condensation if they sit uncovered.
- Freezer: Don’t freeze them. The gelatin breaks down after thawing and the texture turns watery instead of jiggly.
- Make-Ahead: These are best made the day before serving. If you need to prep farther ahead, keep the cups covered once fully set and add any garnishes right before serving.
Questions I Get Asked About This Recipe
Jell-O Shots (Red, White, and Blue Layers)
Ingredients
Equipment
Method
- Dissolve the cherry or strawberry Jell-O in 1 cup boiling water, stirring for 2 minutes until smooth. Stir in 1/2 cup cold vodka, then pour into shot cups, filling each cup about one-third full, and watch for the mixture to turn uniformly red.
- Refrigerate the cups for 45 minutes until fully set and firm to the touch, with no liquid shine on top.
- Whisk sweetened condensed milk with 1 cup boiling water and the unflavored gelatin until dissolved and glossy, then let it cool slightly. Add 1/2 cup cold water, and stir just until smooth, looking for no gelatin lumps before you pour.
- Spoon the white layer gently over the set red layer so the layers stay distinct, and refrigerate for another 45 minutes until set with a clean, opaque surface.
- Dissolve the berry blue Jell-O in 1 cup boiling water, stirring for 2 minutes until smooth, then mix in 1/2 cup cold vodka. Cool to room temperature first, watching for the surface to look even before pouring.
- Gently pour the blue layer over the white layer, then refrigerate for at least 1 hour until fully set and jiggly. Serve cold for the best translucent, glossy look in each cup.