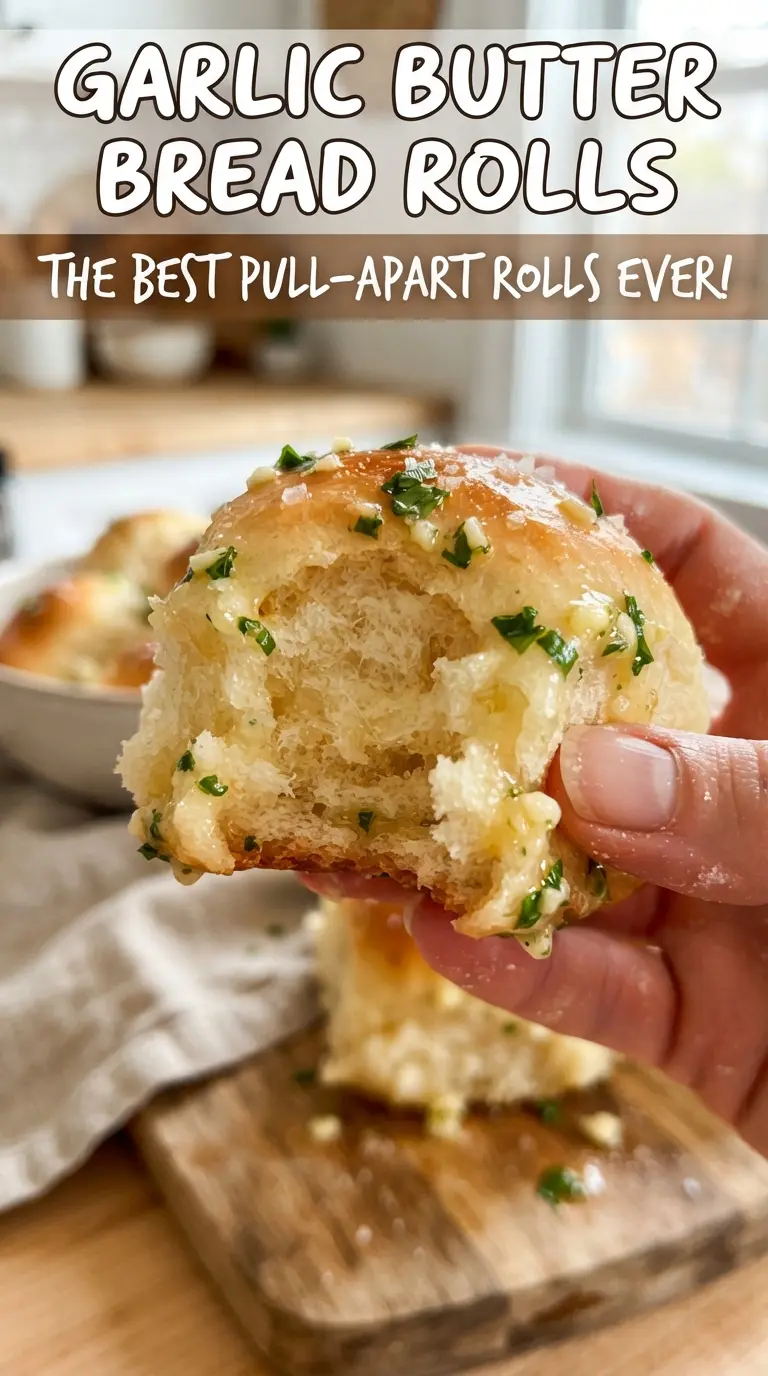
Garlic butter bread rolls come out soft, pull-apart tender, and glossy with a savory butter finish that sinks into every crack and seam. The tops bake up golden, but the real payoff is the fluffy center and the way the garlic butter soaks into the warm dough the second it comes out of the oven.
What makes these worth making at home is the balance. The dough is enriched with milk, butter, and egg, which gives it a soft crumb without turning it heavy. Instant yeast keeps the rise straightforward, and the rolls bake together in a pan so the edges stay tender while the tops catch just enough color. Brushing them while they’re still hot matters. That’s when the butter carries the garlic and parsley into the surface instead of just sitting on top.
Below, I’ve included the part that matters most: how to tell when the dough is ready, how to keep the rolls from baking up dense, and what to change if you want a different finish.
The rolls were soft all the way through, and the garlic butter soaked into the tops without making them soggy. I loved that they stayed fluffy even after sitting on the table for a bit.
Save these garlic butter bread rolls for the night you want soft pull-apart bread with a golden top and a garlicky butter finish.
The Rolls That Stay Soft Instead of Drying Out
Most bread rolls go wrong in one of two places: the dough gets overfloured, or the pan gets baked long enough that the edges turn dry before the centers are done. This recipe avoids both by keeping the dough slightly tacky during kneading and baking the rolls in a tight pan so they support each other as they rise. You want a dough that feels smooth and elastic, not stiff. Stiff dough gives you heavy rolls.
The second part that matters is timing. The first rise builds flavor and structure, but the second rise gives you that puffy, cloudlike crumb. If the rolls still look tight and spring back instantly when touched, they need more time. If they’ve spread flat, they’ve gone too far and won’t bake up as light.
What the Butter, Milk, and Yeast Are Doing Here
- Warm milk — Milk gives the rolls a softer crumb than water and helps the dough brown nicely. Keep it around 110°F; if it’s hot enough to feel uncomfortable on your finger, it can slow or kill the yeast.
- Instant yeast — This keeps the rise simple and predictable. If you only have active dry yeast, it will work, but let it sit a few extra minutes until it looks foamy before adding the other ingredients.
- Butter — Butter in the dough makes the rolls tender, and the melted butter brushed on top is what gives them that glossy, bakery-style finish. Use real butter here; margarine won’t give the same flavor or sheen.
- Garlic and parsley — Fresh garlic gives the topping its punch, and parsley keeps it from tasting flat. Jarred garlic can work in a pinch, but fresh minced garlic tastes cleaner and brighter once it hits the warm rolls.
- Flaky sea salt — This is the last touch that wakes everything up. It gives you little pops of salt on the buttery top instead of blending into the dough.
Building the Dough, Rise, and Garlic Butter Finish
Wake Up the Yeast
Whisk the warm milk, yeast, and sugar together and let it sit until foamy, about 5 minutes. That foam tells you the yeast is active and ready. If nothing happens, the milk was too hot, too cold, or the yeast is old, and it’s worth starting over before you waste flour. The mixture should smell lightly bready and look creamy on top.
Knead Until the Dough Turns Smooth
Add the egg, melted butter, salt, and flour, then knead until the dough becomes smooth and elastic, 6 to 8 minutes. At first it may look shaggy, but it should pull together and feel supple, not dry. If it sticks hard to the bowl, add a spoonful of flour at a time; if it feels tight and tough, stop adding flour. Slight tackiness is fine and usually gives the best texture.
Let the First Rise Build the Structure
Cover the dough and let it rise until doubled, about 1 hour. You’re looking for a soft, puffy dough that holds an indentation for a second when pressed. If your kitchen is cold, this can take longer, and that’s fine. Don’t rush it, because under-risen dough bakes up dense and tears instead of pulling apart.
Shape, Proof, and Bake in the Pan
Divide the dough into 12 equal balls and place them in a greased 9×13-inch pan. After the second rise, they should look swollen and touch each other slightly. Bake at 375°F until the tops are golden brown, 18 to 20 minutes. If they brown too fast before the centers finish, tent loosely with foil for the last few minutes.
Brush While Hot
Stir the melted butter with garlic and parsley, then brush it generously over the rolls the moment they come out of the oven. Hot bread drinks in the butter better than warm bread, and that’s where the flavor comes from. Finish with flaky sea salt and serve them warm so the tops stay glossy and the centers stay soft.
How to Adjust These Rolls Without Losing the Soft Crumb
Make Them Dairy-Free
Use a plain unsweetened non-dairy milk and a good dairy-free butter substitute in both the dough and the topping. The rolls will still be soft, but they won’t have quite the same rich dairy flavor or golden finish, so choose the best-tasting substitute you can find.
Swap the Herb Finish
Parsley keeps the topping fresh and clean, but chopped chives or a little oregano work if that’s what you have. Chives give a sharper onion note, while oregano pushes the rolls more toward a pizza-shop style garlic bread.
Add Cheese on Top
A little grated parmesan over the rolls after the garlic butter goes on adds a salty, savory crust. Don’t add a heavy layer before baking or it can brown too quickly and block the rolls from getting their full rise.
Storage and Reheating
- Refrigerator: Store in an airtight container for up to 4 days. The rolls will firm up a little in the fridge, but they soften again when warmed.
- Freezer: Freeze baked rolls tightly wrapped for up to 2 months. Thaw at room temperature before reheating so the centers don’t stay cold while the tops overbake.
- Reheating: Warm in a 300°F oven, covered loosely with foil, until heated through. The biggest mistake is blasting them in the microwave too long, which makes the bread chewy instead of soft.
Questions I Get Asked About This Recipe

Garlic Butter Bread Rolls
Ingredients
Equipment
Method
- Whisk warm milk, instant yeast, and sugar together, then let sit 5 minutes until foamy.
- (Visual cue) The surface should look bubbly and foamy before you proceed.
- Add the egg, melted butter, salt, and all-purpose flour, then knead 6-8 minutes until smooth and elastic.
- (Visual cue) The dough should feel stretchy with a uniform texture and slightly tacky feel.
- Cover the dough and let rise 1 hour until doubled in size.
- (Visual cue) It should puff up noticeably and fill the container.
- Divide the dough into 12 balls and place them in a greased 9x13-inch pan, cover, and let rise 30 minutes until puffy.
- (Visual cue) The balls should look swollen and touch or nearly touch each other in the pan.
- Preheat oven to 375F, then bake the rolls for 18-20 minutes until golden brown.
- (Visual cue) The tops should be visibly browned and the rolls should sound slightly hollow when tapped.
- Stir melted butter with garlic and chopped parsley, then brush generously over the hot rolls.
- (Visual cue) The tops should look glossy and slightly wet from the butter.
- Sprinkle flaky sea salt over the rolls, then serve warm.
- (Visual cue) The flaky salt should look like small visible crystals on top.