Chicken breasts in creamy garlic sauce land on the plate with the kind of comfort that makes people pause for the first bite. The chicken stays juicy from a hard sear, then gets coated in a velvety sauce that tastes deeply garlicky without turning harsh or thin. It’s the sort of skillet dinner that feels a little special, but still fits into a weeknight when you want dinner done without a fuss.
What makes this version work is the layering. The chicken is browned first so the pan picks up all those savory bits, then the garlic cooks gently in butter before the wine or broth loosens everything into the sauce. Heavy cream and Parmesan do the thickening here, and the sauce needs a real simmer so it turns glossy and clings to the chicken instead of staying runny.
Below, I’ve included the small timing details that keep the garlic from burning and the cream sauce from splitting, plus a few smart swaps if you need to work with what’s in your kitchen.
The sauce thickened up right in the skillet and coated the chicken instead of running all over the plate. I used the wine, added extra thyme, and the garlic stayed mellow and rich instead of bitter.
Save this chicken breasts in creamy garlic sauce for the nights when you want a skillet dinner with a silky Parmesan-garlic finish.
The Trick Is Keeping the Garlic Gentle Before the Cream Goes In
Garlic cream sauces fail in one of two ways: the garlic burns, or the dairy never really comes together and tastes flat. The fix is to use the pan in stages. First, sear the chicken well and leave the browned bits behind. Then cook the garlic in butter just until it smells sweet and looks a shade deeper, not brown and aggressive. That short window is where the sauce gets its backbone.
Once the cream goes in, the heat needs to drop to a steady simmer. Boiling hard can make the sauce split or reduce unevenly, especially once the Parmesan is added. If you’ve ever had a cream sauce turn grainy, it usually started with heat that was too high or cheese that went in too fast. Let the sauce thicken gradually and it will cling to the chicken instead of sliding off.
What Each Ingredient Is Actually Doing in the Pan

- Chicken breasts — These cook fast and stay tender if you don’t overdo the sear. If yours are thick in the center, pound them to an even thickness so the edges don’t dry out before the middle reaches 165°F.
- Garlic — This is the flavor anchor, and fresh garlic matters here. Pre-minced garlic from a jar works in a pinch, but it won’t give you the same sweet, rounded flavor when it cooks in butter.
- Heavy cream — This gives the sauce its body and keeps it stable under heat. Half-and-half can work, but the sauce will be lighter and a little less luxurious.
- Parmesan — Parmesan thickens and seasons the sauce at the same time. Grate it finely so it melts smoothly; pre-shredded cheese can leave the sauce slightly gritty.
- White wine or chicken broth — Wine adds brightness and helps lift the brown bits from the skillet, while broth keeps things savory and a little milder. Use broth if you want a cleaner, less acidic sauce.
- Smoked paprika, Italian seasoning, and cayenne — These keep the sauce from tasting one-note. The paprika adds quiet depth, the Italian seasoning rounds out the herbs, and the cayenne gives just enough heat to wake everything up.
Building the Sauce So It Turns Glossy, Not Grainy
Getting a Real Sear on the Chicken
Season the chicken before it hits the pan, then lay it in the hot oil and leave it alone long enough to build color. You want a deep golden crust that releases easily when it’s ready, not pale chicken that steams in the skillet. If the breasts stick, they probably need another minute. Cook until the internal temperature reaches 165°F, then move them out so they don’t overcook while the sauce comes together.
Blooming the Garlic in Butter
Lower the heat before the garlic goes in. Butter helps soften the garlic’s edges and carries the flavor into the sauce, but garlic only needs a short cook time before it starts to turn bitter. Stir constantly and watch for the smell to shift from sharp to sweet. If the edges start browning too fast, pull the pan off the burner for a few seconds.
Reducing the Cream and Finishing With Cheese
After deglazing, let the cream come to a gentle simmer before the Parmesan goes in. The sauce should look thin at first, then slowly turn silky and coat the back of a spoon as it reduces. Add the cheese a little at a time and stir until it melts before adding more. If it looks too thick, splash in a spoonful of broth or wine. If it looks thin, give it another minute or two on the heat before returning the chicken.
Bringing the Chicken Back Through the Sauce
Put the chicken back into the skillet only after the sauce has thickened. Spoon the sauce over the top and let everything sit over low heat for a minute or two so the chicken warms through without getting tough. Fresh thyme and parsley go on at the end, after the heat is off, so they stay bright instead of wilted.
How to Adapt This Skillet Chicken for Different Kitchens
Dairy-Free Version With a Different Finish
Use dairy-free butter and a full-fat unsweetened coconut cream or cashew cream instead of heavy cream, then finish with a dairy-free Parmesan alternative if you like. The sauce will still be rich, but the flavor shifts a little more toward mellow and nutty, so keep the garlic and thyme front and center.
Lower-Carb, Extra-Rich Serving Style
This recipe is already naturally low in carbs, so the easiest tweak is to serve it over cauliflower mash, sautéed greens, or zucchini noodles. That keeps the sauce as the main event and catches every bit of the garlic-Parmesan cream without needing pasta or rice.
Using Chicken Thighs Instead of Breasts
Boneless thighs work well if you want a juicier, more forgiving cut. They need a few extra minutes in the skillet, and the sauce may look a little richer because thighs bring more fat and flavor to the pan.
No Wine on Hand
Chicken broth stands in cleanly for the deglazing step. You lose the slight acidity from the wine, so squeeze in a tiny bit of lemon at the end if the sauce tastes heavy.
Storage and Reheating
- Refrigerator: Store leftovers in an airtight container for up to 3 days. The sauce thickens as it sits, so expect it to look a little tighter when cold.
- Freezer: I don’t recommend freezing this one. Cream sauces often separate after thawing, and the texture turns grainy even if the flavor is still fine.
- Reheating: Warm gently in a skillet over low heat with a splash of broth or cream, stirring the sauce as it loosens. High heat is the enemy here; it can make the cream break and dry out the chicken.
Answers to the Questions Worth Asking
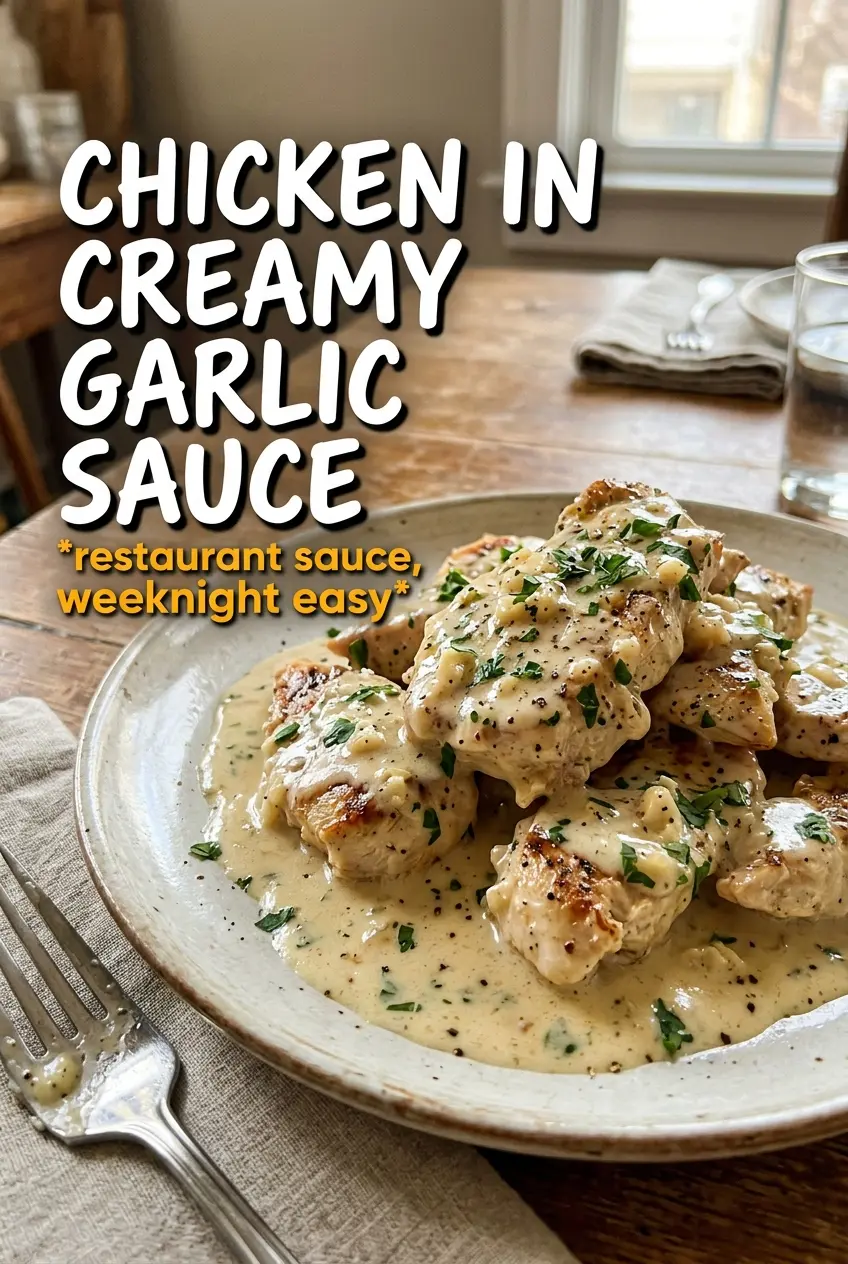
Chicken Breasts in Creamy Garlic Sauce
Ingredients
Equipment
Method
- Season the boneless skinless chicken breasts with salt, pepper, and smoked paprika to taste. Heat olive oil in a large skillet over medium-high heat, then sear until golden, 5-6 minutes per side, until the internal temperature reaches 165°F; remove the chicken to a plate.
- Melt the butter in the same pan over medium heat, then add the minced garlic and cook for 2 minutes, stirring constantly, until fragrant and starting to turn golden. Keep scraping the pan so browned bits don’t burn.
- Deglaze with the dry white wine or chicken broth and cook for 2 minutes, stirring to dissolve any browned flavor from the bottom of the pan. Let the liquid reduce slightly so the sauce tastes less sharp.
- Stir in the heavy cream and bring to a simmer over medium heat. Once simmering, it should look thickening and slightly glossy around the edges.
- Add the grated Parmesan, Italian seasoning, and cayenne pepper, then simmer for 4-5 minutes until the sauce is thick and glossy. Reduce heat if it bubbles too aggressively.
- Return the chicken breasts to the pan and spoon the garlic cream sauce over each breast. Let the chicken warm in the sauce for about 1-2 minutes, just until coated and juicy.
- Garnish with fresh thyme and fresh parsley right before serving. The herbs should look bright green against the creamy sauce pooling at the base.