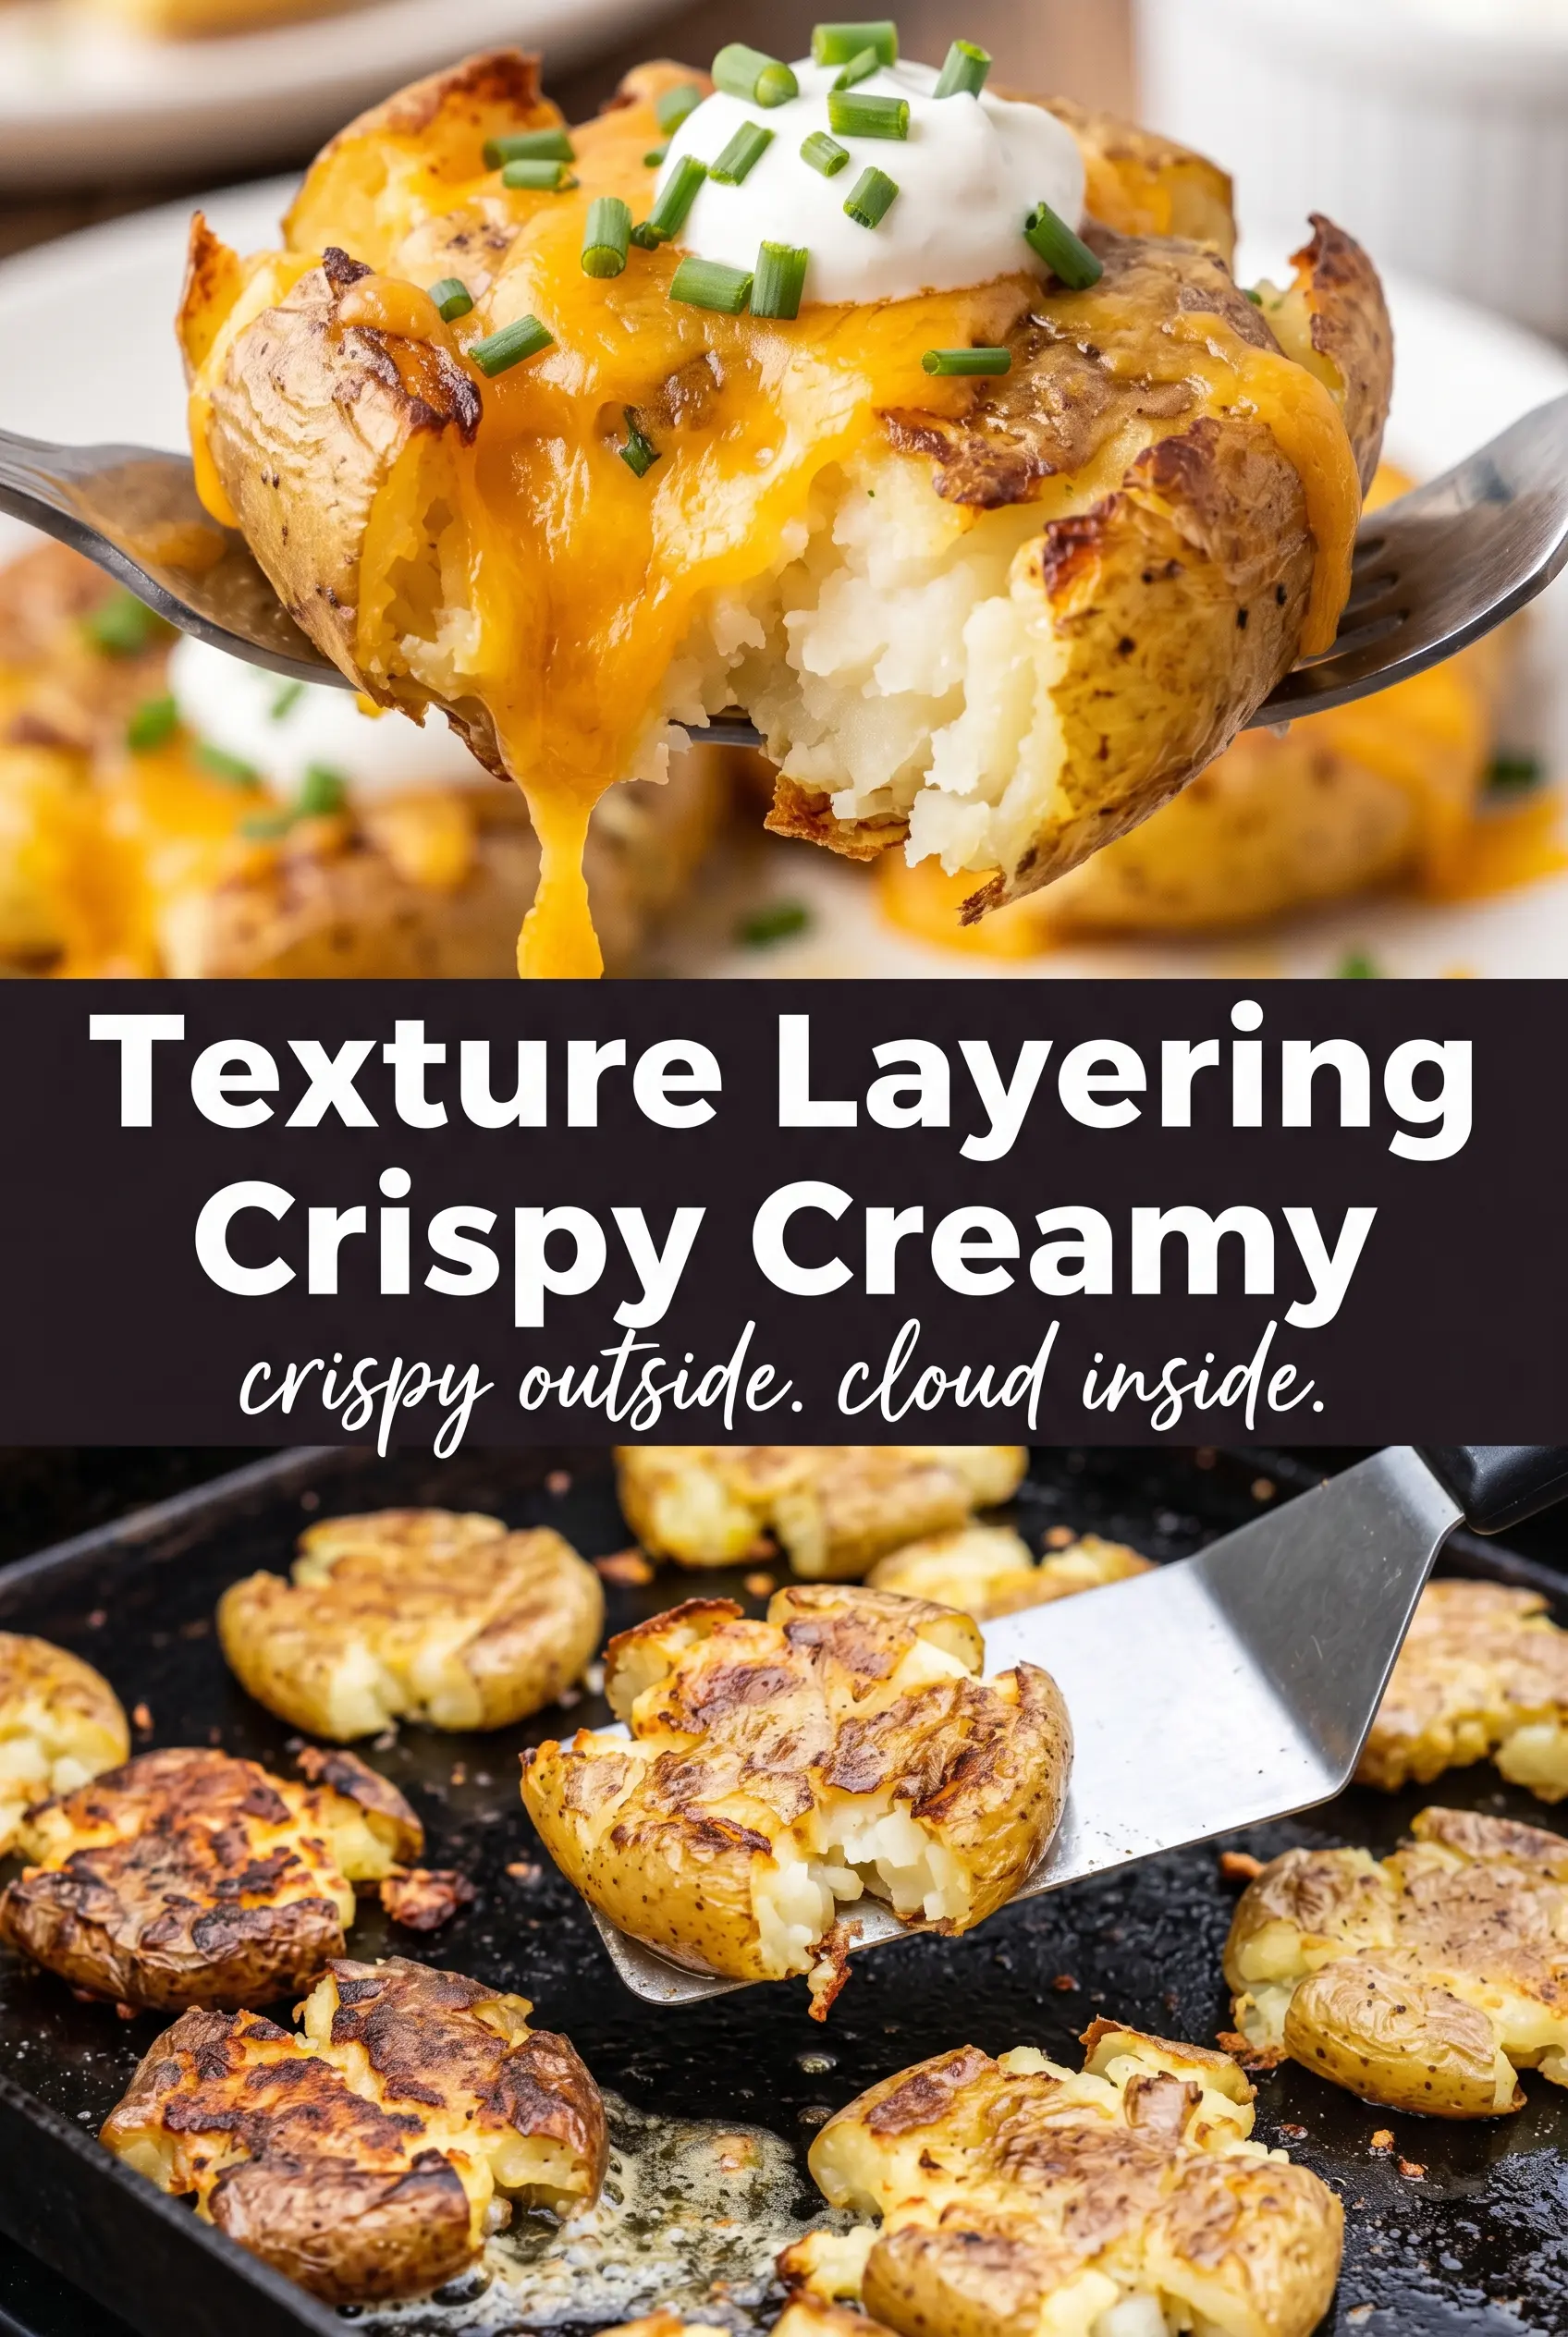
Blackstone smashed potatoes hit that perfect middle ground between a roasted potato and a diner-style crispy side: shatteringly crisp edges, a buttery garlic crust, and a fluffy center that stays soft when you press into it. They come off the griddle with real texture, the kind that makes people reach for a second helping before the first plate is even cleared.
The trick is in the two-stage cooking. Boiling the baby potatoes first gives you that creamy interior, and letting them dry a little before they hit the griddle keeps the exterior from turning greasy or pale. On the Blackstone, the combination of oil and butter gives you enough heat tolerance for browning plus the richer flavor butter brings, while the smashed shape creates more surface area for those crisp, craggy edges.
Below, I’ll show you the small details that make these turn out right every time, including how hard to smash them, when to add the garlic, and what to do if you want to turn them into a loaded potato side with sour cream, cheddar, and bacon.
The potatoes got those lacy crispy edges on the griddle, and the centers stayed fluffy instead of drying out. I added the garlic near the end like you said and it never burned.
Save these Blackstone smashed potatoes for the nights when you want crispy edges, soft centers, and a loaded topping finish.
The Part Most People Miss When They Smash Potatoes Too Soon
The biggest mistake with smashed potatoes is rushing the smash. If the potatoes are still steaming hard or falling apart in your hands, they won’t hold their shape on the griddle and you’ll lose the crisped edges that make this dish worth making. Let them cool just enough that the skins set and the potato flesh firms up a little; that brief pause gives you a cleaner smash and a better crust.
Heat matters here too. A hot griddle does the work of browning fast enough that the potatoes crisp before they dry out. If the surface isn’t hot enough, the butter soaks in and the potatoes soften instead of turning golden. You want audible sizzle the second they hit the griddle.
- Baby potatoes — Their size makes them ideal for boiling whole, then smashing into even rounds with a creamy center. Larger potatoes can work, but you’ll need to cut them first and the texture won’t be quite the same.
- Oil and butter — Oil helps the potatoes brown without burning, while butter brings the flavor you’d miss if you used oil alone. Using both gives you the best of each.
- Garlic — Add it around the potatoes instead of directly under them so it perfumes the fat without scorching. Burned garlic goes bitter fast on a hot griddle.
What Each Ingredient Is Actually Doing on the Griddle
- Baby potatoes — These are the right size for even cooking and easy smashing. Waxy varieties hold together better than starchy ones, which can crumble when you press them.
- Olive oil — Use a straightforward oil here; it keeps the potatoes moving and helps the edges brown. A more expensive finishing oil isn’t necessary because the griddle heat will mute delicate notes anyway.
- Butter — This is where the rich, toasted flavor comes from. If you skip it, the potatoes will still crisp, but they lose that round, savory depth.
- Garlic — Fresh minced garlic gives you the strongest payoff, but it only works if it’s added at the right time. If you want less risk, toss it in during the last minute of cooking instead of from the start.
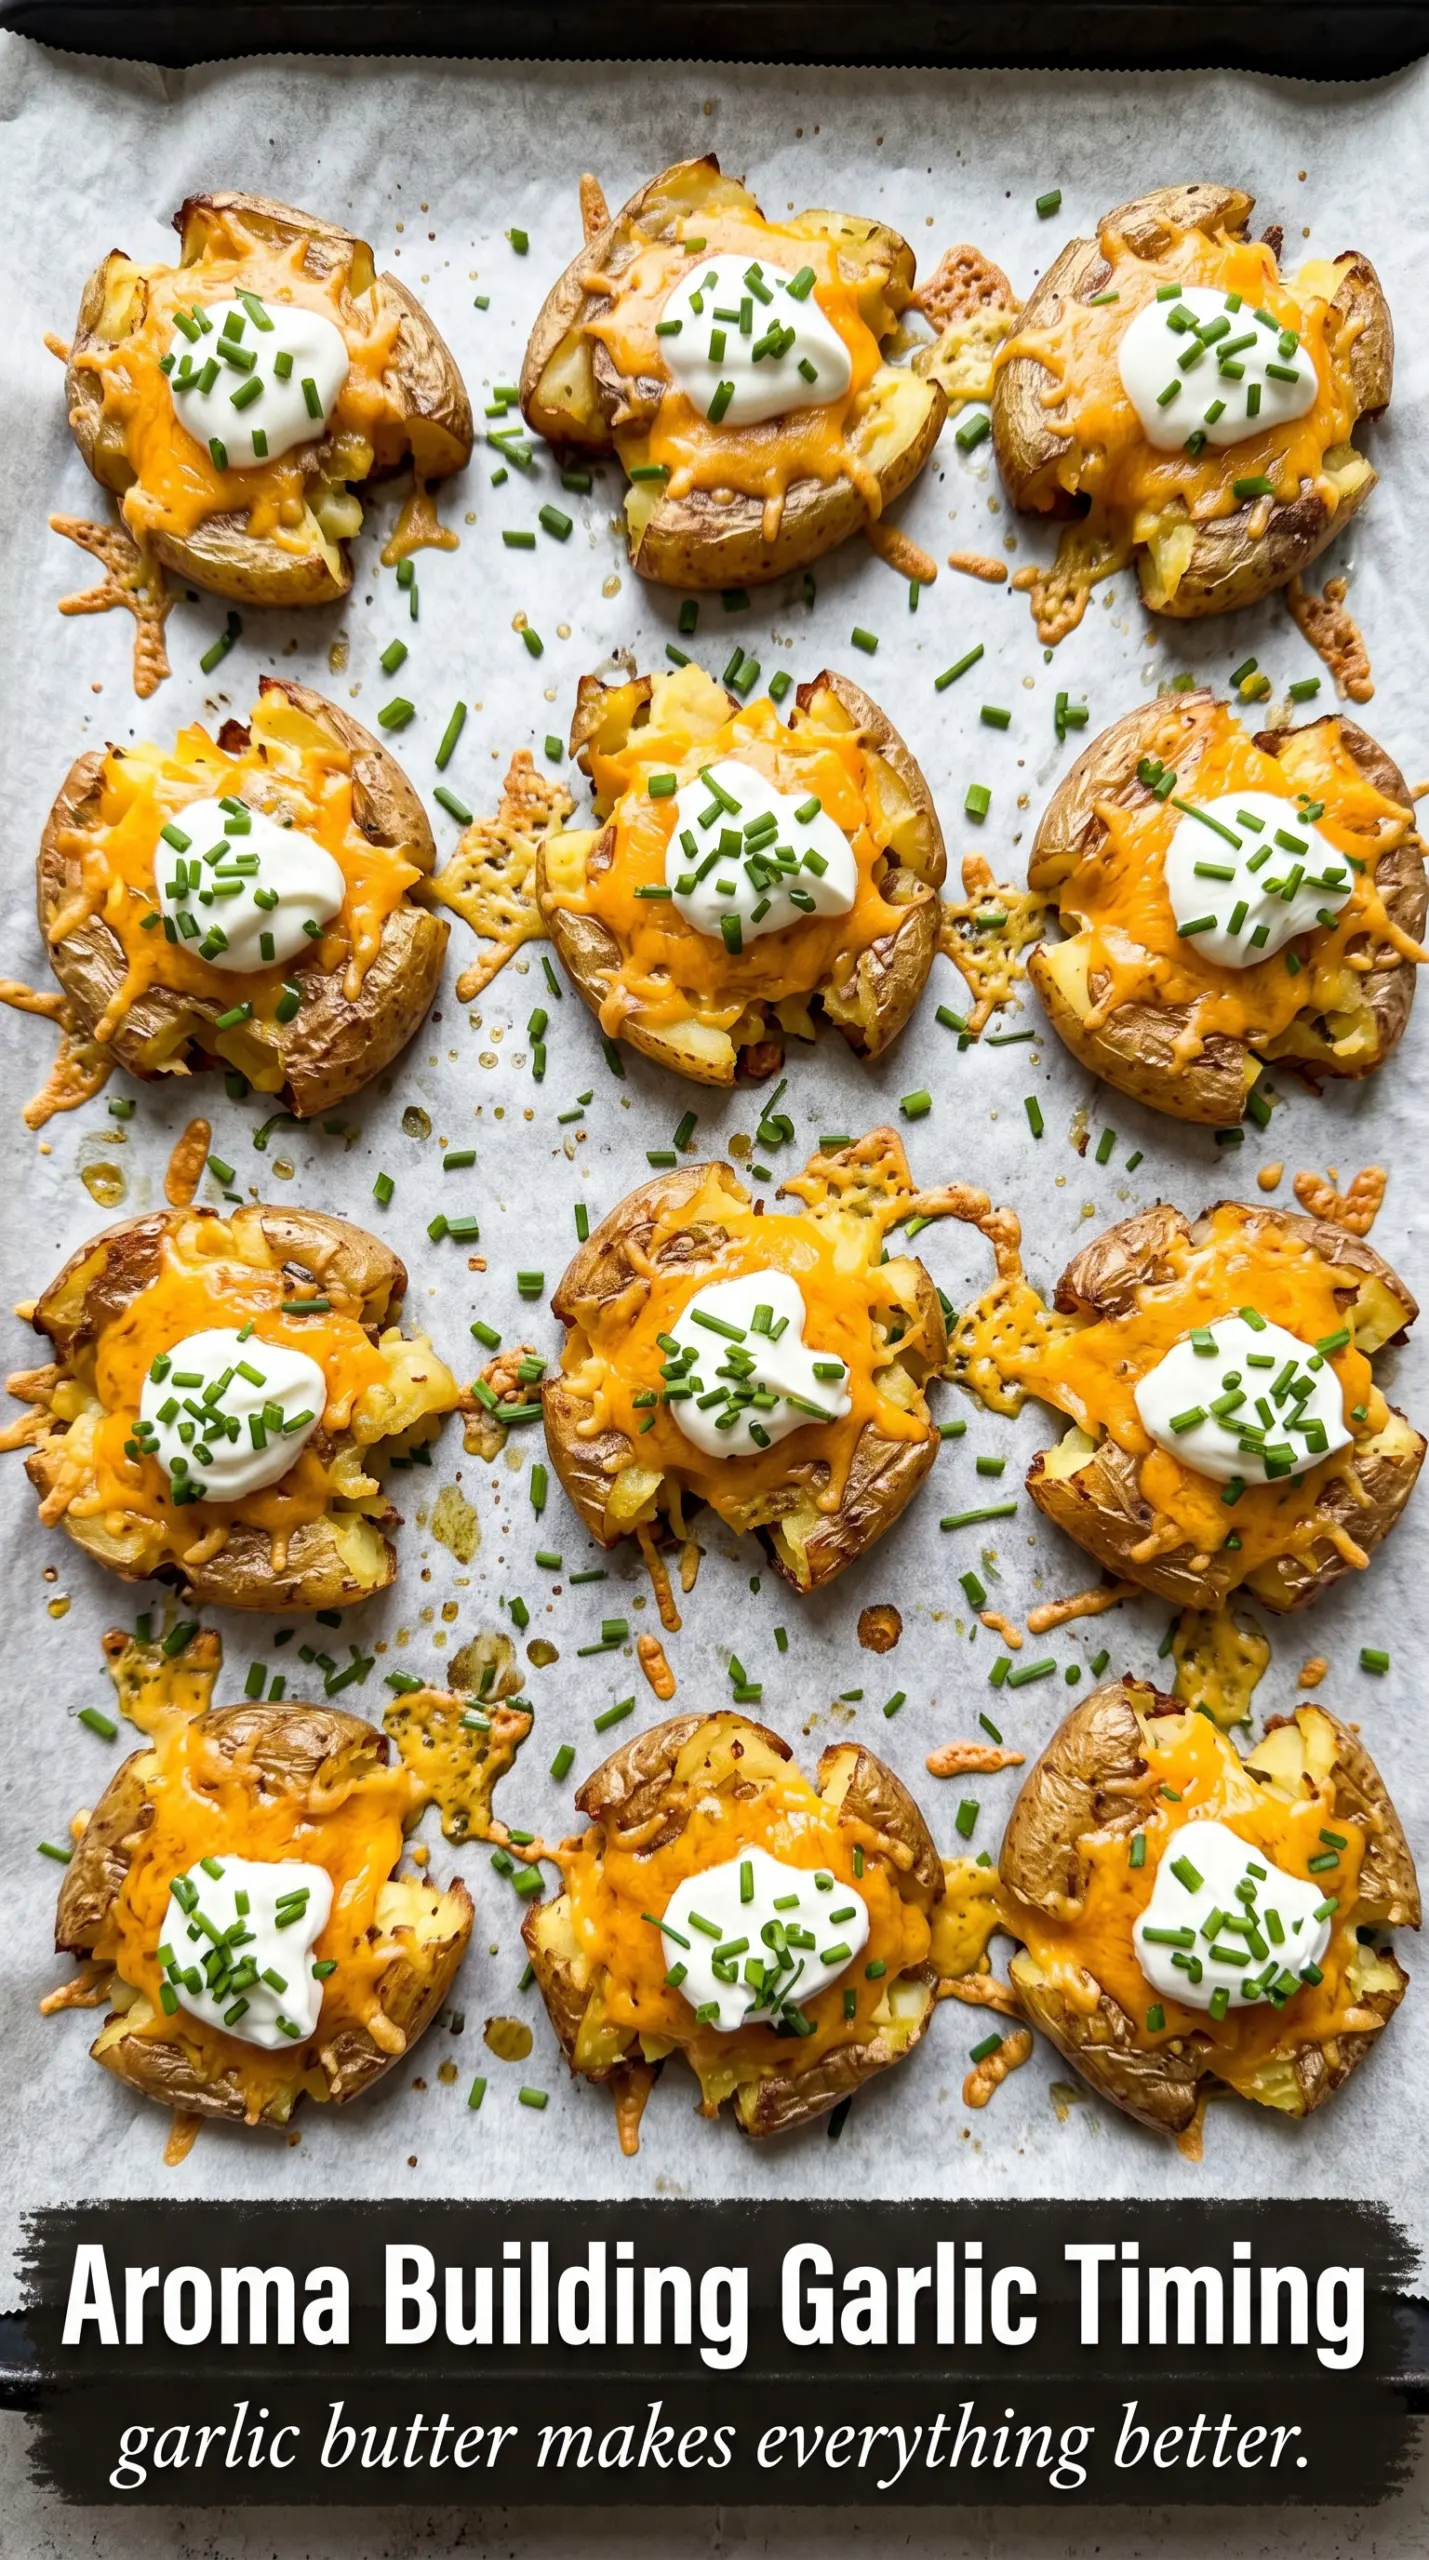
- Sour cream, cheddar, chives, and bacon — These turn the potatoes into a loaded side. The warm potatoes soften the sour cream just enough to spread, while the cheddar melts into the crags and the chives cut through the richness.
Getting the Smash, Sear, and Finish in the Right Order
Boil Until the Centers Yield Cleanly
Cook the baby potatoes until a fork slides in with almost no resistance, about 15 to 20 minutes depending on size. They should be tender all the way through, but not breaking apart in the pot. Drain them well, then let them sit for a few minutes so the surface moisture can evaporate; wet potatoes steam on the griddle and that works against crisping.
Build the Heat Before the Potatoes Go Down
Preheat the Blackstone to medium-high before adding the oil and butter. The fat should shimmer and loosen quickly, but it shouldn’t smoke hard. If the griddle is too cool, the potatoes absorb the fat instead of searing, and you end up with soft bottoms instead of crisp ones.
Smash for Maximum Surface Area
Place the potatoes on the griddle with a little space between them, then press down firmly with a heavy spatula or masher. The goal is a flattened round with ragged edges, not a thin pancake. If they stick to the tool, use a quick lift-and-press motion instead of dragging, which tears the potato apart.
Let the First Side Go Deep Gold
Leave them alone for 6 to 7 minutes until the bottoms are deeply golden and the edges look lacy and crisp. This is where patience pays off; moving them too early prevents that crust from setting. Add the garlic around the potatoes during this stage so it cooks in the butter without burning directly against the hot surface.
Flip, Crisp, and Load Them Up
Turn each potato and cook the second side for another 5 to 6 minutes until both sides are crisp. Season with salt and pepper while they’re still hot so it clings to the crust. Finish with sour cream, cheddar, chives, and bacon bits right before serving so the toppings stay distinct instead of melting into a heavy blanket.
Three Ways to Make These Smashed Potatoes Work for Your Table
Dairy-Free Griddle Potatoes
Swap the butter for more olive oil or a dairy-free butter substitute. You’ll lose a little of the nutty richness butter gives the crust, but the potatoes still crisp well if the griddle is hot enough. Skip the sour cream and use a dairy-free topping or serve them plain with chives.
Vegetarian Loaded Potatoes
Leave off the bacon bits and lean on the cheddar, sour cream, and chives. The dish stays rich and satisfying because the potatoes carry the texture and the butter-garlic crust brings plenty of savory flavor on its own.
Crisper, Less Topped Version
Serve them with just salt, pepper, and chives if you want the potato itself to stay the focus. This version tastes a little lighter and keeps the crust front and center, which is useful when these are going alongside grilled meat or a heavier main.
Storage and Reheating
- Refrigerator: Store leftovers in an airtight container for up to 4 days. The crust softens in the fridge, but the flavor stays good.
- Freezer: These freeze, but the texture won’t be as crisp after thawing. Freeze on a tray first, then transfer to a bag once solid.
- Reheating: Reheat on a hot skillet, griddle, or in the oven at 425°F until the edges crisp again. The mistake people make is microwaving them, which turns the smashed surface soft and gummy.
Answers to the Questions Worth Asking
Blackstone Smashed Potatoes
Ingredients
Equipment
Method
- Boil baby potatoes until fork-tender, about 15-20 minutes, then drain and let cool slightly.
- Heat the Blackstone griddle to medium-high and add olive oil and butter.
- Place the boiled baby potatoes on the griddle and smash flat with a heavy spatula or masher.
- Add minced garlic around the potatoes and cook for 6-7 minutes until bottoms are crispy and golden.
- Flip the smashed potatoes and cook another 5-6 minutes until both sides are crispy.
- Season with salt and pepper, then top with sour cream for topping, shredded cheddar cheese, chopped chives, and bacon bits.