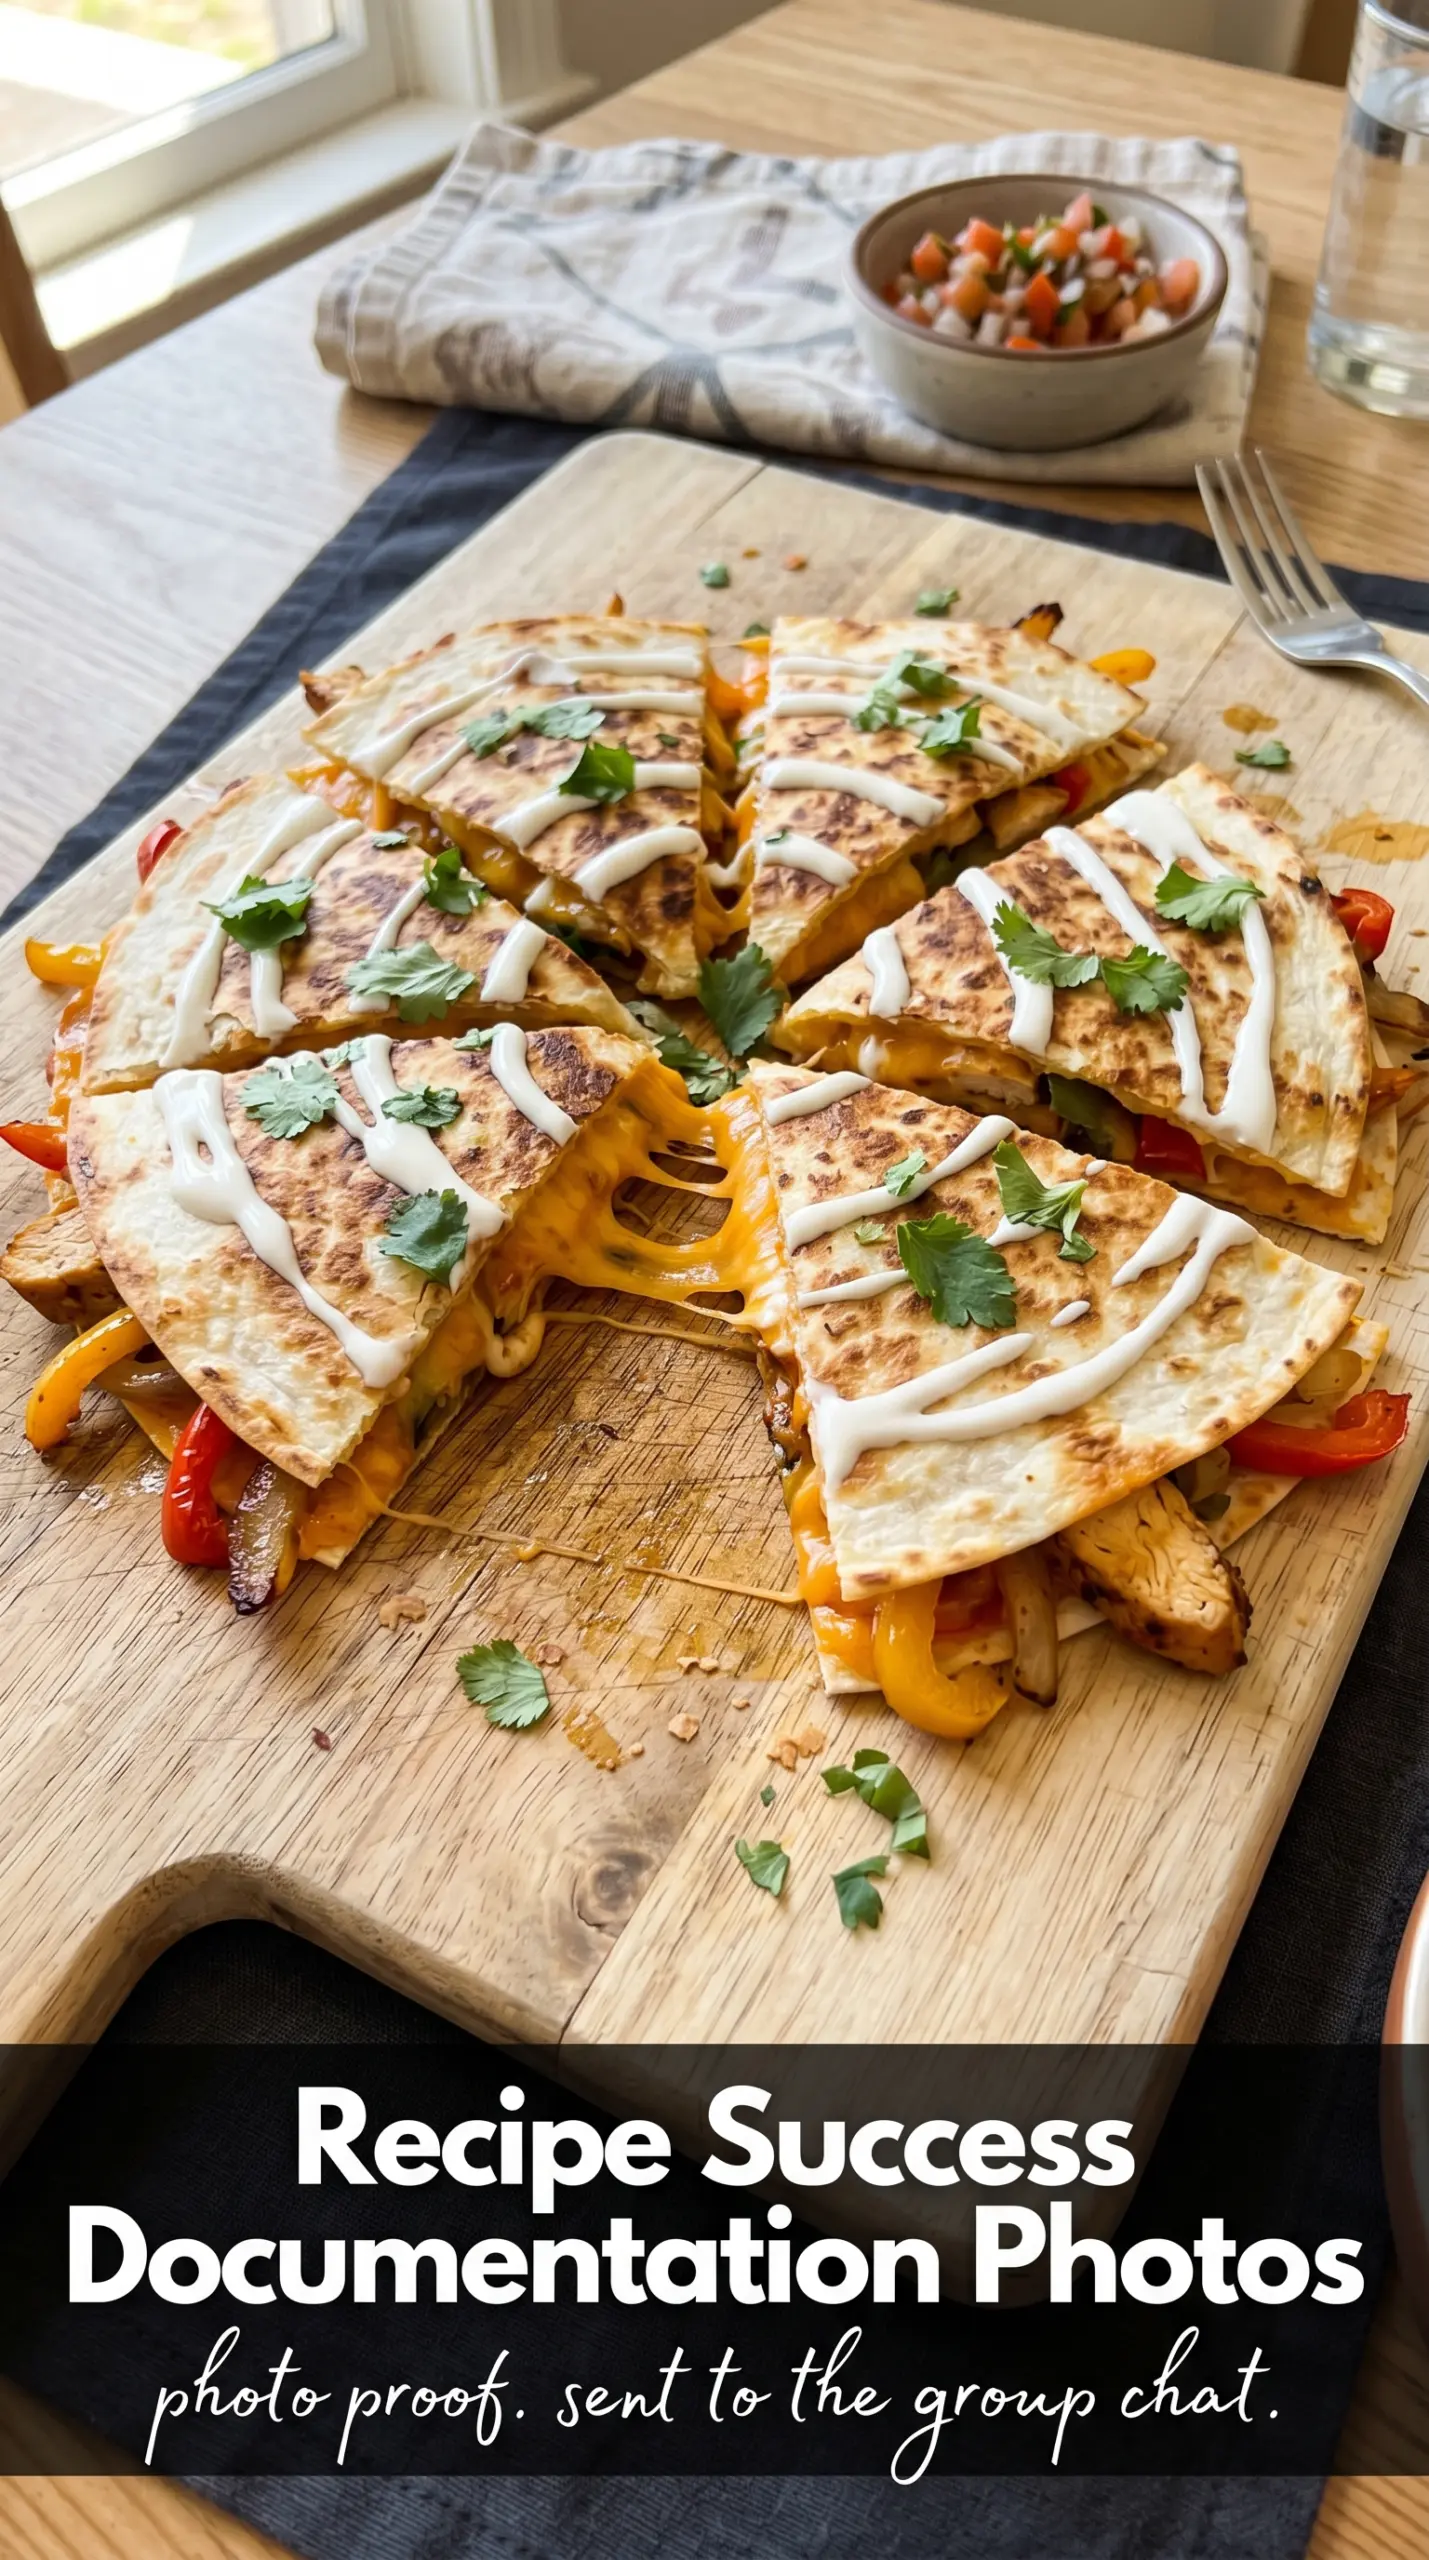
These Blackstone chicken fajita quesadillas hit that sweet spot between crisp, cheesy, and loaded enough to count as dinner. The tortillas pick up a deep golden crust on the griddle, the chicken stays juicy, and the peppers and onions keep just enough bite to stand up to all that melted cheese. When you cut into them, the filling holds together instead of sliding out in a greasy pile.
The trick is giving the chicken and vegetables their own moment before they go inside the tortillas. That keeps the griddle hot enough for browning, but not so crowded that everything steams. I also like splitting the fajita seasoning between the chicken and the vegetables, because it seasons every layer instead of relying on the cheese to carry the whole dish.
Below you’ll find the little details that matter most: how thin to slice the chicken, when the peppers are ready, and how to get that clean, crunchy finish on both sides of the quesadilla. If you’ve ever had filling spill out before the cheese fully melted, this version fixes that.
The tortillas got perfectly crisp on the outside, and the cheese melted all the way through without the filling falling apart. I loved how the peppers still had a little bite.
Save these Blackstone chicken fajita quesadillas for the nights when you want crispy griddle tortillas, juicy chicken, and melty cheese in one pan.
The Reason These Quesadillas Stay Crisp Instead of Turning Soggy
The biggest mistake with fajita quesadillas is treating the filling like it’s going into tacos. Too much moisture, too much filling, and the tortilla never has a chance to brown properly. Here, the chicken and vegetables get cooked off first so the steam leaves the pan before they ever meet the cheese. That matters on a Blackstone, where you can build heat fast but you still need the ingredients dry enough to sear instead of simmer.
Shredded cheese works better than sliced here because it melts into the chicken and vegetables and acts like glue. Use a cheddar and Monterey Jack blend if you can, since cheddar brings the sharpness and Monterey Jack gives you that smooth stretch. If you pile the filling too high, the tortillas won’t seal well, so keep the layers even and press gently as they cook.
What Each Ingredient Is Doing in the Pan
- Chicken breast — Slicing it thin is what keeps it tender and fast-cooking. If the pieces are thick, the tortillas will finish before the chicken does. Chicken thighs work too if you want a juicier result, but they’ll need a minute or two longer on the griddle.
- Bell peppers and onion — These bring the fajita flavor and a little sweetness after they hit the heat. A mix of colors looks best, but any bell pepper works. Slice them evenly so they soften at the same pace and don’t leave you with half-raw strips tucked inside the quesadilla.
- Fajita seasoning — This is the backbone of the dish, so use one you actually like the taste of. If your blend is salty, don’t overdo extra salt on the chicken. Homemade seasoning works well, and it gives you more control over the heat and garlic level.
- Flour tortillas — Large flour tortillas hold up best on the griddle and crisp without cracking. Smaller tortillas can work, but you’ll need to reduce the filling or they’ll tear when you flip them. Corn tortillas aren’t the right fit here; they’re too delicate for this style of quesadilla.
- Cheddar and Monterey Jack — This combo gives you both flavor and melt. Pre-shredded cheese works in a pinch, but freshly shredded cheese melts more smoothly because it doesn’t carry the anti-caking coating. That makes a difference when you want the layers to bind instead of staying loose.
Building the Filling Without Losing the Melt
Cooking the Chicken First
Heat the Blackstone to medium-high and add the oil before the chicken hits the surface. The chicken should sizzle right away and pick up a little color in about 6 to 7 minutes, depending on how thin you sliced it. If the pieces are crowded or stacked, they’ll steam and turn pale, so spread them out in a single layer and stir only enough to cook them evenly. Pull them once they’re cooked through and no longer pink in the center.
Softening the Peppers and Onions
Add the peppers and onion to the same hot surface with the rest of the seasoning. They should soften and pick up a few browned edges, not collapse into mush. That usually takes 5 to 6 minutes. If the pan looks dry, add a small splash of oil rather than water; water cools the griddle and slows the browning you want.
Layering the Quesadillas
Lay down four tortillas and add cheese first, then the chicken and vegetable mixture, then a little more cheese. The first layer of cheese helps anchor the filling, and the top layer melts down into the tortilla when you close it. Don’t overfill them or the edges will burst open when you flip. A thinner, even layer gives you the cleanest cut and the best cheese pull.
Flipping for the Golden Finish
Cook each quesadilla for 3 to 4 minutes per side until the tortillas are deeply golden and the cheese is melted all the way through. Press lightly with a spatula so the layers fuse, but don’t smash them flat or you’ll push the filling out. If the tortilla is browning before the cheese melts, lower the heat a touch and give it another minute. That small adjustment keeps the outside from burning while the center finishes.
How to Change the Filling, the Heat, or the Batch Size
Make It Dairy-Free
Use a good melting dairy-free cheese and keep the heat a little lower so it has time to soften. You’ll lose some of the stretchy pull from traditional cheese, but the griddle crispness and seasoned filling still carry the dish. Check the label on your fajita seasoning too, since some blends include milk powder or cheese flavoring.
Swap in Chicken Thighs for Extra Juiciness
Boneless chicken thighs stay more forgiving if you tend to run the griddle hot. They bring a deeper, richer bite, though they may need a little more time to cook through. Slice them thin just like the breast so they still fit neatly inside the tortilla.
Turn It into a Vegetarian Fajita Quesadilla
Skip the chicken and add sliced mushrooms, zucchini, or extra peppers and onions. Mushrooms need enough heat to release their moisture and brown before they go inside the tortillas, or the filling turns wet. You’ll get a lighter quesadilla with the same fajita feel and a little more vegetable sweetness.
Storage and Reheating
- Refrigerator: Store leftovers in an airtight container for up to 3 days. The tortillas soften as they sit, but the flavor stays strong.
- Freezer: You can freeze them, wrapped tightly and separated with parchment, for up to 2 months. The texture won’t be quite as crisp after thawing, but they still work well for a quick lunch.
- Reheating: Reheat on a dry skillet or back on the griddle over medium heat until the outside crisps again and the center is hot. The microwave makes the tortilla limp, so use it only if you don’t mind losing the crunch.
Questions I Get Asked About This Recipe

Blackstone Chicken Fajita Quesadillas
Ingredients
Equipment
Method
- Heat the Blackstone griddle to medium-high and add the oil. Wait until the surface shimmers slightly.
- Season the sliced chicken with half the fajita seasoning and cook for 6-7 minutes, stirring occasionally, until cooked through. You should see no pink and clear browning on the edges.
- Add the sliced bell peppers and onion to the griddle with the remaining fajita seasoning, cooking for 5-6 minutes until softened. Watch for bright pepper color and tender, lightly browned onion.
- Place 4 tortillas on the griddle and layer each with shredded cheese, the chicken mixture, and more cheese. Aim for even coverage so the cheese will seal the fillings.
- Top with the remaining tortillas and cook for 3-4 minutes per side until golden and the cheese is melted. Flip when the bottom is crisp and the cheese begins to stretch.
- Cut the quesadillas into wedges and serve immediately with sour cream, salsa, guacamole, and lime wedges. Add toppings on the side for cleaner cross-section layers.