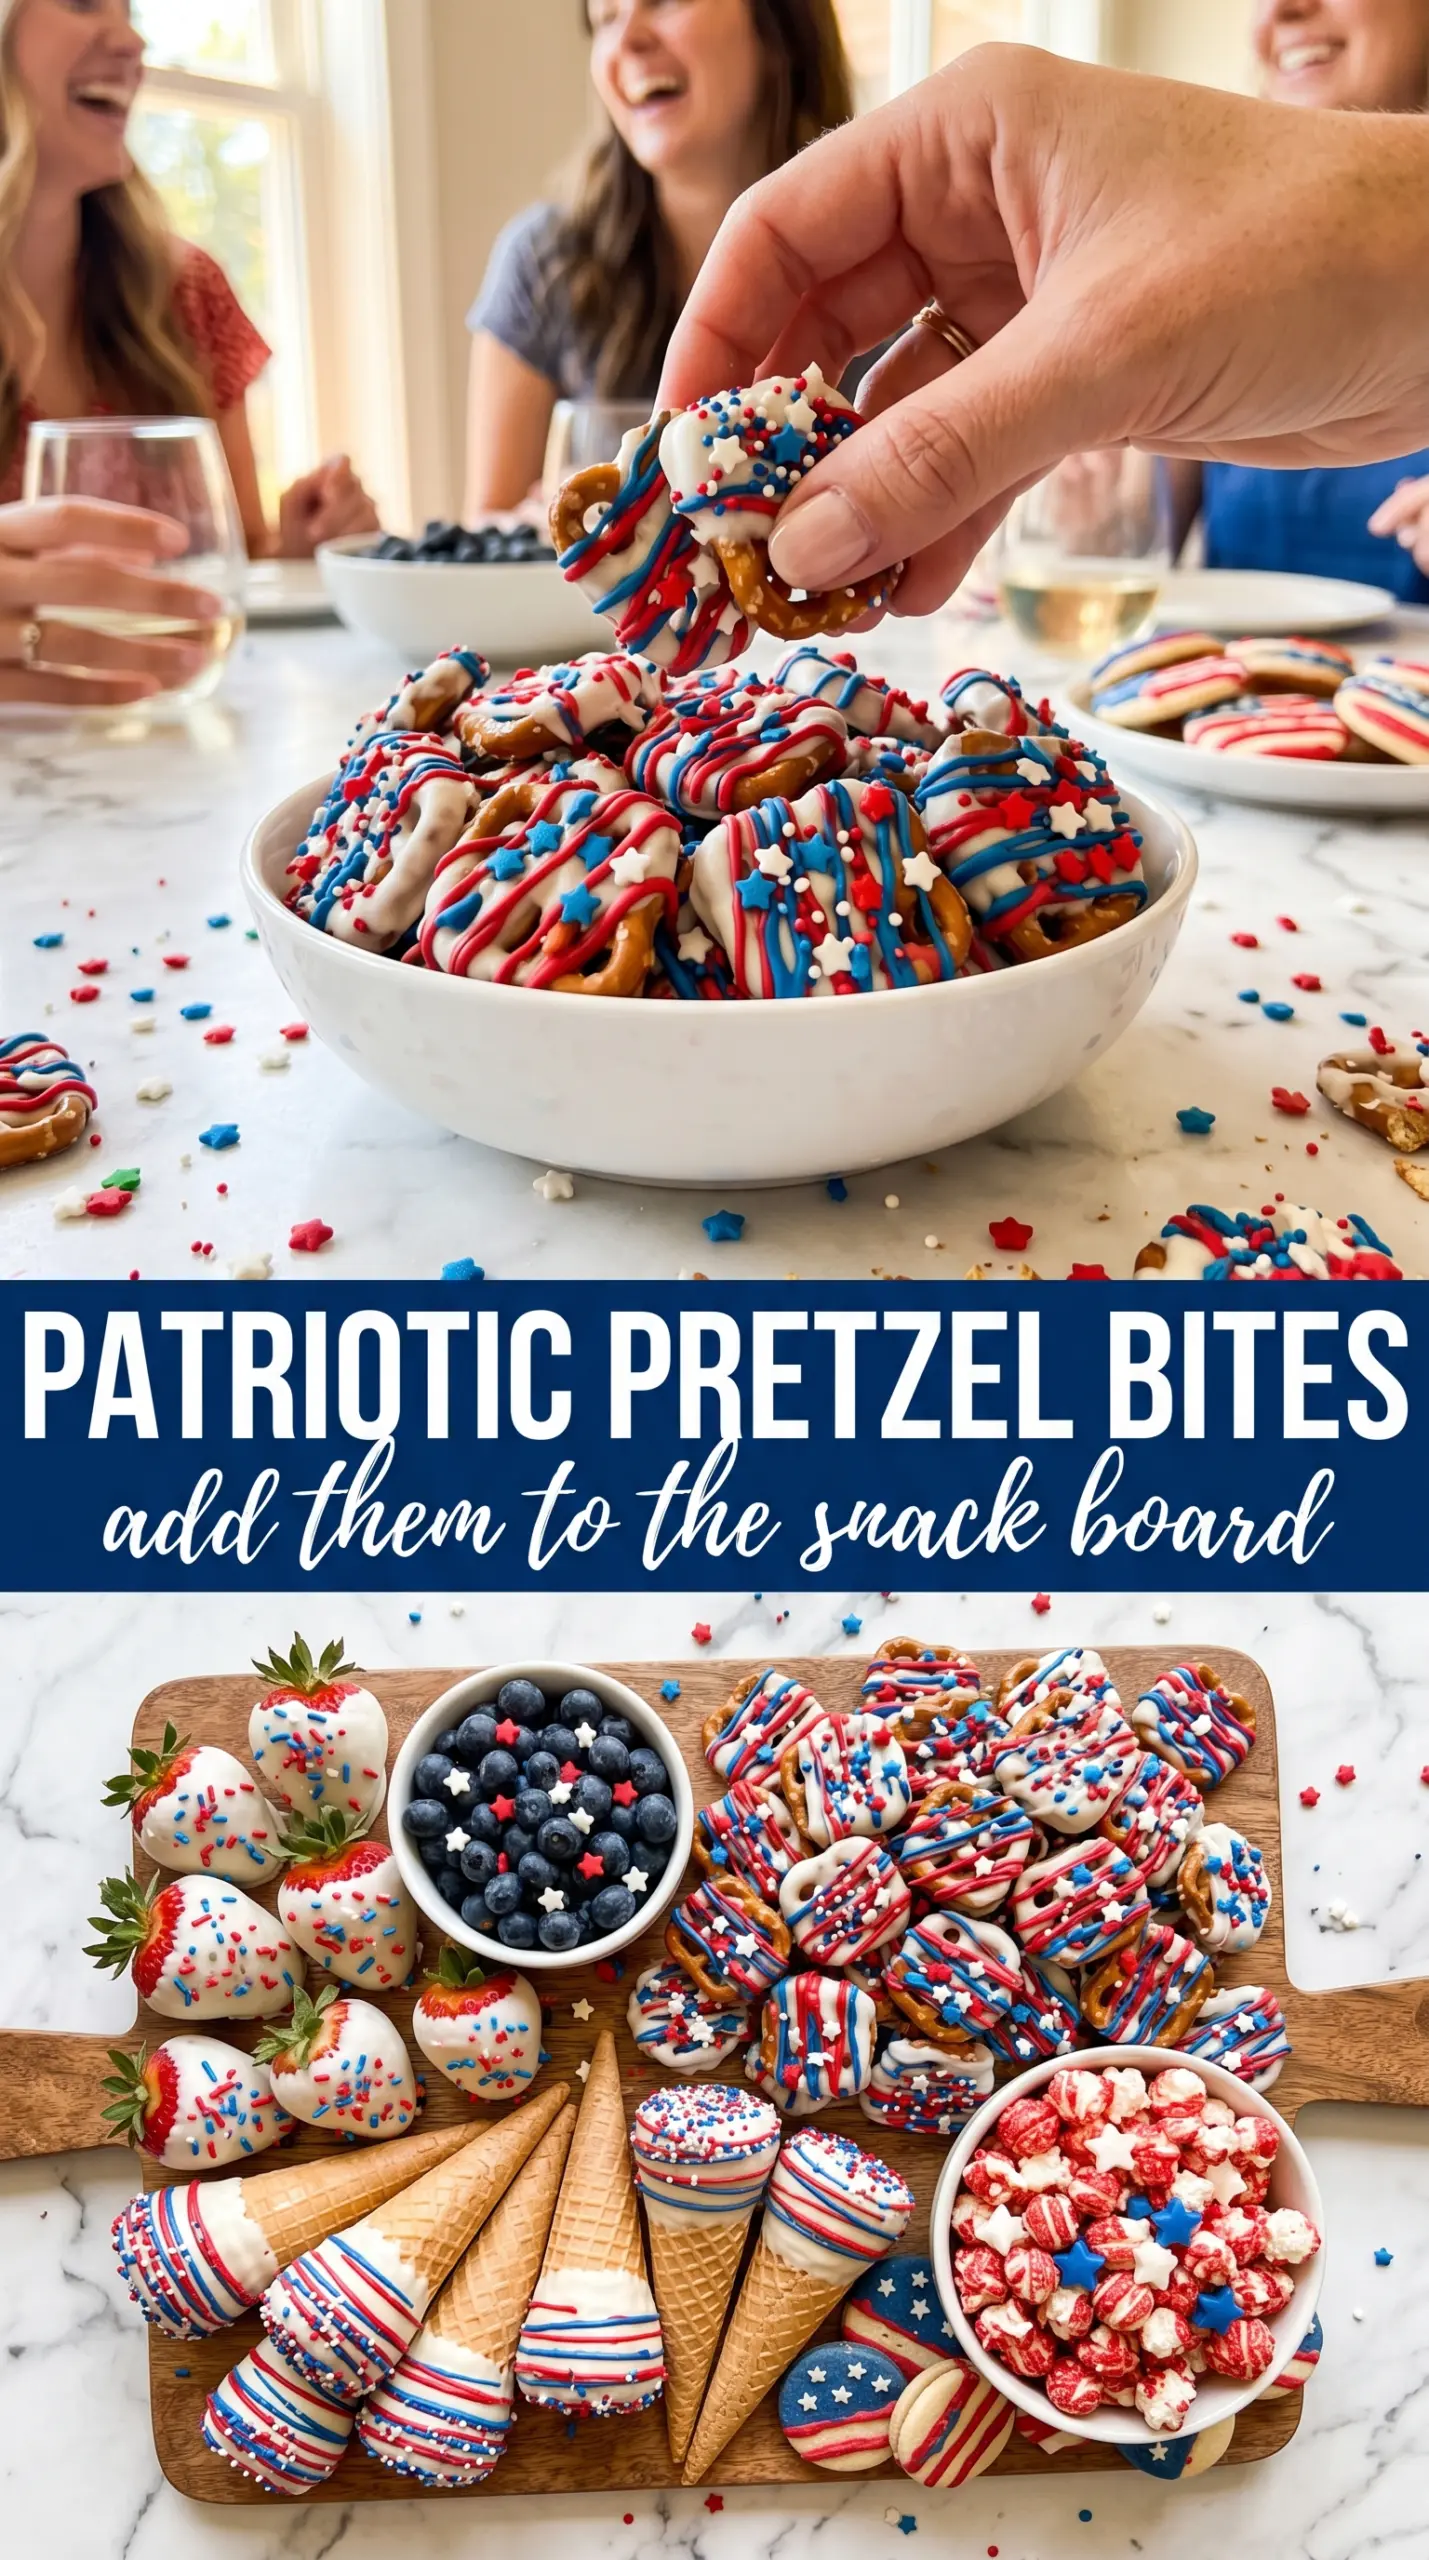
Patriotic pretzel bites hit that sweet-salty-crunchy balance that disappears fast on a party table. The white chocolate sets up into a smooth shell, the red and blue drizzles add a little snap of candy sweetness, and the pretzel underneath keeps every bite from feeling overly sugary. They look festive without requiring any piping skills or tempering drama.
What makes this version work is the order of the layers. The pretzels go down first so the chocolate can cling to something sturdy, and the white chocolate gets spread while it’s still fluid enough to settle into a neat top coat. The colored melts go on last, right before the sprinkles, so you get clean stripes instead of muddy streaks.
Below, I’ll walk through the trick that keeps the drizzle sharp and the one setting method that prevents the bottoms from sweating. If you’ve ever had candy melts seize up or white chocolate seize into lumps, there’s a fix for that here too.
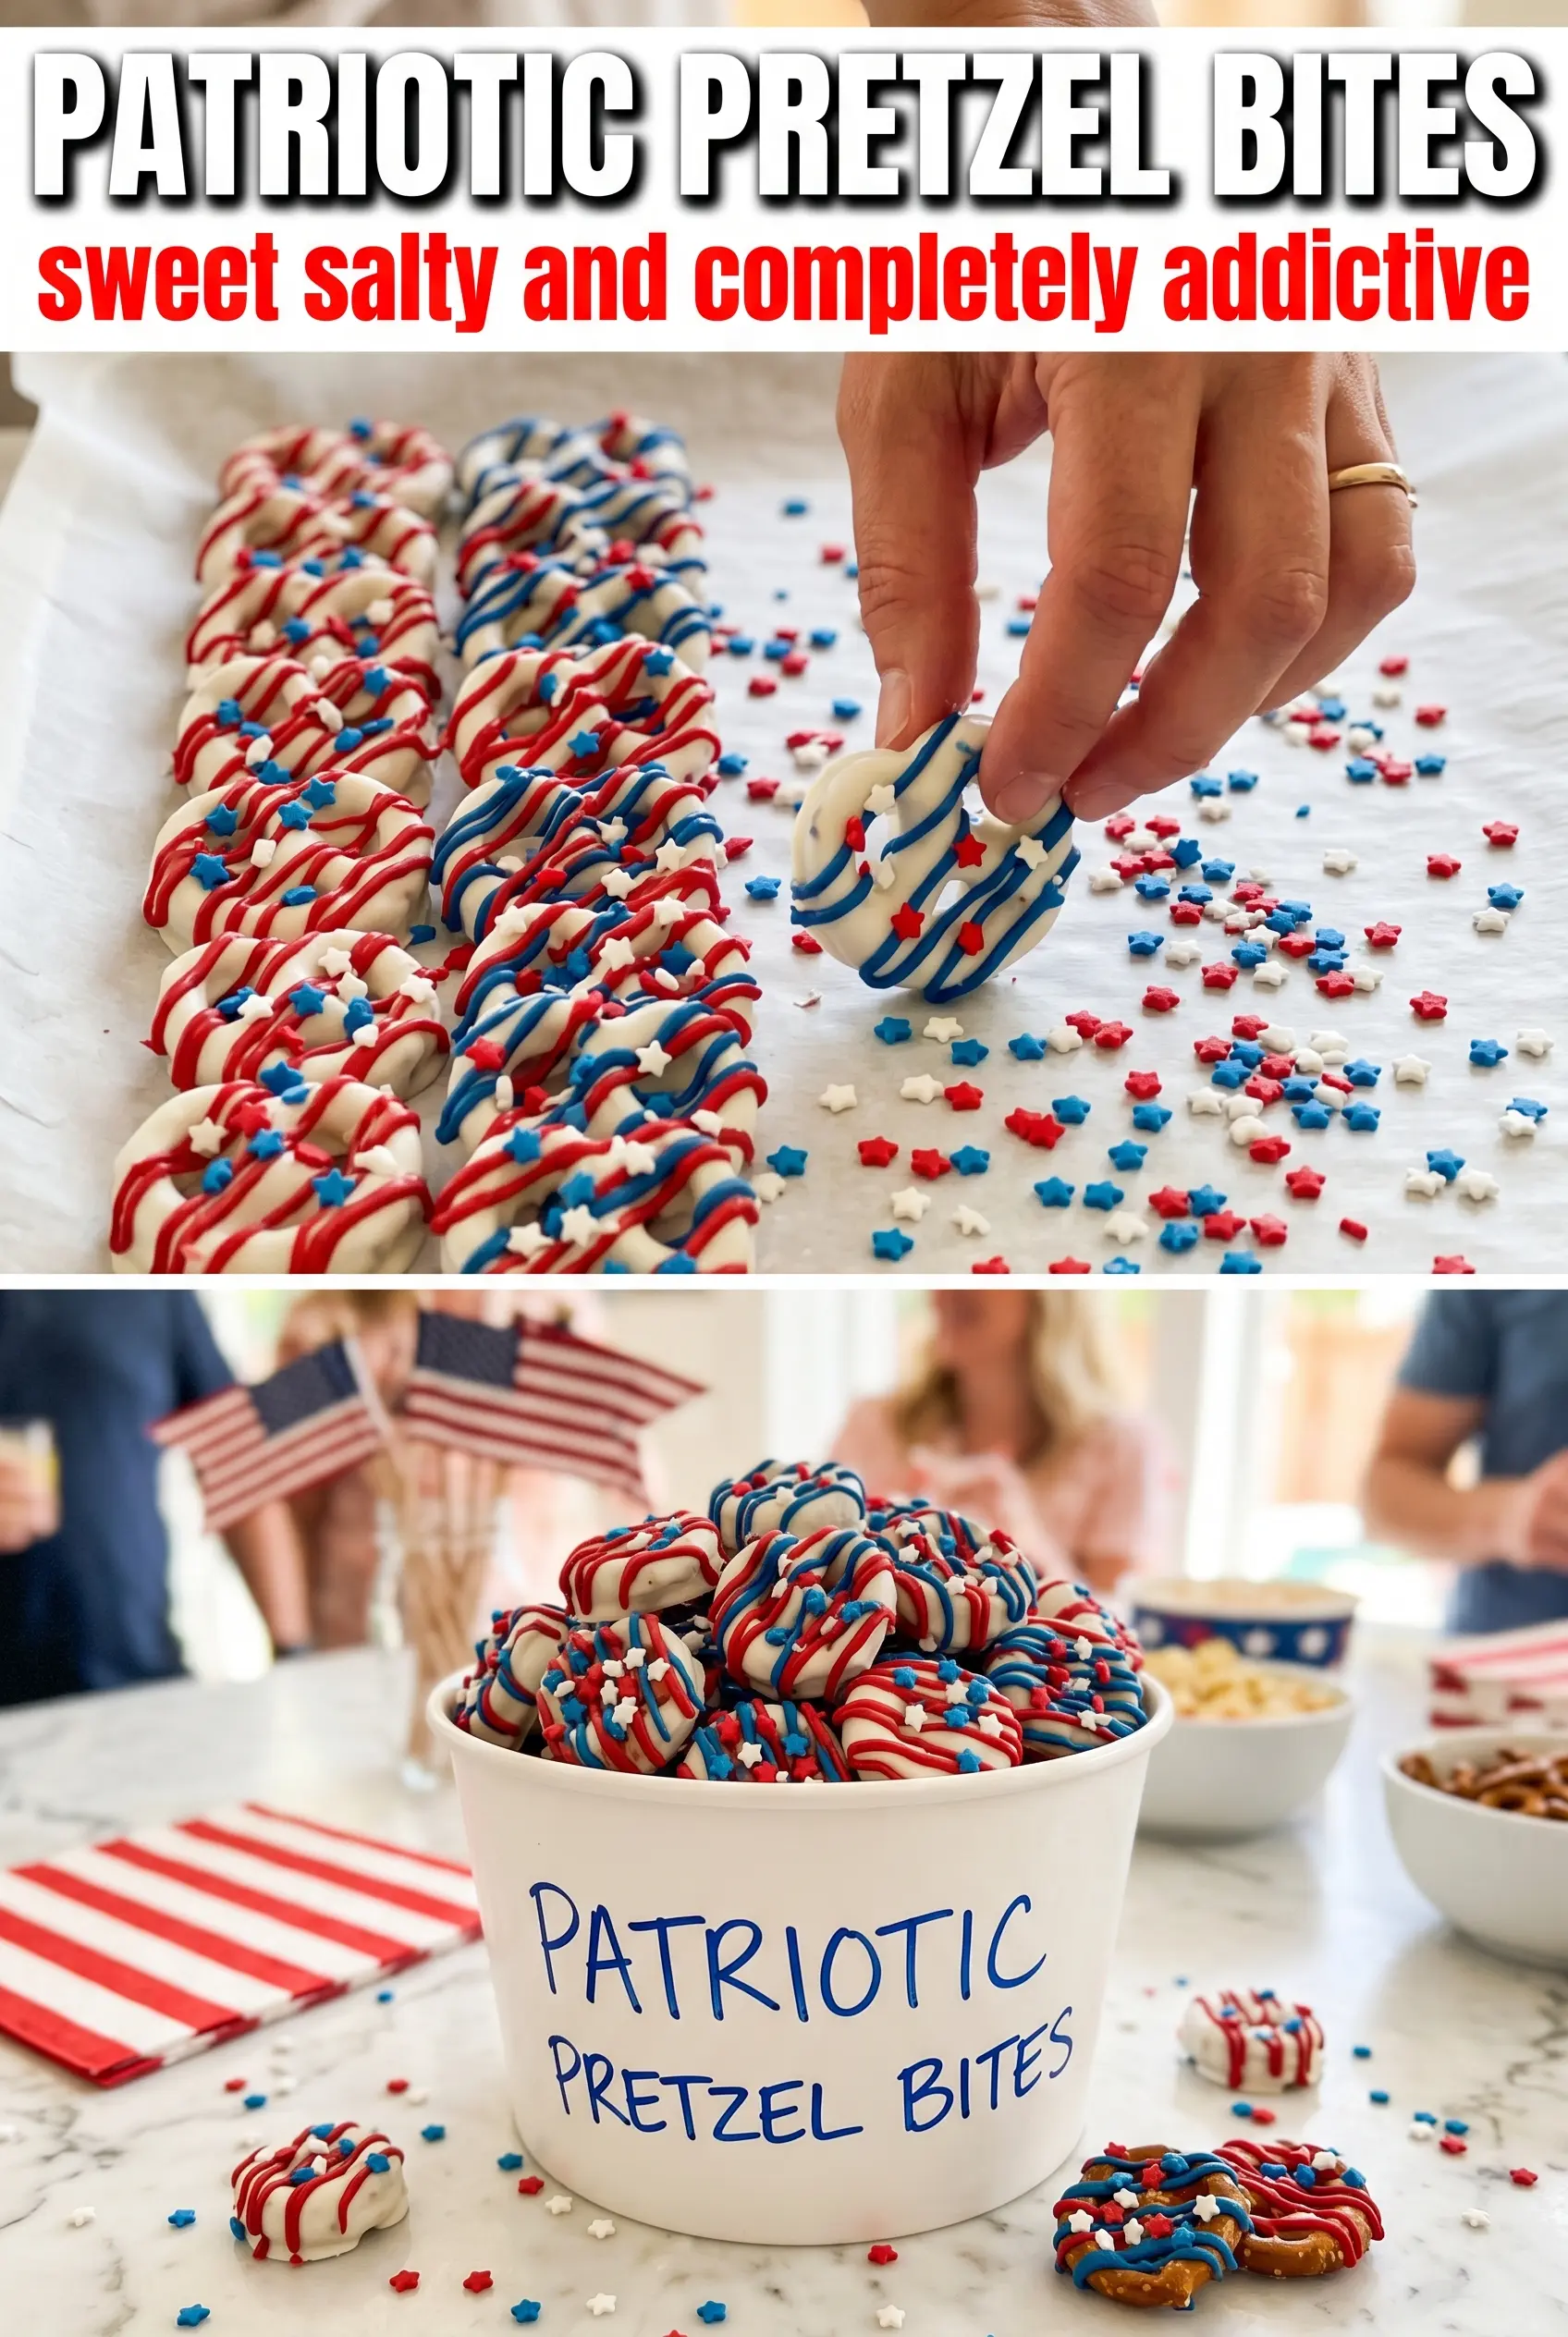
The white chocolate went on smooth and the red and blue drizzle stayed bright instead of blending together. I set them on parchment for half an hour and they came off cleanly with the perfect crunchy-sweet bite.
These patriotic pretzel bites set up with a glossy white chocolate shell, bright candy drizzles, and the best sweet-salty crunch for a parade, picnic, or dessert tray.
The Trick to Keeping the Drizzle Clean and Bright
The biggest mistake with pretzel bark-style snacks is rushing the toppings. If the white chocolate starts to set before the red and blue candy melts go on, the drizzle sits in stiff ridges instead of settling into crisp lines. Work in a small enough batch that you can finish the decorating before the first layer turns matte.
Another thing that matters here is heat. White chocolate and candy melts both dislike overheating. Melt them in short bursts and stop stirring as soon as the last few lumps disappear, because a thin, overheated mixture drizzles poorly and can turn grainy fast.
- Pretzel squares or rounds — Either shape works, but squares give a neater, more uniform look for party platters. Use a sturdy pretzel with a flat surface so the white chocolate doesn’t slide off.
- White chocolate melting wafers — These are easier than regular white chocolate chips because they melt smoothly and reset with a clean snap. If you use chips instead, they can stay thicker and a little duller unless you thin them carefully.
- Red and blue candy melts — Candy melts are the easiest way to get vivid patriotic color without changing the texture of the base. You can use colored white chocolate coating, but the shade is often softer and less defined.
- Parchment paper — This is worth using instead of wax paper. The bites release cleanly, and the bottoms won’t stick or pick up a waxy finish.
What Each Ingredient Is Actually Doing in This Recipe
- Primary ingredient (the star) — Quality matters most. Choose the best you can find.
- Cooking medium (oil, butter, or broth) — This carries flavors and prevents dryness.
- Seasonings (salt, pepper, spices, herbs) — Layer flavors so nothing overpowers. Build depth gradually.
- Aromatics (garlic, onion, herbs) — Cook with fat to bloom flavors. Become the foundation.
- Supporting ingredients — Complement the main ingredient without overpowering it.
- Sauce or liquid (if applicable) — Brings flavors together. Balance richness with acid.
- Acid (lemon, vinegar, wine, or other) — Brightens and prevents flat-tasting results.
- Final finish (garnish, glaze, or sauce) — Prevents one-dimensional taste and adds visual appeal.
Building the Layers So Each Bite Sets Up Right
Lining Up the Pretzels
Spread the pretzels in a single layer with a little space between them. If they’re crowded, the white chocolate spills together and you lose the bite-sized look. A parchment-lined sheet keeps the undersides dry and makes cleanup painless.
Melting the White Chocolate
Microwave the wafers in 30-second intervals and stir each time, even if they don’t look fully melted yet. Residual heat finishes the job. If you keep heating until they look perfect in the bowl, they often go from smooth to thick and stubborn in seconds.
Coating and Decorating Fast
Spoon or drizzle the white chocolate over each pretzel, then move straight into the red and blue melts. The base should still look glossy when you add the color. Finish with the star sprinkles immediately, because once the surface starts to crust, the sprinkles bounce right off instead of settling in place.
Letting Them Set Without Sweating
Room temperature gives the cleanest finish, and the chocolate stays shinier that way. If you’re short on time, a short refrigerate works, but don’t leave them in long enough to trap moisture underneath. That’s what causes a sticky underside and a cloudy finish.
Three Ways to Make These Work for Your Crowd
Extra Crunchy Pretzel Bites
Use pretzel squares with a sturdier bake and let the white chocolate coat stay a little thinner. You’ll get a sharper snap when you bite in, which is nice if you want these to feel more like snack mix than candy.
Dairy-Free Version
Choose dairy-free white chocolate-style melting wafers and check that your candy melts are also dairy-free, since brands vary. The finish will still be glossy and festive, but the flavor may lean a little sweeter than real white chocolate.
Less Sweet, More Salty
Use a thinner layer of white chocolate and a lighter hand with the drizzle so more pretzel shows through. That keeps the candy-coated look while letting the salty pretzel come forward more clearly.
Storage and Reheating
- Refrigerator: Store in an airtight container for up to 1 week. The pretzels stay crisp, though the chocolate can pick up a little condensation if you move them straight from cold to warm air.
- Freezer: They freeze well for up to 2 months if layered between parchment in a sealed container. Thaw in the container so moisture stays off the chocolate surface.
- Reheating: No reheating needed. If they’ve been chilled, let them sit at room temperature for 10 to 15 minutes before serving so the chocolate loses its cold snap without softening.
Questions I Get Asked About This Recipe
Patriotic Pretzel Bites
Ingredients
Equipment
Method
- Line a large baking sheet with parchment paper and spread the mini pretzel squares in a single layer.
- Melt the white chocolate melting wafers in the microwave in 30-second intervals, stirring between each, until completely smooth.
- Spoon or drizzle the white chocolate over each mini pretzel, covering the top but leaving the edges slightly visible.
- Melt the red and blue candy melts separately in the microwave in 30-second intervals, stirring between each, until completely smooth.
- Drizzle the red and blue melts over the white chocolate-coated pretzels using a spoon or piping bag.
- Immediately scatter the red, white, and blue star sprinkles over each piece while the chocolate is still wet.
- Let the pretzel bites sit at room temperature for 30 minutes until fully set, or refrigerate for 10 minutes.
- Break apart and serve the set pretzel bites.