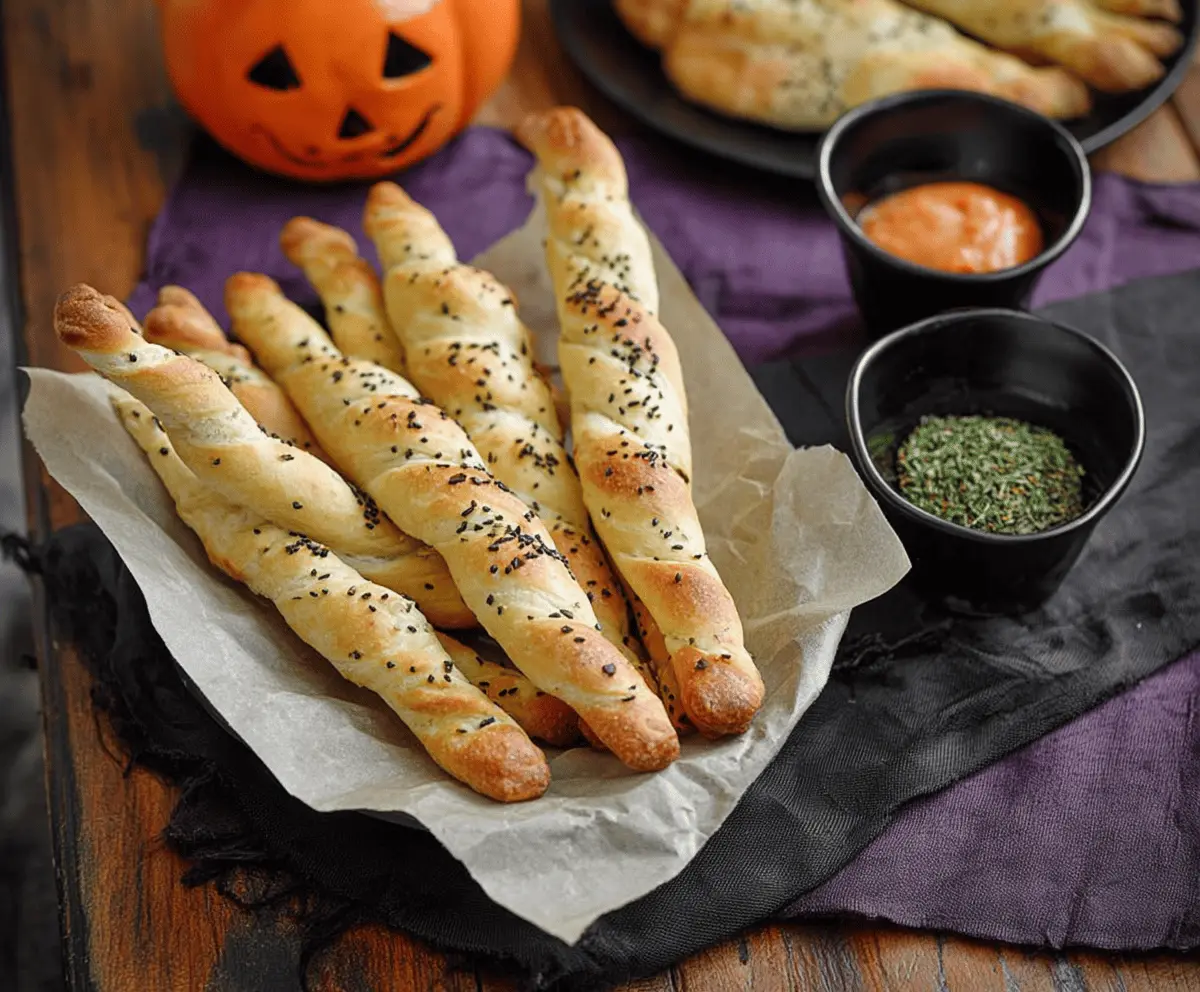
These spooky Witch Finger Breadsticks are super fun and easy to make! With their creepy shape and almond “nails,” they’re perfect for Halloween gatherings or a themed party.
Making these breadsticks is a blast! I love how you can get creative with the design. Plus, they taste great dipped in marinara sauce—just like witch fingers dipped in “blood!”👻
Key Ingredients & Substitutions
Refrigerated Breadstick Dough: The base of these witch fingers! I like using Pillsbury, but any store-bought dough works. If you prefer making your own, a simple pizza dough can be a fun alternative!
Olive Oil or Melted Butter: This adds richness and helps the seasonings stick. I usually go with olive oil for a lighter taste, but melted butter gives a nice flavor too!
Almonds: These act as creepy fingernails! Whole or sliced almonds fit the look perfectly. If you’re nut-free, use sunflower seeds or omit them completely for a fun “nail-less” look.
Dried Italian Herbs: This is optional but recommended for extra flavor. You can swap them for dried oregano or basil if that’s what you have on hand.
How Do You Shape the Breadsticks to Look Like Fingers?
Shaping the breadsticks is key to their “witch finger” appearance. Here’s how you can master it:
- After unrolling the dough, gently pull apart each breadstick. Be careful not to tear them!
- To create the finger shape, twist each stick lightly. Aim for a tapered end with a thicker base.
- For extra fun, you can make knuckles by pinching the dough slightly at intervals along the length.
Practice makes perfect here—don’t worry if they don’t all look the same. The more unique they are, the creepier and more fun they become!

Witch Finger Breadsticks
Ingredients You’ll Need:
- 1 can (13.8 oz) refrigerated breadstick dough (such as Pillsbury)
- 1 tablespoon olive oil or melted butter
- 1 teaspoon dried Italian herbs (optional)
- 1/2 teaspoon garlic powder (optional)
- 1/2 teaspoon salt
- 1 tablespoon black sesame seeds or poppy seeds (for a spooky look)
- Almonds (whole, blanched or sliced) for fingernails
- Marinara sauce or your favorite dipping sauce, for serving
How Much Time Will You Need?
This recipe will take about 10 minutes of prep time and 12-15 minutes to bake. So, you can have these fun and spooky breadsticks ready in about 25-30 minutes, perfect for a last-minute Halloween treat!
Step-by-Step Instructions:
1. Preheat Your Oven:
Start by preheating your oven to 375°F (190°C). While it warms up, line a baking sheet with parchment paper for easy cleanup.
2. Prepare the Breadstick Dough:
Open the can of refrigerated breadstick dough and gently separate it into individual sticks. Be careful not to tear them apart!
3. Shape into Fingers:
Now, take each breadstick and twist it gently to create a finger-like spiral shape. Don’t worry if they’re not perfectly shaped—each finger can have its own unique character!
4. Add Flavor:
Lightly brush each twisted breadstick with olive oil or melted butter. This adds flavor and helps the seasonings stick. If you’d like, sprinkle on the dried Italian herbs, garlic powder, salt, and black sesame or poppy seeds to mimic the “warts” of spooky fingers!
5. Create Spooky Fingernails:
At the tip of each breadstick, gently press an almond slice or whole almond. This will resemble a creepy fingernail and enhance the witchy vibe!
6. Bake Them Up:
Carefully place the shaped breadsticks on the prepared baking sheet, ensuring they are spaced apart for even baking. Pop them in the oven for about 12-15 minutes, or until they are golden brown.
7. Serve and Enjoy!
Once baked, remove the breadsticks from the oven and let them cool slightly. Serve them warm with marinara sauce or your favorite dipping sauce. Enjoy your creepy and delicious Witch Finger Breadsticks that are sure to delight and scare your guests!
Can I Use Frozen Breadstick Dough Instead?
Yes, you can use frozen breadstick dough! Just make sure to thaw it completely according to package instructions before using it in this recipe. Follow the same shaping and baking steps once thawed.
How Long Do Leftover Breadsticks Last?
Leftover breadsticks can be stored in an airtight container in the fridge for up to 3 days. Reheat them in the oven or microwave, and they’ll still taste great!
Can I Make These Breadsticks Gluten-Free?
Absolutely! Look for gluten-free breadstick dough at your local grocery store, or make your own using a gluten-free flour blend. Just follow the same shaping and baking instructions.
What Other Toppings Can I Use?
Feel free to get creative! You can add different herbs like rosemary or thyme, sprinkle cheese on top before baking, or even use different seeds for added texture and flavor. The possibilities are endless!