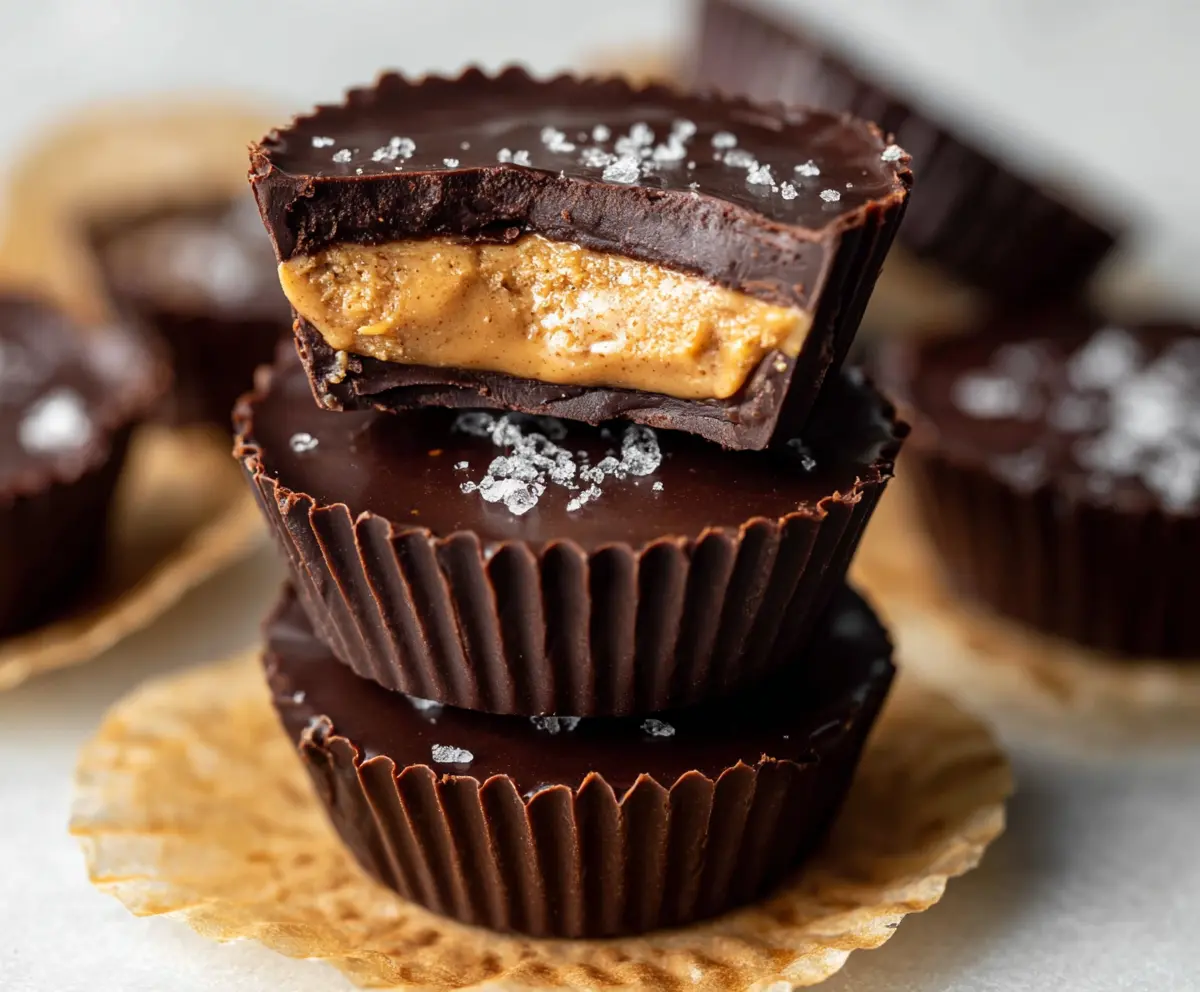
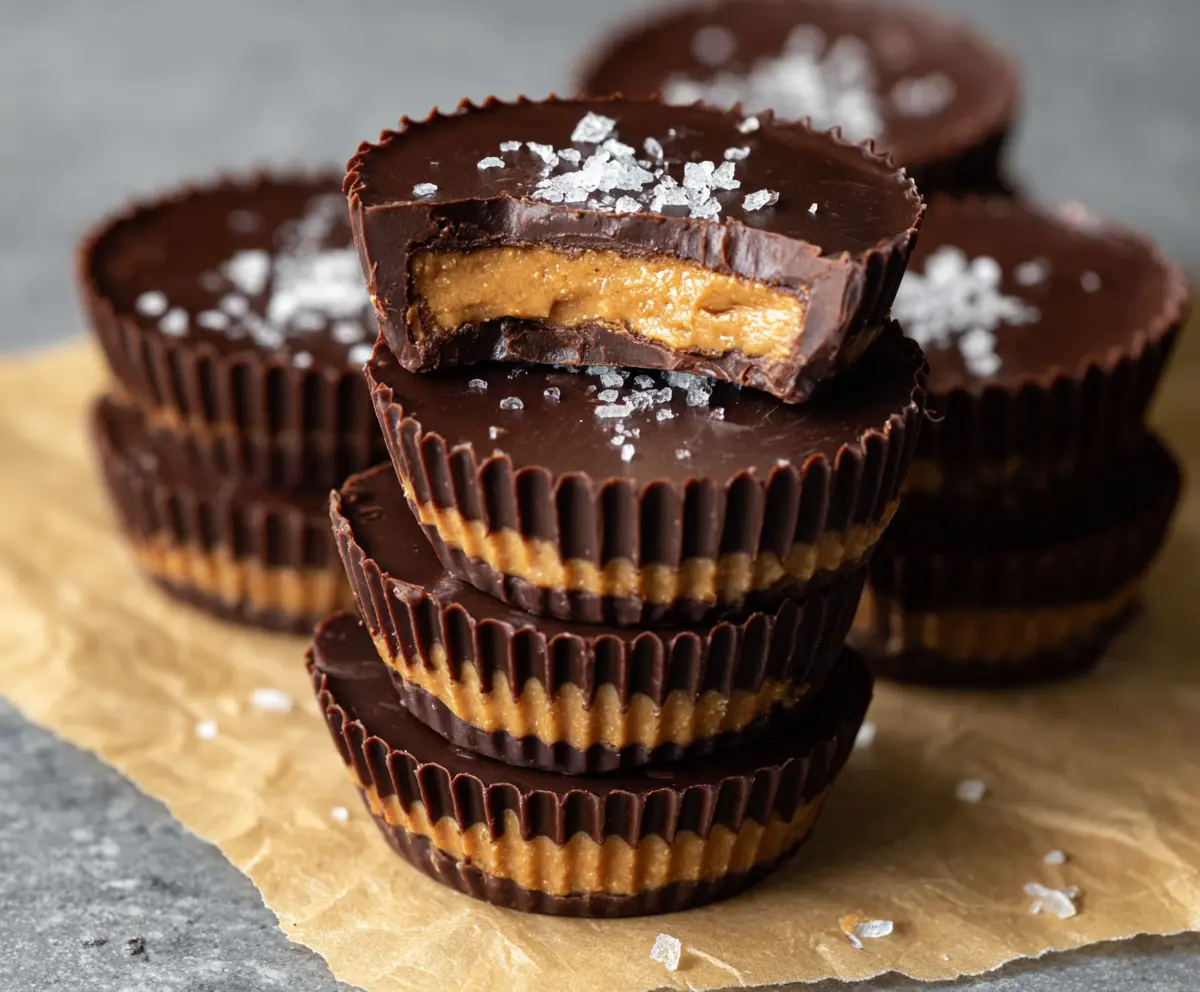
Protein Peanut Butter Cups are a tasty treat packed with goodness. They combine creamy peanut butter and rich chocolate, making them a delicious way to get some protein in your day!
I can’t resist these little bites of joy! They’re perfect for a quick snack or dessert when I need a pick-me-up. Plus, making them is so easy, which is always a win! 😄
Key Ingredients & Substitutions
Natural Creamy Peanut Butter: Choose a brand with no added sugar for a healthier option. If you’re allergic to peanuts, try almond or sunflower butter instead—they work great too!
Protein Powder: You can use either whey for a creamy texture or a plant-based protein powder if you prefer vegan options. Explore flavors like chocolate or vanilla for extra taste!
Coconut Flour or Almond Flour: Both flours help bind the ingredients. If you don’t have these, you can use all-purpose flour, but it may change the texture slightly.
Sweetener: Honey adds a nice taste, but for a vegan option, use maple syrup or date syrup instead. If you want fewer calories, you can skip sweetening altogether!
Dark Chocolate: Use at least 70% cacao for rich flavor. If you’re dairy-free, look for vegan chocolate. You can also use cocoa powder with some coconut oil, but melting chocolate is easier!
What’s the Best Method for Melting Chocolate Smoothly?
Melting chocolate can be tricky. You want it silky, not clumpy! The key is gentle heat. Using a microwave, do this:
- Place chocolate chips and coconut oil in a microwave-safe bowl.
- Heat for 20 seconds, then stir.
- Repeat until melted, making sure not to overheat. If the chocolate gets too hot, it can seize up.
Alternatively, you can melt chocolate using a double boiler on the stove, which gives you more control over the temperature. Just be careful not to let any steam or water touch the chocolate!
With these tips, you’re set for making delicious Protein Peanut Butter Cups that are sure to satisfy! Enjoy your snack!
Protein Peanut Butter Cups
Ingredients You’ll Need:
- 1 cup natural creamy peanut butter (no sugar added)
- 1/4 cup vanilla or unflavored protein powder (whey or plant-based)
- 2 tablespoons coconut flour or almond flour
- 2 tablespoons honey or maple syrup (optional, for sweetness)
- 1/4 teaspoon sea salt (plus extra for sprinkling)
- 1 1/2 cups dark chocolate chips or chopped dark chocolate (at least 70% cacao)
- 1 tablespoon coconut oil
How Much Time Will You Need?
This delicious recipe will take about 15 minutes to prepare and 30 minutes to chill. So, in less than an hour, you’ll have delightful protein-packed peanut butter cups ready to enjoy!
Step-by-Step Instructions:
1. Mixing the Filling:
In a medium bowl, combine the natural creamy peanut butter, protein powder, coconut flour (or almond flour), honey (if you’re using it), and 1/4 teaspoon of sea salt. Mix everything together until it’s smooth and well-blended. The mixture should be thick but easy to scoop. Don’t be tempted to taste too much—you’ll want it all in the cups!
2. Preparing the Muffin Liners:
Grab a muffin tin or a small round silicone mold and line it with cupcake liners. This will make it super easy to pop the cups out later!
3. Melting the Chocolate:
In a microwave-safe bowl, add the dark chocolate chips and the coconut oil. Heat this mixture in the microwave in 20-second bursts, stirring in between, until it’s completely melted and smooth. Be careful not to overheat it, or the chocolate might seize!
4. Creating the Base Layer:
Spoon about 1 teaspoon of the melted chocolate into the bottom of each cupcake liner. Make sure to spread it evenly to create a nice base layer. Then, pop the tray in the freezer for about 5–10 minutes to let the chocolate set up. You want it firm but not frozen solid!
5. Adding the Peanut Butter Layer:
Once the chocolate is set, take the tray out of the freezer. Spoon about 1 tablespoon of your peanut butter mixture onto the set chocolate in each cup. Use the back of the spoon to gently flatten it down a bit, so it’s nice and even.
6. Topping with More Chocolate:
Now, using your melted chocolate, add about 1 teaspoon more on top of the peanut butter layer in each cup, making sure to cover it completely with chocolate. This is what makes it a true peanut butter cup!
7. Finishing Touches:
Sprinkle a tiny pinch of sea salt on top of each cup. This little touch enhances the flavor and makes it even more delicious!
8. Chilling to Set:
Return the cups to the freezer for at least 30 minutes, or until they are firm. Patience is key here—you want them nice and solid!
9. Enjoying Your Treats:
Once the cups are set, gently remove them from the muffin liners. Store your delicious peanut butter cups in an airtight container in the fridge or freezer until you’re ready to enjoy them. They make a perfect pick-me-up treat!
These protein peanut butter cups are an irresistible combination of creamy, salty, and sweet. Enjoy these delicious little gems guilt-free, whenever the craving strikes!
Can I Use a Different Nut Butter?
Absolutely! If you’re allergic to peanuts or just want to try something different, almond butter or cashew butter work great in this recipe. Just ensure they are smooth and creamy for the best texture.
How Can I Make These Cups Vegan?
To make these peanut butter cups vegan, simply use a plant-based protein powder and swap honey for maple syrup. Check the chocolate label to ensure it’s dairy-free, opting for vegan dark chocolate chips.
Can I Store These Protein Peanut Butter Cups Long-Term?
Yes! You can keep them in an airtight container in the refrigerator for up to 2 weeks. For longer storage, freeze them—just thaw in the fridge for a few hours before enjoying!
Is There a Way to Add More Flavor?
Definitely! You can add vanilla extract or a pinch of cinnamon to the peanut butter mixture for an extra flavor boost. You could even mix in some chopped nuts or dried fruit to the filling for added texture!