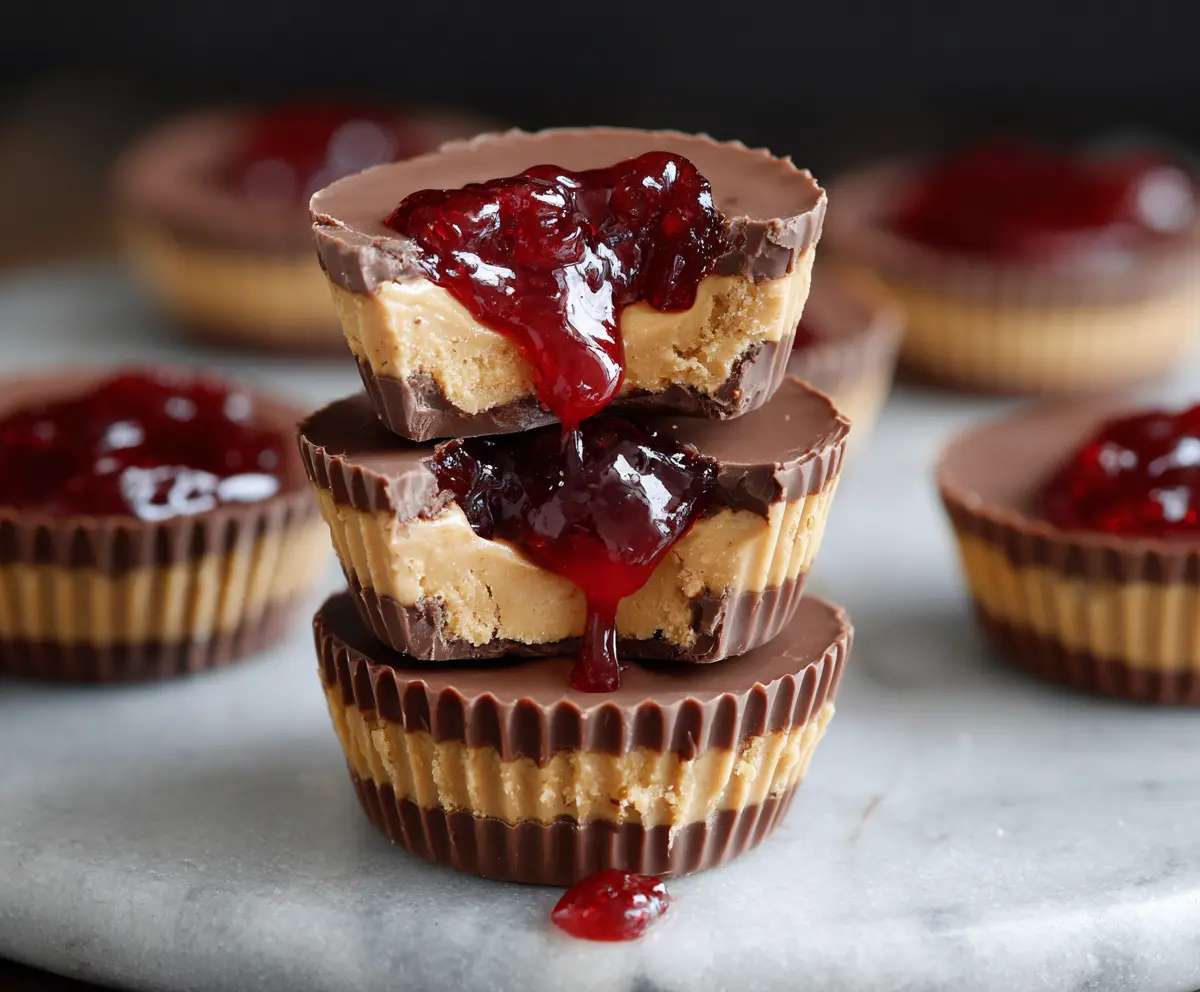
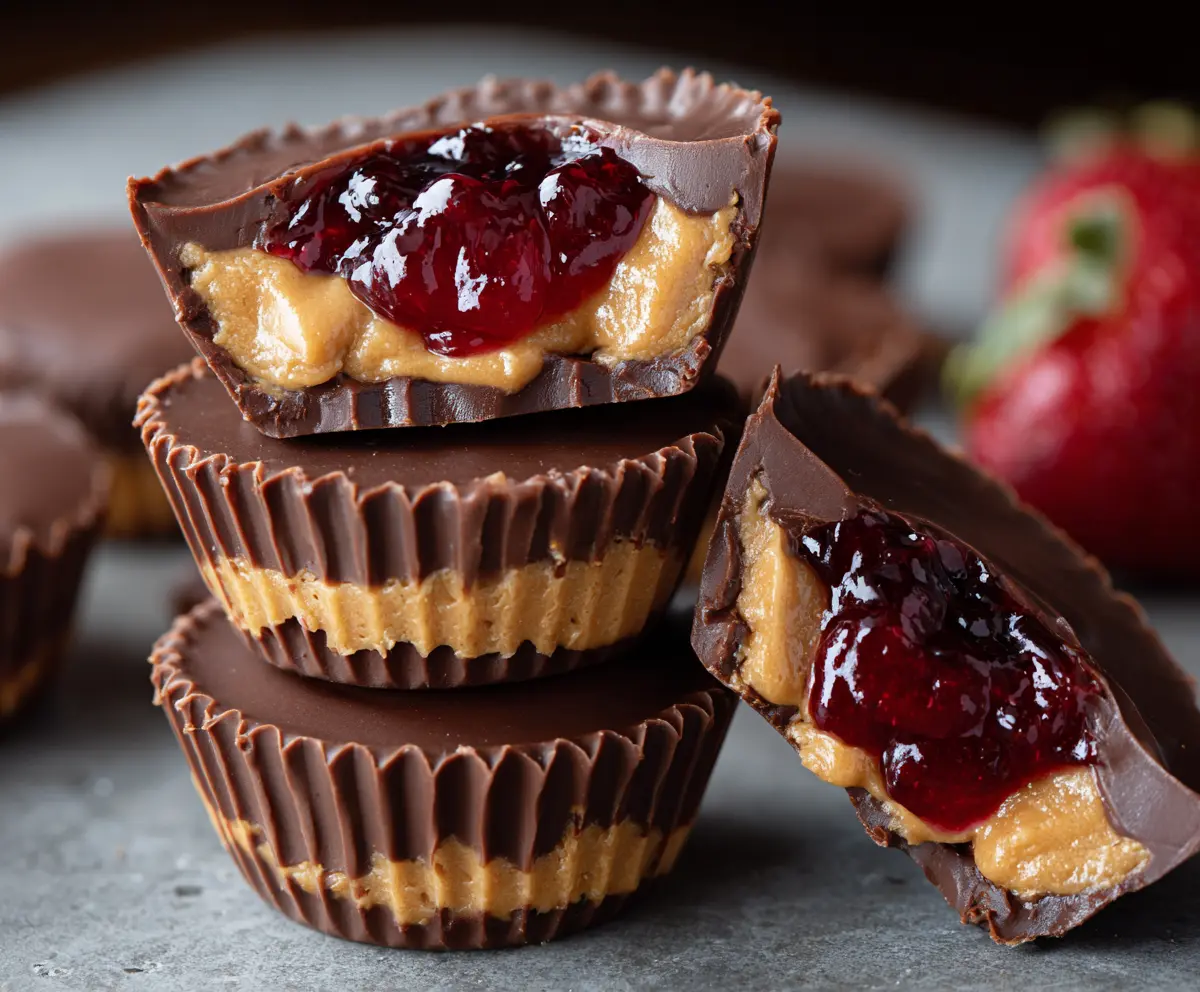
These Peanut Butter and Jelly Cups are a fun treat that combines creamy peanut butter and sweet jelly in a tasty cup. Perfect for a snack or dessert!
Making these is a breeze! Just fill chocolate cups with peanut butter and jelly, then chill. They remind me of childhood lunches, but way more exciting. 🍇🥜
Key Ingredients & Substitutions
Creamy Peanut Butter: This is the star of the show! If you prefer crunchy peanut butter, feel free to use that instead for some texture. Just watch out for the oil separation; mix it well before measuring.
Powdered Sugar: This sweetens the peanut butter layer and gives it a smooth texture. If you’re looking for a healthier option, you can use honey or maple syrup. Just keep in mind it might change the consistency slightly.
Chocolate Chips: Semi-sweet chocolate is my go-to for a balance of sweet and rich. If you want it sweeter, use milk chocolate. Dark chocolate is a great choice if you enjoy a more bitter flavor.
Fruit Jelly or Jam: While grape is a classic choice, feel free to mix it up! Strawberry and raspberry are delicious alternatives. For a healthier twist, you can also use fruit preserves with less sugar.
Silicone Muffin Cups: These make it easy to pop out the cups. If you don’t have them, regular paper liners will work fine. Just make sure to let the cups cool completely before removing them.
How Do I Get the Chocolate Cups to Layer Perfectly?
The key to great layers is patience and careful handling. Start by melting your chocolate chips slowly. After spreading the chocolate base, let it set in the fridge before adding the peanut butter mixture.
- Be sure the chocolate is firm before adding the peanut butter. It prevents the layers from mixing.
- When adding the jelly, just press it gently into the peanut butter layer—this keeps it intact.
- Ensure the top layer of chocolate is smooth to cover any imperfections underneath.
With these tips, your peanut butter and jelly cups will look as good as they taste!
How to Make Peanut Butter and Jelly Cups
Ingredients You’ll Need:
Base Layer:
- 1 ½ cups creamy peanut butter
- ⅓ cup powdered sugar, sifted
- ½ teaspoon vanilla extract
Chocolate Layer:
- 2 cups semi-sweet chocolate chips (or milk chocolate if preferred)
Center Filling:
- ½ cup fruit jelly or jam (classic choices: grape, strawberry, or raspberry)
- Silicone muffin cups or paper cupcake liners
How Much Time Will You Need?
This recipe takes about 15 minutes of prep time and requires at least 30 minutes in the refrigerator to set completely. It’s a quick and easy treat you can whip up for any occasion!
Step-by-Step Instructions:
1. Prepare Your Muffin Tray:
Start by lining a muffin tin with silicone muffin cups or paper cupcake liners. This will help you remove the cups easily after they are set.
2. Melt the Chocolate:
In a microwave-safe bowl, melt 1 cup of semi-sweet chocolate chips. Do this in 30-second intervals, stirring between each time until smooth. Make sure not to overheat the chocolate!
3. Create the Chocolate Base:
Spoon a bit of the melted chocolate into each muffin cup, just enough to cover the bottom (about a tablespoon). Spread it evenly and then pop the tray into the refrigerator for about 10 minutes to firm up the base.
4. Make the Peanut Butter Mixture:
While the chocolate is setting, mix together the peanut butter, powdered sugar, and vanilla extract in a bowl. Stir until the mixture is smooth and creamy.
5. Add the Peanut Butter Layer:
Once the chocolate base has hardened, spoon or press a layer of the peanut butter mixture over the chocolate in each cup, filling them about halfway.
6. Create the Jelly Center:
Add about a teaspoon of jelly on top of the peanut butter layer in each cup. Gently press down to create a jelly core, being careful not to mix it into the peanut butter.
7. Top with Chocolate:
Melt the remaining 1 cup of chocolate chips using the same method as before. Spoon the melted chocolate over the peanut butter and jelly layers, smoothing the tops to seal everything in.
8. Chill and Set:
Place the tray back in the refrigerator for at least 30 minutes or until the cups are completely firm. The chilling process helps everything set nicely!
9. Remove and Serve:
Once set, carefully remove the peanut butter and jelly cups from the liners. Serve them chilled as a delightful snack or dessert!
Enjoy these rich, gooey, and nostalgic peanut butter and jelly cups as a bite-sized treat, perfect for sharing or keeping all to yourself!
Can I Use Natural Peanut Butter Instead?
Yes! You can use natural peanut butter, but you might need to adjust the amount of powdered sugar as natural peanut butter tends to be less sweet. It might also be a bit thinner, so consider adding a touch more powdered sugar to maintain the right consistency.
How Long Can I Store These Cups?
Store the peanut butter and jelly cups in an airtight container in the fridge for up to a week. If you do not eat them all within that time, they can also be frozen! Just layer them with parchment paper in the container to prevent sticking and freeze for up to 3 months.
What Other Fillings Can I Use?
Feel free to experiment with different jams and jellies, like apricot or blackberry. You can also use nutella, chocolate spread, or even add crushed nuts to the peanut butter layer for some crunch!
Can I Make These Vegan?
Absolutely! Use dairy-free chocolate chips and make sure your jelly is free of gelatin or animal products. The other ingredients (peanut butter, powdered sugar, and vanilla extract) are typically vegan-friendly.