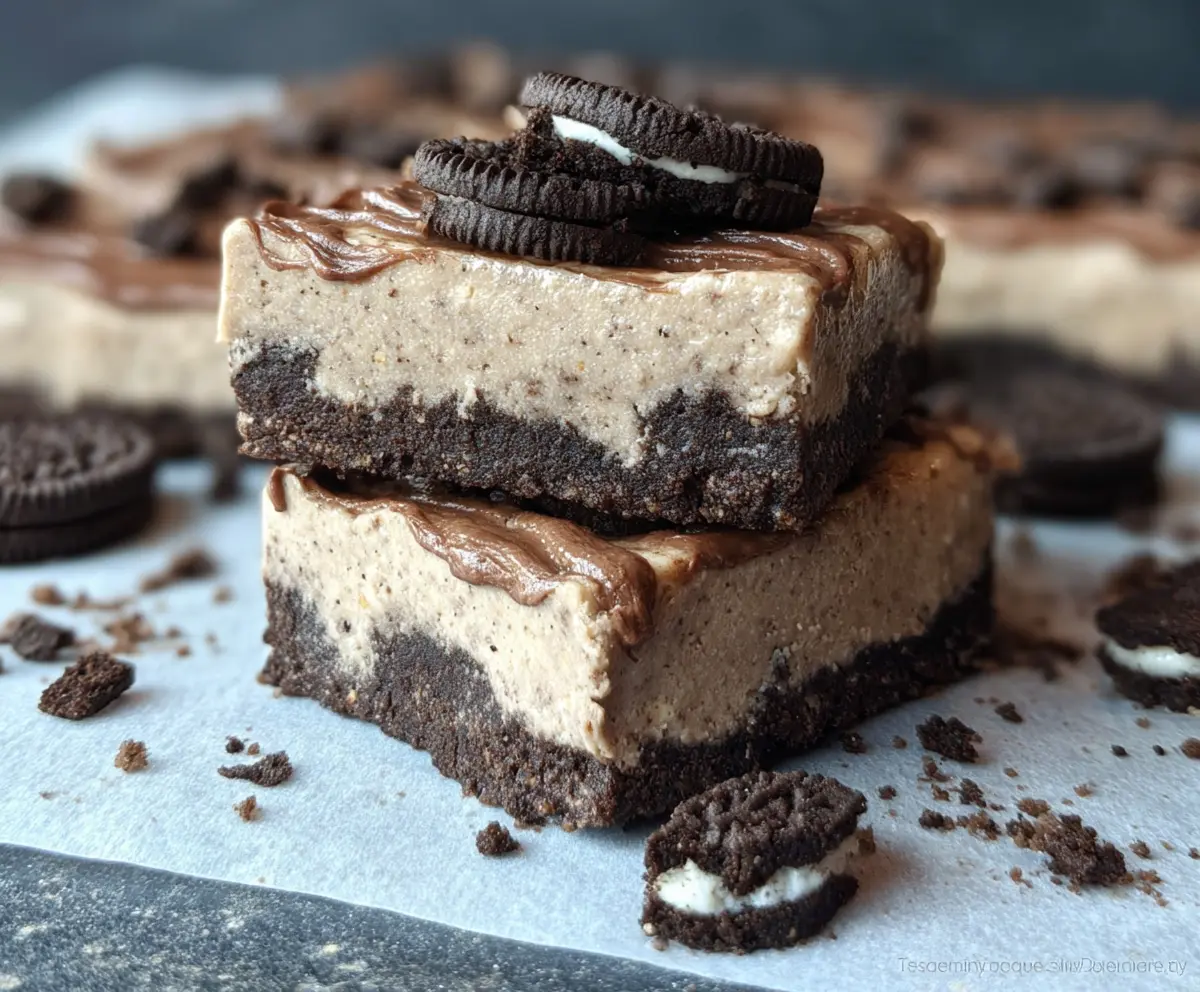
These No Bake Oreo Protein Bars are a tasty treat that’s super easy to make! With crushed Oreos and creamy protein, they are perfect for a quick snack or a boost after a workout.
Who knew being healthy could be this delicious? I like to keep a batch in the fridge for when those sweet cravings hit. Grab one and feel good about it! 😋
Key Ingredients & Substitutions
Oreo Cookies: These give the bars their signature flavor. You can replace them with a different chocolate cookie if needed, like Hydrox or even gluten-free options. Just ensure they’re roughly the same size and texture for the best results.
Protein Powder: I recommend vanilla or chocolate flavors for these bars. If you’re not a fan of protein powder, you can use additional crushed cookies or oats, though they won’t be as high in protein. Plant-based powders also work well for dietary restrictions.
Nut Butter: Natural peanut butter adds creaminess and flavor. You can substitute almond butter, cashew butter, or sunflower seed butter if you prefer or have nut allergies. Each will give a slight twist to the taste!
Honey or Maple Syrup: These serve as sweeteners and binders. If you want a vegan option, maple syrup is perfect. Agave syrup is another alternative if honey isn’t your thing.
Greek Yogurt: Using Greek yogurt makes the bars extra creamy. If you want a vegan option, you could try using a plant-based yogurt, or you can skip this altogether for a firmer texture.
How Do You Make Sure Your Protein Bars Hold Together?
Properly mixing and pressing your dough is key for bars that don’t crumble. Here’s how to ensure they set perfectly:
- Make sure to mix both the dry and wet ingredients thoroughly until you achieve a dough-like consistency. A little extra milk can help if it’s too dry.
- Press the mixture firmly into the pan. Use the back of a spatula or your hands to compress it well. This creates a solid base that holds together.
- Refrigerate the bars for the full 2–3 hours, as cooling helps them firm up more than just sitting at room temperature. Patience pays off!
Follow these tips, and your No Bake Oreo Protein Bars will be a hit! They make a thoughtful snack for busy days or a guilt-free treat anytime.
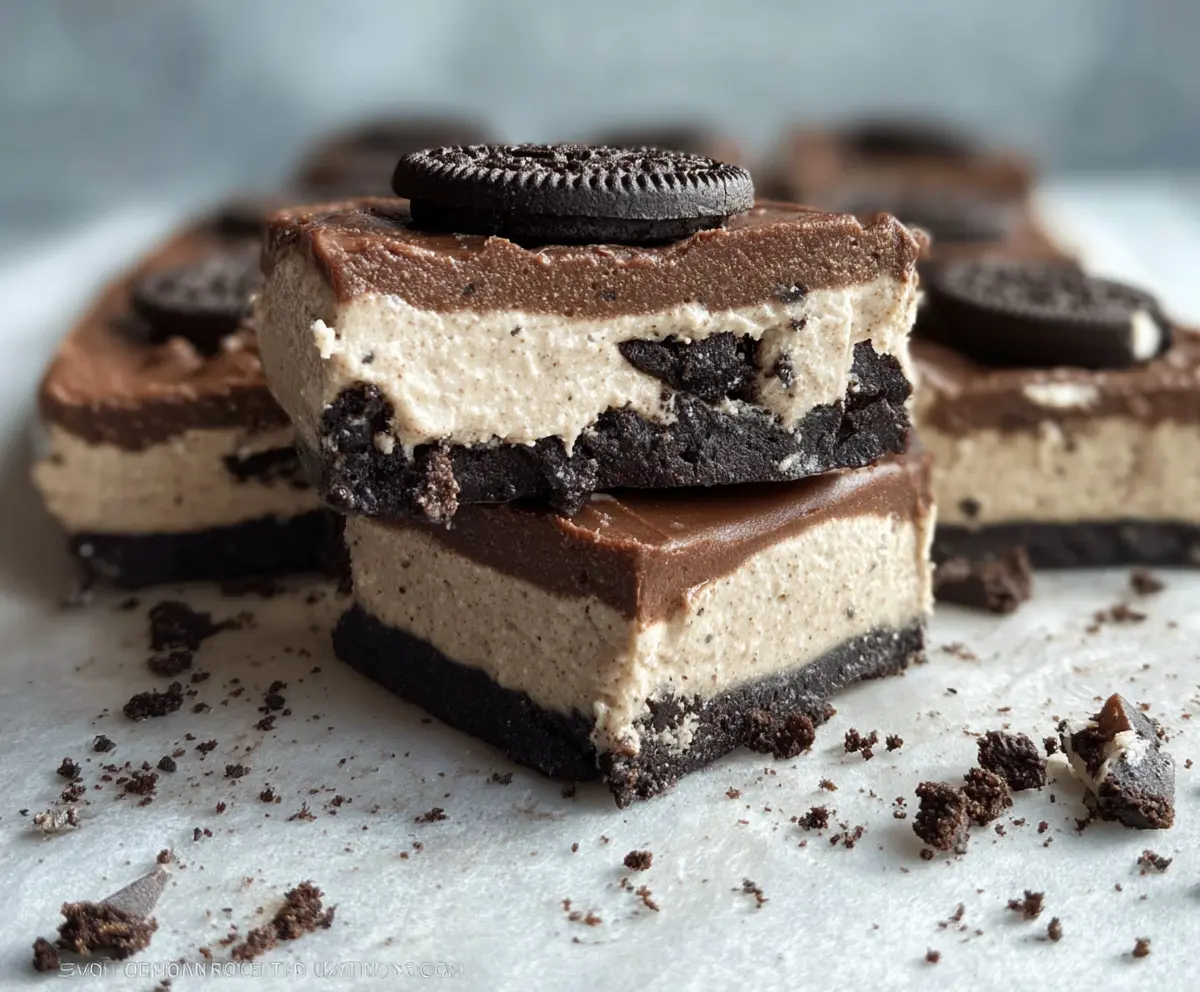
No Bake Oreo Protein Bars
Ingredients You’ll Need:
For the Base:
- 20 Oreo cookies, crushed (divided)
- 1 cup protein powder (vanilla or chocolate flavor)
- 1/2 cup natural peanut butter or almond butter
- 1/4 cup honey or maple syrup
- 1/4 cup milk (dairy or plant-based)
- 1/4 cup Greek yogurt (optional, for creaminess)
For the Topping:
- 1/4 cup dark chocolate or melted chocolate protein bar (for drizzling and topping)
- Additional whole or halved Oreos for garnish
How Much Time Will You Need?
This recipe takes about 15 minutes to prepare and then needs at least 2–3 hours to chill in the fridge. You’ll be enjoying your delicious protein bars in no time!
Step-by-Step Instructions:
1. Prepare the Pan:
Start by lining an 8-inch square baking pan with parchment paper. Leave some edges hanging over the sides so you can easily lift the bars out later.
2. Mix the Base Ingredients:
In a medium bowl, combine about two-thirds of the crushed Oreos with the protein powder. Give it a good stir until everything is mixed together nicely.
3. Heat the Peanut Butter and Honey:
In a small, microwave-safe bowl, warm the peanut butter and honey for about 20-30 seconds until it’s smooth and runny. Stir it well to combine.
4. Make the Dough:
Pour the warmed peanut butter and honey mix into the dry ingredients. Add the milk and Greek yogurt if using. Stir everything together until you get a dough-like consistency. If the mixture feels too dry, add a smidge more milk, a tablespoon at a time.
5. Press into the Pan:
Take the Oreo protein dough and press it firmly and evenly into the bottom of your prepared pan. Creating a solid base is key here!
6. Prepare the Creamy Layer:
In another bowl, combine the remaining crushed Oreos with the protein powder. Mix in the peanut butter, honey, milk, and Greek yogurt. Blend until you have a thick, spreadable mixture.
7. Spread It Out:
Spread the creamy mixture evenly over the Oreo base layer. Make it nice and smooth!
8. Drizzle with Chocolate:
For a delicious finishing touch, drizzle melted dark chocolate or melted chocolate protein bar over the top. You can also decorate with extra halved Oreos if you like.
9. Chill Out:
Put the pan in the fridge and let the bars chill for at least 2–3 hours, or until they are firm.
10. Slice and Enjoy:
Once set, lift the bars out of the pan using the parchment overhang and cut them into squares.
11. Store for Later:
Keep the bars in an airtight container in the fridge for up to one week so you can enjoy them whenever a snack craving hits!
Enjoy your rich, creamy, and chocolaty No Bake Oreo Protein Bars as a healthy, satisfying snack! 🍫
Can I Use Different Types of Protein Powder?
Yes, you can use any flavor you enjoy! Vanilla or chocolate are most common, but feel free to experiment with any protein powder that suits your taste. Just ensure it mixes well with the other ingredients.
Can I Make These Bars Vegan?
Absolutely! To make the bars vegan, simply substitute honey with maple syrup and use a plant-based yogurt if you wish. Additionally, ensure your protein powder is vegan-friendly.
How Should I Store the Bars?
Store the bars in an airtight container in the fridge for up to one week. This will keep them fresh while preventing them from drying out. You can also freeze them for longer storage; just thaw in the fridge before enjoying!
What Can I Use Instead of Peanut Butter?
If you’re looking for alternatives to peanut butter, almond butter, sunflower seed butter, or cashew butter work well, too. Each will bring a different flavor, but they’ll complement the oreos beautifully!