These Halloween shortbread cookies are buttery, crunchy treats shaped like spooky ghosts, pumpkins, and bats! They are perfect for adding some fun to your Halloween celebrations.
Making these cookies is a blast! I love decorating them with colorful icing and sprinkles. Plus, the smell of baking fills the house with sweet joy. 🎃🍪
Key Ingredients & Substitutions
Unsalted Butter: Using unsalted butter lets you control the saltiness of your cookies. If you’re in a pinch, salted butter works too—just reduce the additional salt in the recipe by a pinch.
Granulated Sugar: This is the sugar that gives your cookies their sweet flavor. If you want a bit of a twist, try using brown sugar for a deeper, caramel-like taste.
All-Purpose Flour: It’s the base of our cookies! If you need a gluten-free option, substitute with a 1:1 gluten-free flour blend. Just check that it has xanthan gum included for texture.
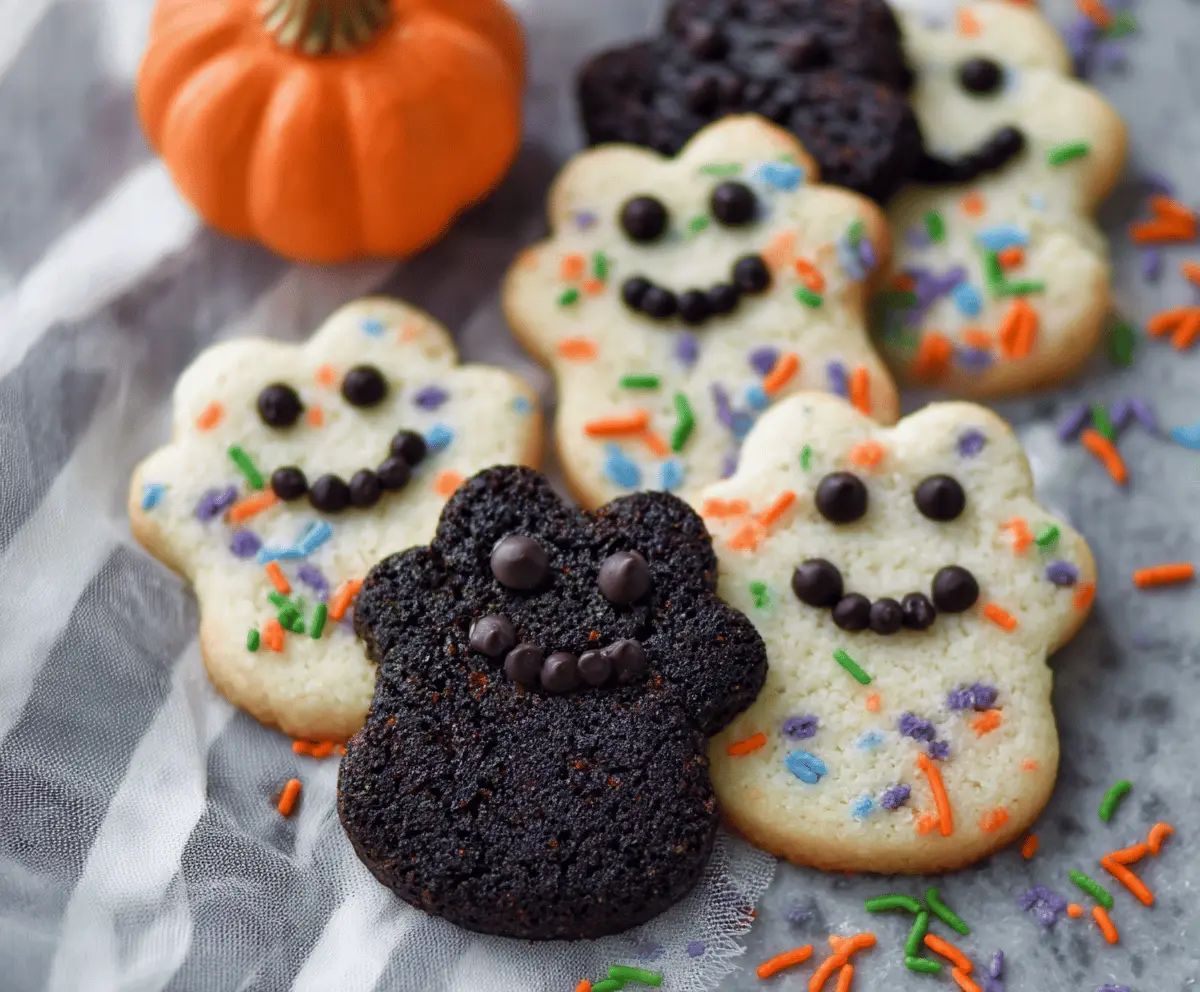
Cocoa Powder: This adds a chocolatey kick to half of your dough. If you prefer another flavor, feel free to experiment with matcha powder for a green twist!
Colored Sprinkles: They add a festive touch! If you can’t find Halloween-themed sprinkles, use regular sprinkles or even crushed candy corn for a fun effect.
How Can I Ensure My Cookies Are Perfectly Shaped?
Keeping the fun shapes in your shortbread cookies is so important! Here are some tips:
- Roll the dough to an even thickness of about 1/4 inch. This helps them bake evenly.
- Chill the dough for 30 minutes before cutting the shapes. This makes it firmer and easier to handle.
- Dip cookie cutters in flour before cutting to prevent sticking.
- If your cookies spread while baking, try chilling them again for a few minutes before placing them in the oven.
With these tips, your Halloween shortbread cookies will turn out festive and delightful! Happy baking!

Halloween Shortbread Cookies
Ingredients You’ll Need:
- 1 cup (226g) unsalted butter, softened
- 3/4 cup (150g) granulated sugar
- 1 teaspoon vanilla extract
- 2 cups (240g) all-purpose flour
- 1/4 teaspoon salt
- Colored sprinkles in Halloween colors (orange, green, purple, blue)
- Mini chocolate chips or small chocolate candies (for eyes and mouths)
- 2 tablespoons cocoa powder (optional, for chocolate version of cookies)
How Much Time Will You Need?
This recipe takes about 15 minutes of preparation time and around 10-12 minutes for baking. You’ll also want to let the cookies cool for about 5 minutes on the baking sheet before moving them to a wire rack, making it easy and fun for everyone involved!
Step-by-Step Instructions:
1. Preheat Your Oven:
First, preheat your oven to 350°F (175°C). This step is important because it makes sure your cookies bake evenly! Line your baking sheets with parchment paper so the cookies don’t stick.
2. Cream the Butter and Sugar:
In a large bowl, cream together the softened butter and granulated sugar using an electric mixer. Mix until the mixture is light and fluffy—this usually takes about 2-3 minutes.
3. Add Vanilla Extract:
Add the vanilla extract to the butter and sugar mixture, stirring to combine well. This gives your cookies a lovely flavor!
4. Combine Dry Ingredients:
In a separate bowl, whisk together the all-purpose flour and salt. This evenly distributes the salt and helps prevent lumps in your dough.
5. Mix in Dry Ingredients:
Gradually add the dry ingredients to the butter mixture, mixing on low speed until just combined. Don’t overmix, as you want your cookies to be tender!
6. Prepare Chocolate Dough (Optional):
If you’d like chocolate cookies, divide the dough in half and stir cocoa powder into one half until well blended. This will give you a fun variety!
7. Roll Out the Dough:
Lightly flour your surface and roll out the dough to about 1/4 inch thick. Make sure it’s even, so all cookies bake evenly!
8. Cut Out Shapes:
Use a ghost-shaped cookie cutter to cut out shapes from both the plain and chocolate dough. These shapes will be super cute!
9. Place on Baking Sheets:
Transfer the cookie shapes onto the prepared baking sheets, leaving about 1 inch of space between each one so they have room to spread a little as they bake.
10. Decorate Before Baking:
Gently press colored sprinkles into the top of the plain cookies for a fun Halloween look. This is where you can really get creative!
11. Add Facial Features:
Use mini chocolate chips or small chocolate candies to create eyes and smiling mouths on each cookie. Just press them gently into the dough.
12. Baking Time:
Place the cookies in the oven and bake for 10-12 minutes. Keep an eye on them, you want the edges to turn slightly golden on the plain cookies and the chocolate ones will look set.
13. Cooling Off:
Once they’re done, remove the cookies from the oven and allow them to cool on the baking sheet for about 5 minutes. After that, transfer them to a wire rack to cool completely.
14. Final Touches:
Once your cookies are cool, you can decorate them even more if you’d like by piping on additional details with melted chocolate or icing!
Enjoy your festive Halloween shortbread cookies! They’re perfect for sharing during spooky celebrations—or keeping all to yourself! Sweet treats like these are spooky fun!
Can I Use Different Cookie Cutters?
Absolutely! While this recipe is perfect for ghost shapes, feel free to use any Halloween-themed cookie cutters you have on hand, such as pumpkins, bats, or witches! Just adjust the baking time if the shapes vary significantly in size.
How Do I Store Leftover Cookies?
Store leftover cookies in an airtight container at room temperature for up to a week. If you want them to stay fresh longer, consider refrigerating them, but allow them to reach room temperature before enjoying to keep the texture perfect.
Can I Freeze the Dough?
Yes! You can freeze the cookie dough for up to 2 months. Wrap it tightly in plastic wrap, and then place it in an airtight container. When ready to bake, thaw it in the fridge overnight before rolling out and cutting your cookies.
What Can I Use Instead of Sprinkles?
If you’re out of sprinkles, you can use crushed nuts, edible glitter, or even colored sugar for decoration. Get creative! Just ensure whatever you use pairs well with the buttery flavor of the shortbread.