These spooky Graveyard Chocolate Pudding Cups are perfect for Halloween! They’re made with creamy chocolate pudding, crumbled cookies for dirt, and cute gummy worms on top. 🎃
They’re so fun to make that kids will love helping out in the kitchen! I like to set them out at parties; the kids can’t resist those gummy worms peeking out from the “dirt.” Yummy and adorable!
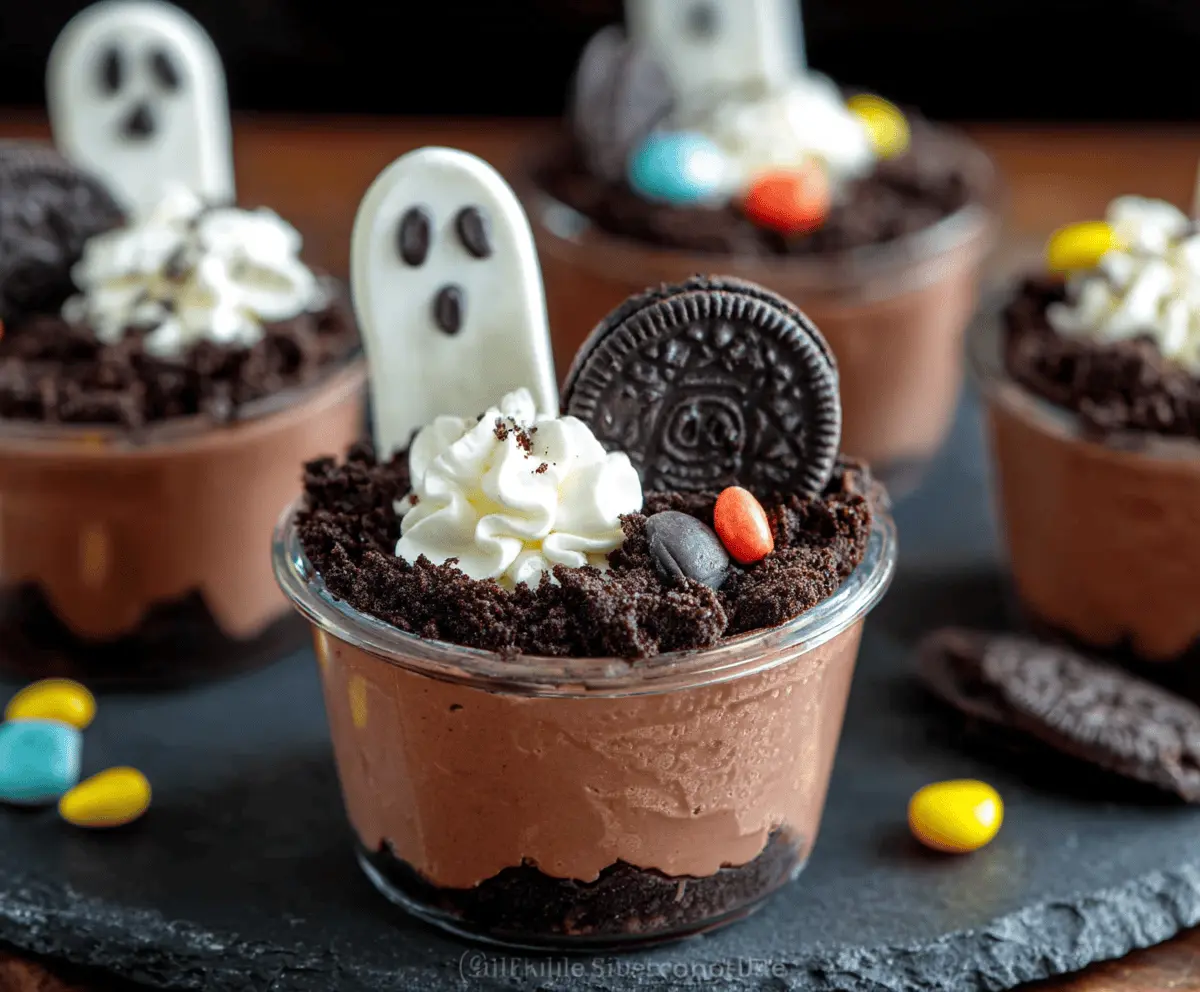
Key Ingredients & Substitutions
Oreo Cookies: These are perfect for creating the “dirt” layer. If you need a substitute, chocolate wafer cookies work well too. For a gluten-free option, look for gluten-free chocolate cookies.
Instant Chocolate Pudding: This is what makes the dessert creamy and chocolatey. If you prefer a healthier route, you can use a sugar-free pudding mix. Vanilla pudding can also work for a different flavor.
Heavy Whipping Cream: This gives a nice fluffy texture. If you want a lighter option, you can use light whipped topping or coconut cream for a dairy-free alternative.
Chocolate Chips: Use these for the optional drip effect. Dark chocolate adds a rich flavor, while milk chocolate is sweeter. You can even use white chocolate for a spooky contrast!
How Do I Fold Whipped Cream into Pudding Smoothly?
Folding whipped cream into the pudding is key for a light texture. Instead of stirring vigorously, which can deflate the cream, gently scoop down through the pudding and bring it up again in a folding motion. Repeat this until blended.
- Start by adding a small amount of the whipped cream to lighten the pudding.
- Then, gently fold the remaining cream in, ensuring you keep as much air as possible.
This method keeps your chocolate pudding light and airy, making for a delicious treat!
Graveyard Chocolate Pudding Cups
Ingredients You’ll Need:
For the Dirt Base:
- 24 Oreo cookies (or similar chocolate sandwich cookies)
For the Chocolate Pudding:
- 2 cups whole milk
- 1 packet (3.9 oz) instant chocolate pudding mix
For the Whipped Cream Layer:
- 1 cup heavy whipping cream
- 2 tablespoons powdered sugar
- 1 teaspoon vanilla extract
For the Chocolate Drip (Optional):
- 1/2 cup chocolate chips or chocolate melting wafers
For Decoration:
- Halloween-themed candy decorations (like marshmallow tombstones, candy crosses, gummy worms, etc.)
- Multicolored mini candy-coated chocolates (optional for extra detail)
How Much Time Will You Need?
This spooky dessert takes about 30 minutes to prepare, plus an additional hour to chill in the refrigerator. So, in total, you’ll need about 1 hour and 30 minutes before serving.
Step-by-Step Instructions:
1. Prepare the Cookie Dirt Base:
Start by placing the Oreo cookies in a food processor. Pulse them until they are finely crushed. If you don’t have a food processor, you can put the cookies in a sealed plastic bag. Crush them using a rolling pin until they resemble dirt. Set this aside for later.
2. Make the Chocolate Pudding:
In a medium bowl, whisk together the instant chocolate pudding mix and whole milk. Do this for about 2 minutes until the mixture thickens. Once thickened, pop it in the refrigerator for at least 5 minutes to set properly.
3. Whip the Cream:
In a separate bowl, use an electric mixer to whip the heavy cream together with the powdered sugar and vanilla extract. Continue whipping until the cream forms stiff peaks. This will create a light, fluffy topping for your pudding cups.
4. Combine Pudding and Whipped Cream:
Gently fold the whipped cream into your set chocolate pudding. Use a spatula and scoop down into the pudding, then lift it up and over the whipped cream. This technique keeps the mixture light and airy, creating a lovely mousse texture.
5. Assemble the Cups:
Grab some clear cups or jars and start assembling your dessert! Begin by adding a generous layer of your crushed cookie mix at the bottom of each cup. This layer will represent the “dirt.”
6. Spoon on the Chocolate Mousse:
After the cookie layer, spoon or pipe the chocolate mousse on top, smoothing out the surface so it looks nice and even.
7. Add More Cookie Dirt:
Now it’s time to sprinkle another thin layer of the crushed cookie mixture on top of the mousse. This will mimic thick dirt on a grave.
8. Make the Chocolate Drip (Optional):
If you’d like an added touch, melt the chocolate chips or chocolate melting wafers in a microwave-safe bowl. Heat in short bursts, stirring every 20 seconds until smooth. Allow it to cool slightly, then drizzle it around the top edges of each cup to create a spooky drip effect.
9. Decorate the Graveyard:
Now get creative! Insert your Halloween-themed candy decorations, like marshmallow tombstones and candy crosses, into the top layer of “dirt.” You can also scatter some mini candy-coated chocolates or gummy worms on top for an extra creepy-crawly effect.
10. Chill and Serve:
Finally, cover the pudding cups and refrigerate them for at least 1 hour. This will help them set up nicely. Once chilled and ready, enjoy your spooky Graveyard Chocolate Pudding Cups at your Halloween party or themed treat!
Happy Halloween!

Can I Use Sugar-Free Pudding Mix?
Yes, you can definitely use sugar-free instant chocolate pudding mix! It will still yield a delicious dessert while reducing the sugar content for a healthier option.
How Do I Store Leftover Pudding Cups?
Store any leftover pudding cups in an airtight container in the refrigerator for up to 3 days. Make sure to cover them tightly to keep the layers fresh and prevent drying out.
Can I Make These Pudding Cups Gluten-Free?
Absolutely! Just substitute the Oreo cookies with gluten-free chocolate sandwich cookies. Many brands offer tasty gluten-free options that work perfectly.
What Can I Use Instead of Heavy Cream?
If you’re looking for a lighter option, you can use a non-dairy whipped topping or coconut cream for a dairy-free version. Just make sure it’s whipped before folding into the pudding!