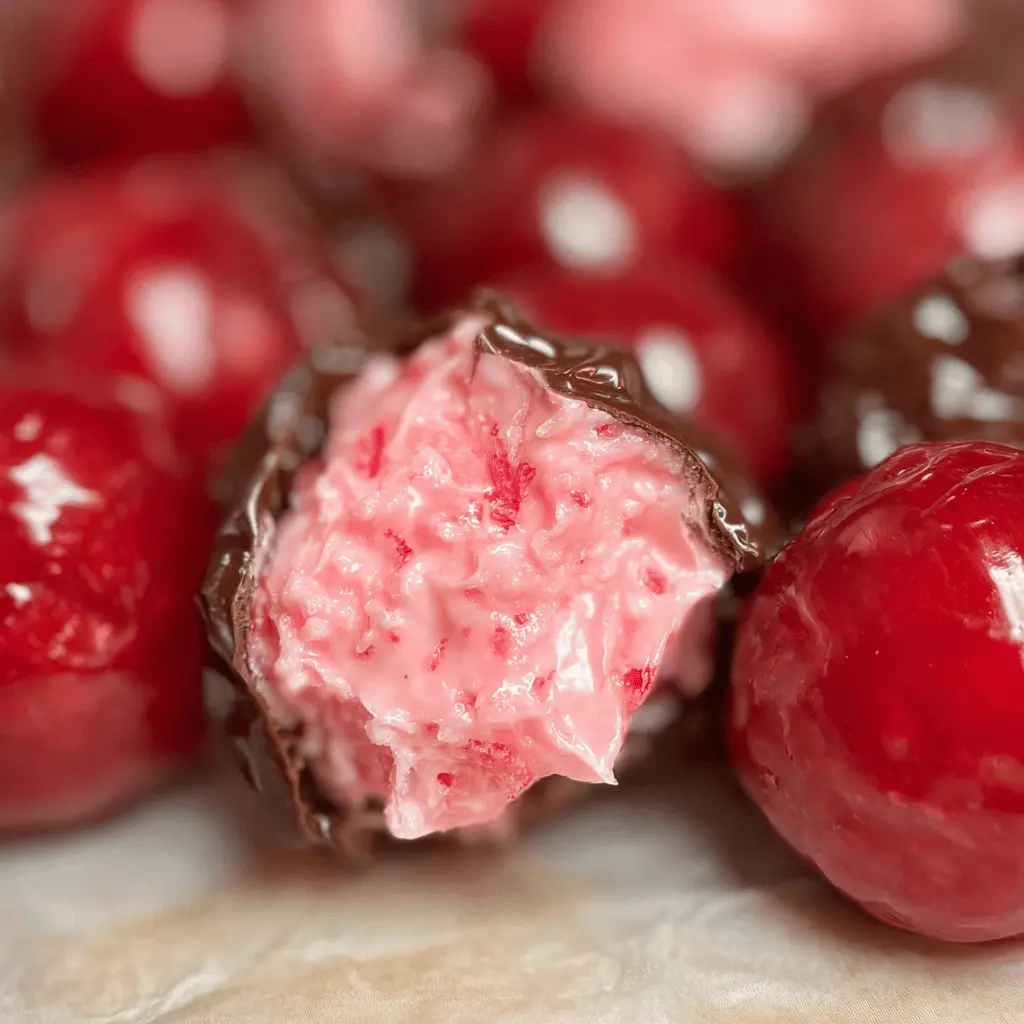
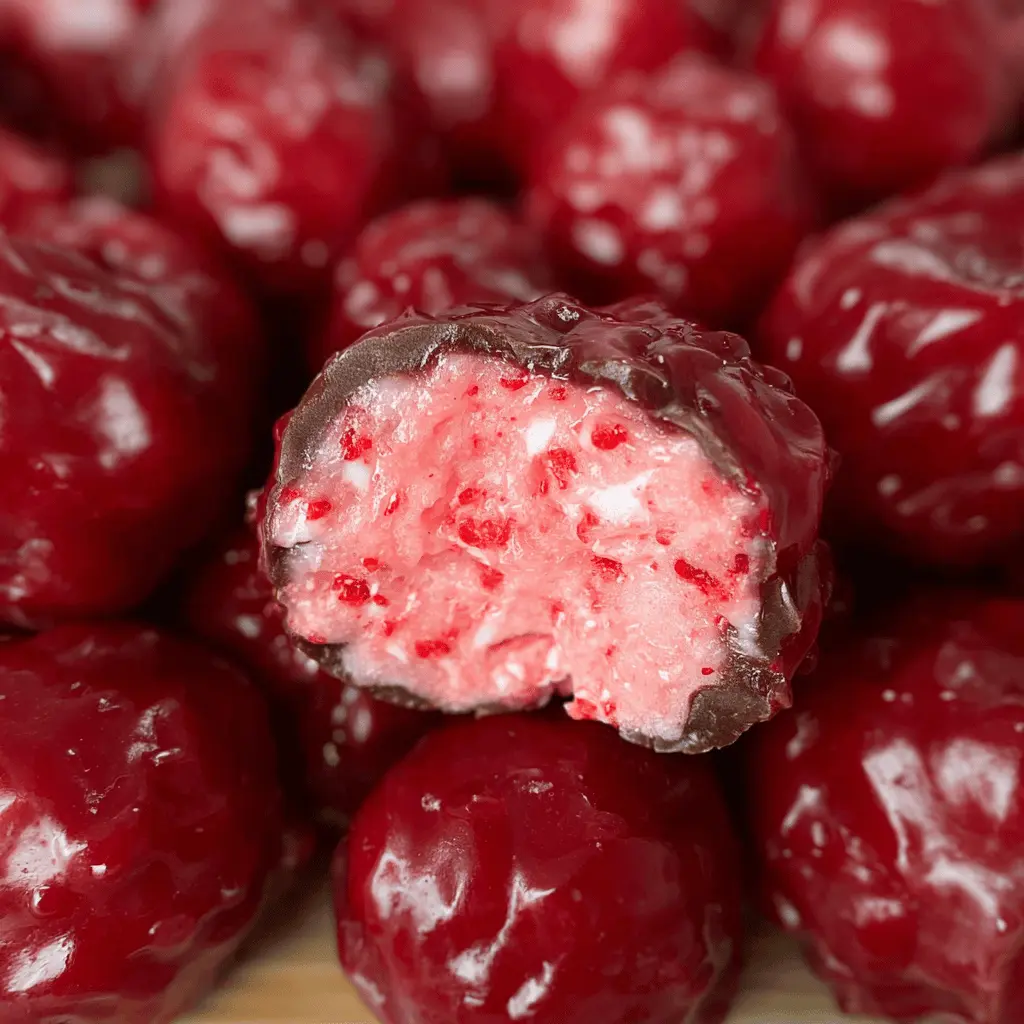
This Easy Homemade Cherry Mash Candy is a fun treat that combines sweet cherries and creamy chocolate. It’s chewy, soft, and absolutely irresistible!
Making it at home is a breeze! Just mix the ingredients, shape them into little mounds, and let them chill. I love sharing these with friends—they disappear faster than I can blink! 🍬
Key Ingredients & Substitutions
Maraschino Cherries: These sweet cherries are the star of the candy. If you’re looking for a healthier option, you could use fresh cherries, but keep in mind they won’t have the same sweetness. Make sure to chop them finely for even mixing.
Cream Cheese: This gives the candy its creamy texture. If you’re dairy-free, try using a plant-based cream cheese alternative. I find that the flavor remains rich and delicious with substitutes.
Powdered Sugar: Essential for sweetness and binding. If you want to reduce sugar intake, consider using a powdered sugar substitute, though it may change the texture slightly.
Chocolate Chips: Semisweet chips work great, but feel free to switch to milk chocolate or dark chocolate based on your preference. I personally love dark chocolate for its slightly bitter taste that pairs well with the sweet filling.
Chopped Peanuts: These add a nice crunch. If you’re allergic or don’t like peanuts, try using chopped almonds or walnuts, or leave them out entirely for a smoother finish.
How Do You Get the Perfect Chocolate Coating?
Coating the cherry balls in chocolate can be tricky, but with a few tips, you’ll master it! The key is to melt the chocolate properly. Here’s how:
- Use a microwave-safe bowl for melting chocolate. Heat it in 30-second bursts to prevent overheating.
- Stir thoroughly between intervals. This distributes the heat evenly and helps the chocolate become smooth.
- Once melted, dip a cherry ball using a fork or toothpick. Let excess chocolate drip off before placing it back on the baking sheet.
- Optionally, you can sprinkle extra chopped peanuts on top immediately after dipping for added texture.
Let the chocolates set in the fridge to firm up, and you’re ready to enjoy your homemade treats!
How to Make Easy Homemade Cherry Mash Candy
Ingredients You’ll Need:
For the Cherry Filling:
- 1 (16 oz) jar maraschino cherries, drained and chopped
- 1 (8 oz) package cream cheese, softened
- 1 teaspoon vanilla extract
- 3 cups powdered sugar
For the Chocolate Coating:
- 3 cups semisweet chocolate chips
- 1 1/2 cups chopped peanuts (optional)
How Much Time Will You Need?
This easy candy recipe will take about 20 minutes of prep time and 1 to 2 hours total if you include chilling time. The hands-on time is quick, and then you just let them set in the refrigerator. Perfect for a sweet treat any day!
Step-by-Step Instructions:
1. Make the Cherry Filling:
In a large mixing bowl, combine the softened cream cheese, chopped maraschino cherries, and vanilla extract. Use an electric mixer to beat the mixture until it’s smooth and creamy, making sure everything is well incorporated.
2. Add the Sweetness:
Gradually add the powdered sugar to the bowl, mixing well after each addition. Keep mixing until the mixture is thick enough to shape into balls. You want it to hold together but still be soft. This step is crucial for the perfect texture!
3. Shape the Candy:
With your hands or a cookie scoop, take small portions of the mixture and shape them into balls or mounds. Place each piece on a wax paper-lined baking sheet. Put the sheet in the refrigerator and let the balls chill for at least 1 hour until they are firm.
4. Prepare the Chocolate Coating:
While the cherry balls are chilling, melt the chocolate chips. Place them in a microwave-safe bowl and heat in 30-second intervals, stirring after each until the chocolate is completely smooth.
5. Coat the Cherry Balls:
If using chopped peanuts, stir them into the melted chocolate now. Then, take each chilled cherry ball and dip it fully into the chocolate. Make sure to give it a good coat! Let the excess chocolate drizzle off before placing it back on the wax paper.
6. Chill Again:
Return the chocolate-coated candy back to the refrigerator for about 30 minutes or until the chocolate is set and firm. This step is essential for that delightful crunch when you bite into them!
7. Store and Enjoy:
Once set, store the cherry mash candies in an airtight container in the refrigerator. Enjoy them straight from the fridge—they make for a perfect sweet treat any time!
Frequently Asked Questions (FAQ) about Easy Homemade Cherry Mash Candy
Can I Use Fresh Cherries Instead of Maraschino Cherries?
Yes, you can use fresh cherries if you prefer a healthier option! Just make sure to pit and finely chop them. Keep in mind that fresh cherries will have a slightly different flavor and sweetness compared to maraschino cherries.
How Do I Store Leftover Candy?
Store any leftover Cherry Mash Candy in an airtight container in the refrigerator. They will keep well for about a week, but I doubt they’ll last that long with how delicious they are!
Can I Make These Candy Balls Ahead of Time?
Absolutely! You can prepare the filling and shape the balls up to 2 days in advance. Just keep them wrapped tightly in the refrigerator until you’re ready to coat them in chocolate.
What if My Chocolate is Too Thick to Dip?
If you find that your melted chocolate has thickened, try adding a teaspoon of vegetable oil or coconut oil to thin it out for easier dipping. Just melt it again briefly if needed, and stir well!