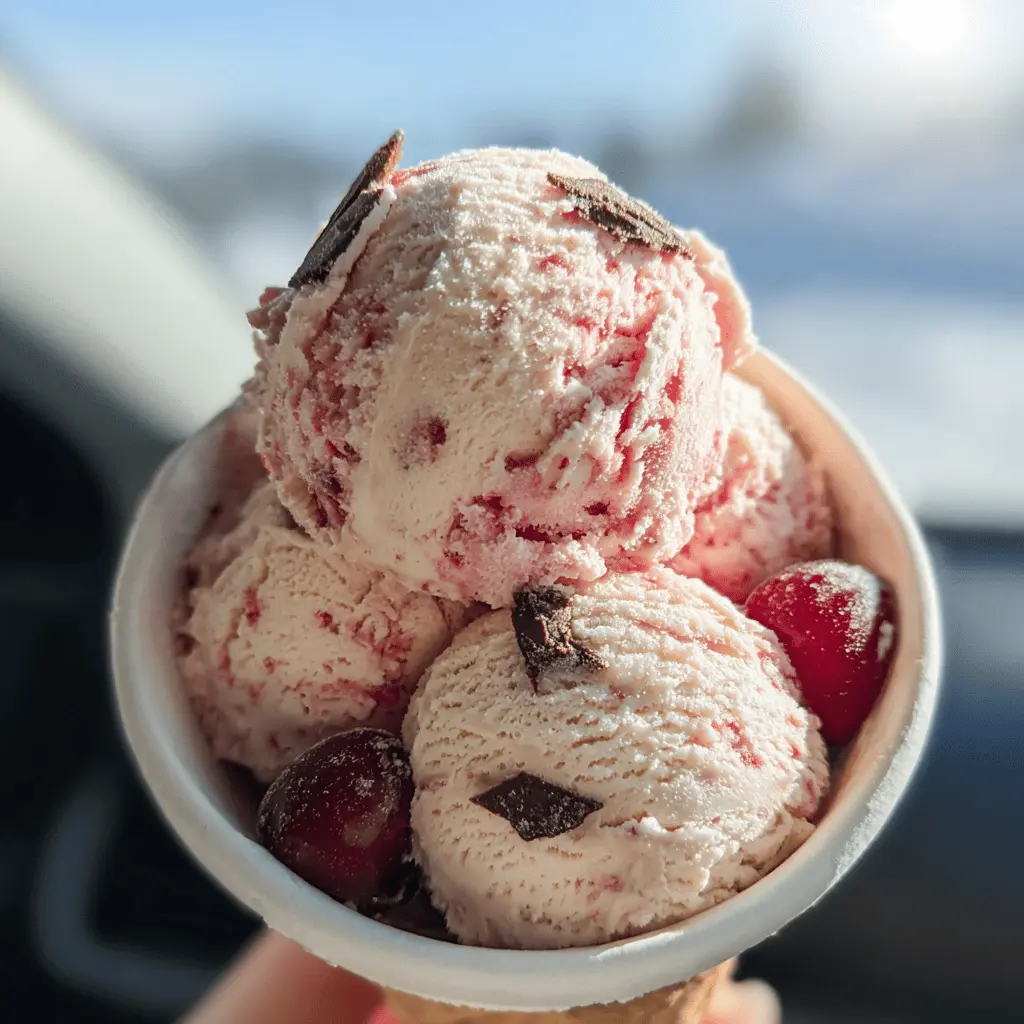
This Easy Homemade Cherry Garcia Ice Cream is a real treat! It’s creamy, fruity, and packed with delicious cherry pieces and chocolate chips. You’ll love how simple it is to make!
I enjoy this ice cream on hot days, scooped into a waffle cone. Just be careful not to eat it too fast—it’s super creamy and you might get a brain freeze! 😂
Key Ingredients & Substitutions
Heavy Cream: This ingredient adds creaminess to the ice cream. If you want a lighter version, you can use half-and-half, but it might not be as rich. I love using the heavy cream for that classic taste.
Whole Milk: Whole milk balances the creaminess. If you’re looking for a non-dairy option, almond milk or coconut milk can work, though they may alter the flavor slightly.
Granulated Sugar: Sugar is essential for sweetness. If you prefer, you can substitute with honey or maple syrup, but keep in mind that they may change the final taste.
Cherries: Fresh cherries are wonderful, but frozen ones work just as well. If cherries aren’t your favorite, you could swap them out for raspberries or strawberries to make a different fruit ice cream.
Dark Chocolate Chunks: I love using dark chocolate for its rich flavor. If you want a sweeter taste, semi-sweet chocolate or milk chocolate are great alternatives.
How Do I Get the Creamiest Ice Cream Consistency?
To achieve that creamy texture, it’s crucial to properly blend your ingredients and churn the mixture well. Here’s how you can ensure smooth ice cream:
- Make sure your heavy cream and milk are very cold before mixing.
- Whisk until the sugar is completely dissolved to avoid graininess.
- Churn at low speed first to incorporate air smoothly, then increase to medium speed.
- Don’t skip the freezing step! This solidifies the ice cream and enhances the texture.
By following these tips, you’ll end up with a delicious, creamy Cherry Garcia ice cream that you can be proud of!
Easy Homemade Cherry Garcia Ice Cream
Ingredients You’ll Need:
- 2 cups heavy cream
- 1 cup whole milk
- 3/4 cup granulated sugar
- 1 tablespoon vanilla extract
- 1 cup fresh or frozen pitted cherries, chopped (reserve a few whole for garnish, optional)
- 1/4 cup cherry preserves or jam
- 1 cup dark chocolate chunks or chips
- Pinch of salt
How Much Time Will You Need?
You’ll need about 15 minutes of prep time, plus 20-25 minutes to churn the ice cream in your ice cream maker, and at least 3-4 hours to freeze it before serving. That means about 4-5 hours before you can indulge in this delicious treat—definitely worth the wait!
Step-by-Step Instructions:
1. Mix the Base:
In a large mixing bowl, combine the heavy cream, whole milk, granulated sugar, vanilla extract, and a pinch of salt. Whisk everything together until the sugar is completely dissolved. This should only take a minute or two!
2. Add the Cherries:
Gently stir in the chopped cherries and cherry preserves. This will create delicious fruity swirls in your ice cream, plus it adds more cherry flavor. Don’t forget to set aside a few whole cherries for garnishing later if you like!
3. Churn the Ice Cream:
Pour the cherry mixture into your ice cream maker. Follow the manufacturer’s instructions and churn for about 20-25 minutes until the mixture has a soft-serve consistency. Keep an eye on it; you want it to be creamy but not overly frozen at this stage.
4. Add Chocolate Chunks:
In the last 5 minutes of churning, add the dark chocolate chunks or chips. This way, they incorporate perfectly without going mushy. Yum!
5. Freeze for Later:
Once your ice cream is ready, transfer it to an airtight container. For the best texture, freeze it for at least 3-4 hours. If you can resist, letting it freeze overnight makes it even better!
6. Serve & Enjoy:
Scoop the ice cream into bowls or cones. Garnish with the reserved whole cherries and maybe a sprinkle of extra dark chocolate chunks if you want to impress! Enjoy this delightful treat right away—you’ve earned it!
This recipe delivers a creamy, luscious homemade version of Cherry Garcia ice cream that features fresh cherries and rich chocolate chunks, just like the classic favorite!

FAQ for Easy Homemade Cherry Garcia Ice Cream
Can I Use Frozen Cherries Instead of Fresh Ones?
Absolutely! Frozen cherries work just as well as fresh cherries. Just make sure to chop them before adding them to the mixture. They may add a bit more liquid, but don’t worry—it’ll turn out delicious!
How Long Can I Store Leftover Ice Cream?
You can store leftover ice cream in an airtight container in the freezer for up to 2 weeks. To keep it fresh, make sure to smooth the top before sealing to minimize air exposure. It may harden a bit, so let it sit at room temperature for a few minutes before scooping!
What If I Don’t Have an Ice Cream Maker?
No problem! You can still make this ice cream. Pour the mixture into a shallow dish and freeze it. Every 30 minutes, stir it vigorously with a fork to break up any ice crystals, repeating until it’s firm (about 4-6 hours). It’s a bit more labor-intensive, but still worth it!
Can I Make This Recipe Dairy-Free?
Yes! You can replace the heavy cream and whole milk with coconut cream and almond milk (or any other non-dairy milk). Just keep in mind that the flavor and texture may differ slightly, but it will still be delicious!