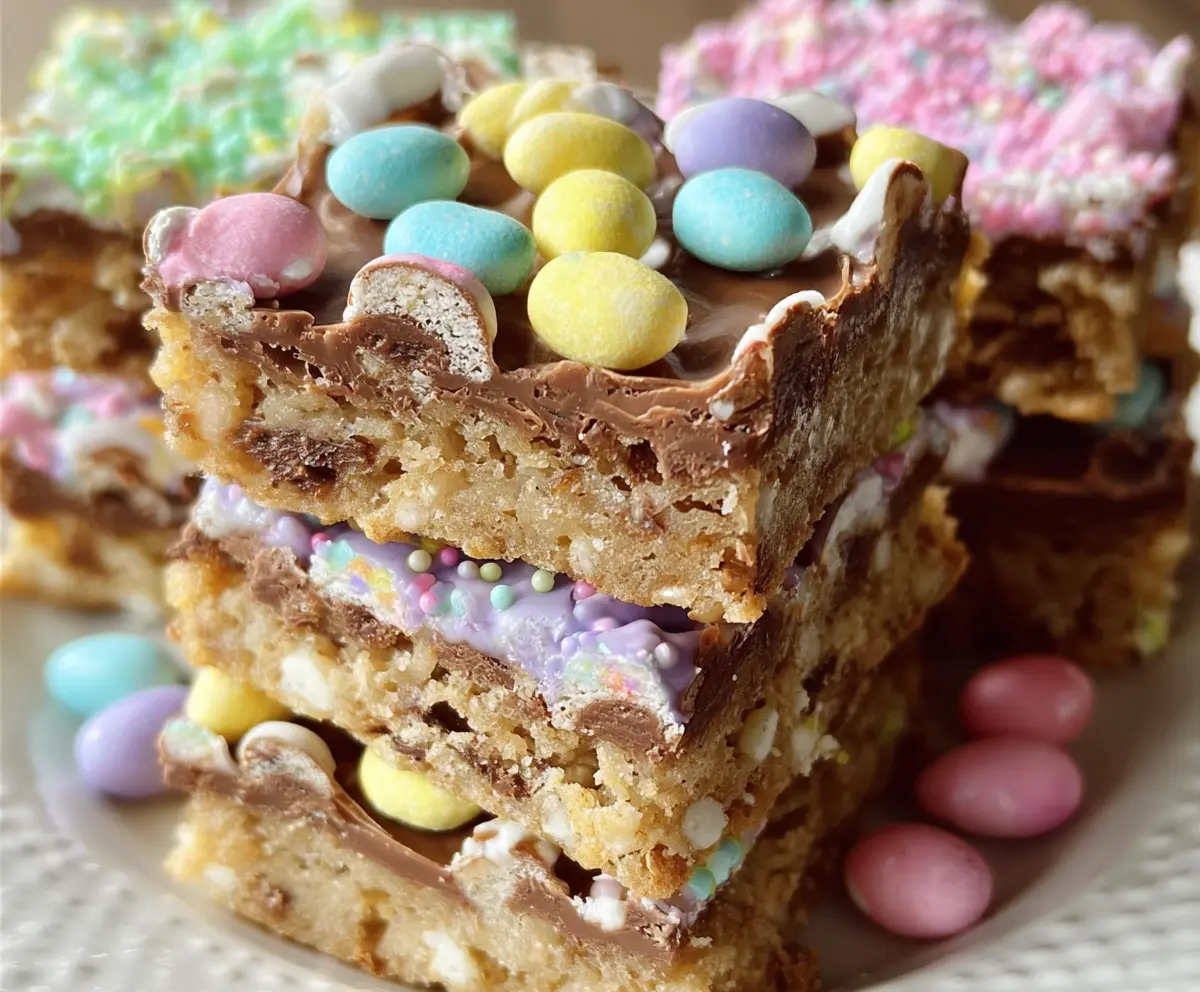
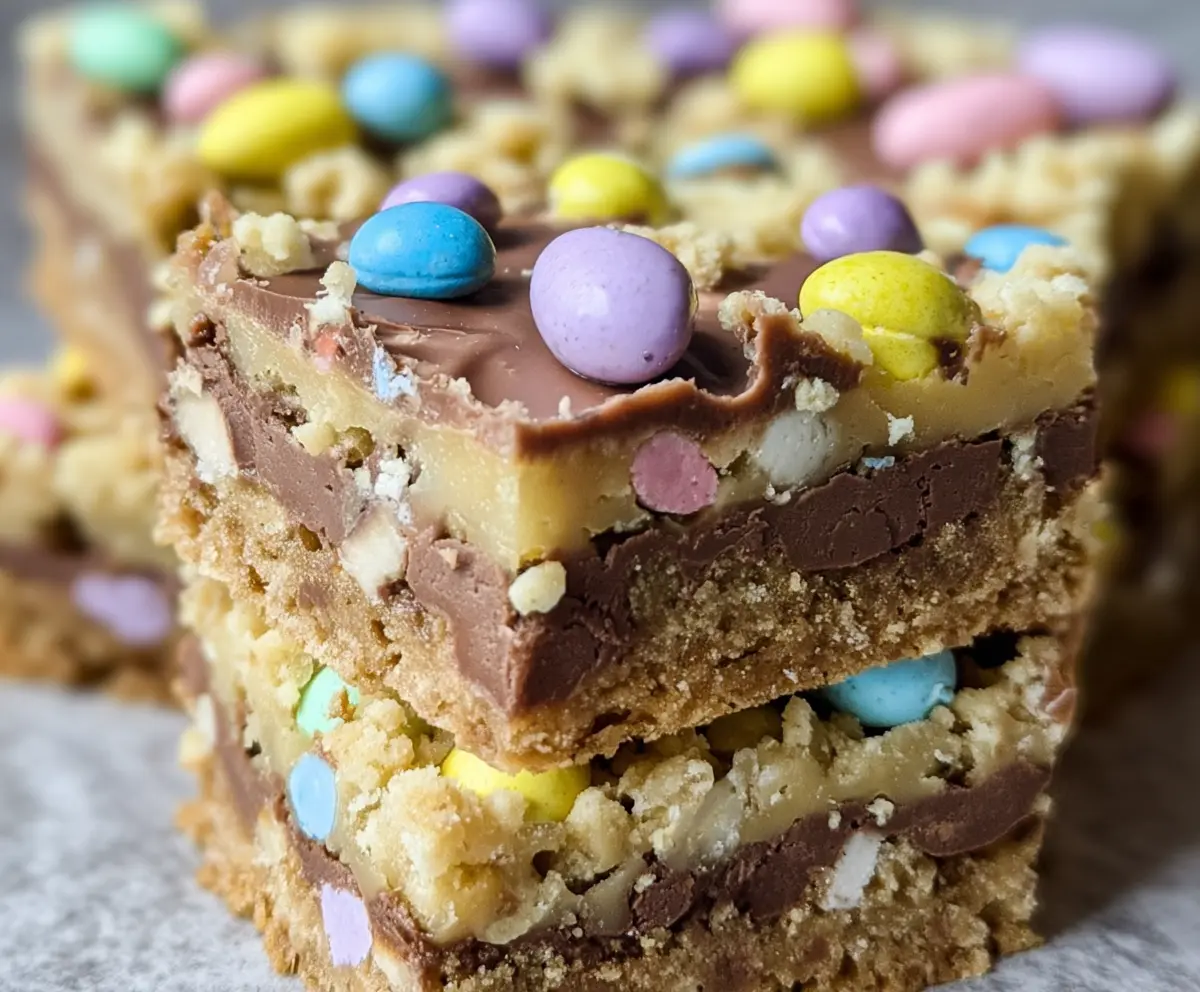
These Easter Goody Bars are a fun treat packed with colorful candies, crispy cereal, and sweet marshmallows. They’re perfect for celebrating with friends and family!
Making these bars is so easy, even the kids can help! I love how they look all festive and pretty. Plus, they disappear fast at family gatherings—no leftovers here! 😄
Key Ingredients & Substitutions
Crispy Rice Cereal: This provides the main texture for the bars. If you’re looking for a gluten-free option, check that your rice cereal is certified gluten-free. You can also use puffed quinoa if you want a different twist!
Mini Marshmallows: They give the bars their chewy consistency. If you can’t find them, you can cut up regular marshmallows into smaller pieces to use instead. For a vegan option, look for plant-based marshmallows.
Milk Chocolate Chips: This adds a lovely richness. You can swap dark chocolate chips for a bolder flavor, or use semi-sweet chips if that’s your preference. Don’t forget about white chocolate if you want something sweeter!
White Chocolate Chips or Candy Melts: These add a colorful touch, especially if you use pastel colors for Easter! If you’re avoiding white chocolate, you can use yogurt chips or leave them out entirely for a simpler treat.
Candy-Coated Chocolate Eggs: These are all about the festive vibe! You can use any chocolate candies you like, such as M&M’s or other holiday-themed candy. Feel free to get creative with toppings!
How Do I Melt Chocolate Smoothly?
Melted chocolate can be tricky, but with a few simple tips, you can get it just right! It’s essential to melt chocolate slowly to avoid burning it. Here’s how:
- Use a microwave-safe bowl and heat in short bursts of 20-30 seconds.
- Stir the chocolate after each interval. This helps it melt evenly and prevents hot spots.
- If it doesn’t seem smooth yet, keep heating in shorter bursts and stirring until fully melted.
Another option is to use a double boiler, which gently heats the chocolate. Just make sure no water gets in the chocolate, or it could seize up.
How to Make Easter Goody Bars
Ingredients You’ll Need:
For the Base:
- 6 cups crispy rice cereal
- 1 cup mini marshmallows
- 1/2 cup butter
For the Chocolate Topping:
- 1 1/2 cups milk chocolate chips
- 1 cup white chocolate chips or candy melts (choose colorful pastels for a fun Easter theme)
For the Festive Touch:
- 1 1/2 cups candy-coated chocolate eggs (like mini Cadbury eggs or your favorite candy)
For Greasing:
- Nonstick cooking spray or butter
How Much Time Will You Need?
This recipe will take you about 20 minutes to prep and about 1 hour for the bars to chill and set in the refrigerator. With a little patience, you’ll have delicious Easter Goody Bars ready to enjoy!
Step-by-Step Instructions:
1. Prepare the Baking Pan:
Start by lightly greasing a 9×13-inch baking pan with butter or nonstick cooking spray. This will help the bars come out easily once they’re set!
2. Melt the Butter and Marshmallows:
In a large pot, place the butter over low heat. As it melts, add the mini marshmallows. Stir constantly until everything is well melted and smooth. Take your time with this step to ensure the marshmallows get fluffy and creamy!
3. Combine with Cereal:
Once the marshmallow mixture is smooth, remove the pot from the heat. Quickly add in the crispy rice cereal and stir until every piece is well-coated with that sweet, gooey mixture.
4. Press the Mixture into the Pan:
Transfer the cereal mixture into the greased baking pan. With a spatula, press it down firmly and evenly so it forms a solid base. This is an important step for making sure your bars hold together nicely.
5. Melt the Milk Chocolate:
Now it’s time to melt the milk chocolate chips! In a microwave-safe bowl, heat them in 20-30 second intervals. Stir between each heating until the chocolate is completely smooth and melted.
6. Add the Milk Chocolate Layer:
Pour the melted milk chocolate over the cereal mixture in the pan. Use a spatula to spread it out evenly across the top. This will create a delicious, chocolaty layer!
7. Melt the White Chocolate:
In another bowl, repeat the melting process with the white chocolate chips or colored candy melts. Once melted, spread or drizzle this on top of the milk chocolate layer in the pan.
8. Top with Candy Eggs:
While the chocolate layers are still warm and soft, sprinkle the candy-coated chocolate eggs evenly on top. Lightly press them into the chocolate so they stick well.
9. Chill to Set:
Now, place the pan in the refrigerator and let it chill for at least 1 hour. This will allow the bars to set properly and hold their shape.
10. Serve and Enjoy:
Once the bars are fully set, take them out of the fridge. Cut them into squares or bars, and they’re ready to enjoy! Perfect for sharing at Easter gatherings or any time you want a sweet treat.
Can I Use Different Types of Cereal?
Absolutely! While crispy rice cereal works best for texture, you can substitute with other cereals like puffed corn or even granola. Just be mindful that different cereals may alter the final texture or sweetness of the bars.
How Do I Store Leftover Easter Goody Bars?
Store any leftovers in an airtight container at room temperature for up to 3 days. If you prefer, you can refrigerate them for up to a week. Just make sure they are completely cooled before sealing to avoid moisture buildup!
Can I Use Dark Chocolate Instead?
Yes, you can definitely use dark chocolate chips for a richer flavor! Just adjust the sweetness to your taste, as dark chocolate can be less sweet than milk chocolate. It pairs wonderfully with the sweetness of the marshmallows and candy eggs!
What If I Don’t Have Mini Marshmallows?
No worries! If you can’t find mini marshmallows, you can cut regular-sized marshmallows into smaller pieces or use marshmallow fluff as a substitute. If using fluff, about 2 cups should give you a similar effect! Just mix it in with the melted butter until fully incorporated.