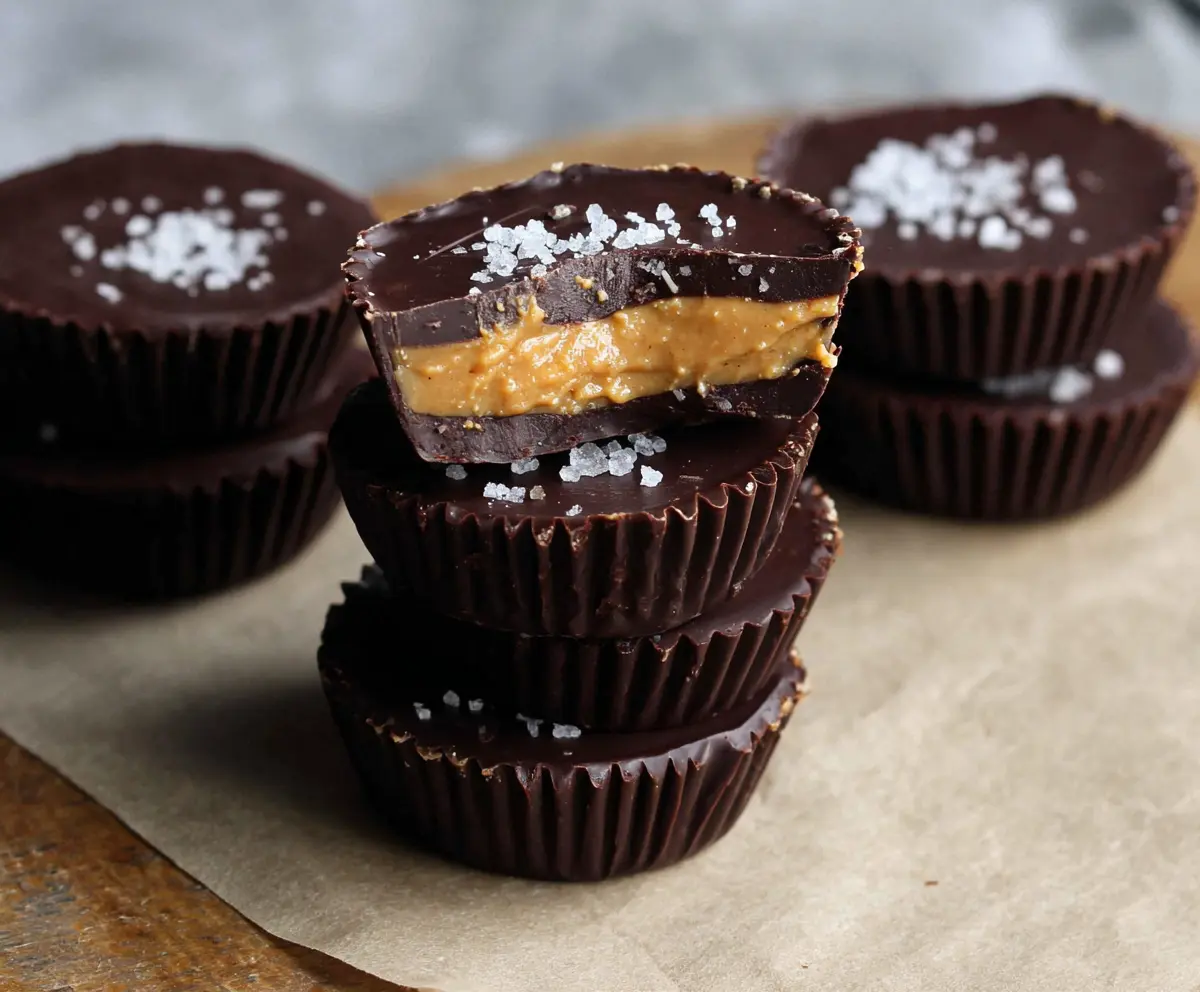
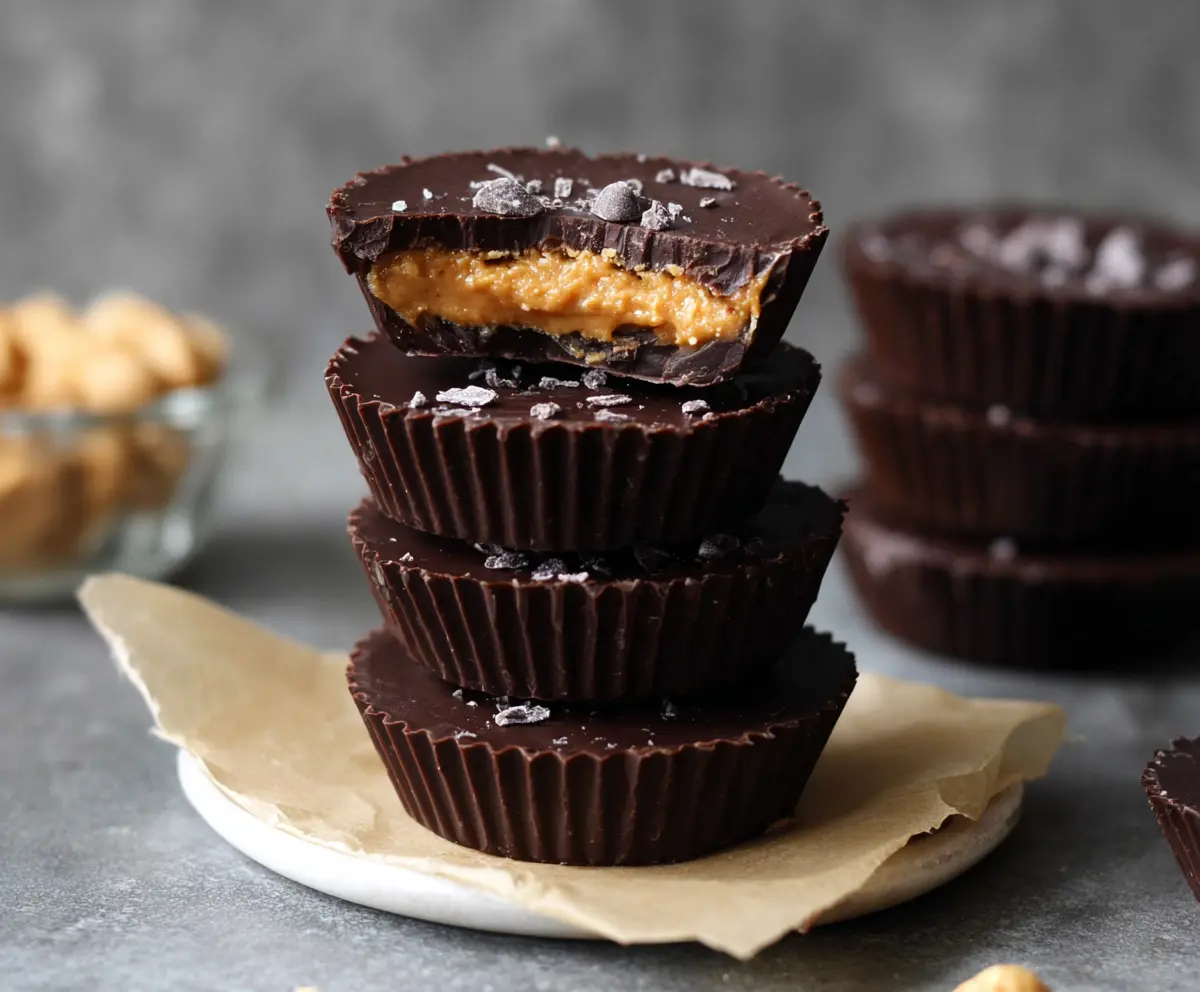
These Dark Chocolate Peanut Butter Cups are a tasty treat that hits the sweet spot! With rich dark chocolate and creamy peanut butter, they’re simply irresistible.
Making these cups is a fun, messy adventure! I love how quick they are to whip up. Plus, who can resist the delicious combo of chocolate and peanut butter? Yum! 🍫🥜
Key Ingredients & Substitutions
Dark Chocolate: Use dark chocolate that is 70% cocoa or higher for a rich flavor. If you’re not a fan of dark chocolate, semi-sweet or milk chocolate can work too, but they’ll be sweeter. I personally love the deep taste of dark chocolate, especially when paired with peanut butter!
Peanut Butter: Creamy peanut butter is perfect for this recipe. If you prefer crunchy for texture, go ahead! For a nut-free version, try sunflower seed butter or almond butter as great alternatives.
Powdered Sugar: This ingredient is optional; it helps sweeten the peanut butter. If you’re looking for a healthier option, you could use maple syrup or honey instead, but be cautious with the amount as it can change the texture.
Vanilla Extract: Adding vanilla is optional but brings out the flavors beautifully. You can skip it or try other extracts like almond or hazelnut for a unique twist.
How Can I Melt Chocolate Without Burning It?
Melting chocolate needs careful attention to avoid burning and getting that ugly clump. Here’s how to do it right:
- Microwave: Start with 30-second intervals, stirring every time. This helps distribute the heat evenly.
- Double Boiler: Fill a pot with an inch of water, then place a bowl on top with the chocolate. Heat on low to gently melt the chocolate while stirring.
- Always remember: if it looks slightly lumpy at first, keep stirring. The residual heat will smooth it out!
With these tips, you can confidently make your Dark Chocolate Peanut Butter Cups. Enjoy making this delightful treat!
How to Make Dark Chocolate Peanut Butter Cups
Ingredients You’ll Need:
- 1 cup dark chocolate chips or chopped dark chocolate (70% cocoa or higher)
- 1/2 cup creamy peanut butter (natural or regular)
- 2 tablespoons powdered sugar (optional, for sweetness)
- 1/4 teaspoon vanilla extract (optional)
- Sea salt flakes, for garnish
How Much Time Will You Need?
This recipe will take about 15 minutes to prepare, plus about 40 minutes of chill time in the freezer. A little patience is required, but the delicious rewards will be well worth it!
Step-by-Step Instructions:
1. Prepare the Molds:
Start by lining a muffin tin or small silicone molds with paper cupcake liners. This will make it easy to remove the cups once they are set.
2. Melt the Dark Chocolate:
Next, melt the dark chocolate. Place the chocolate chips in a microwave-safe bowl and heat in 30-second intervals, stirring after each interval until smooth. If you prefer, you can melt it using a double boiler on the stove, which is a gentle way to melt chocolate without burning it.
3. Create the Chocolate Base:
Once the chocolate is melted, spoon about a tablespoon of melted chocolate into the bottom of each cupcake liner. Use the back of a spoon to spread it evenly. Place the tray in the freezer for about 10 minutes to let the chocolate firm up.
4. Prepare the Peanut Butter Filling:
While the chocolate base is setting, mix the creamy peanut butter with the powdered sugar and vanilla extract in a bowl until it’s smooth and creamy. Taste a little if you can—it’s so good!
5. Add the Peanut Butter Layer:
Once the chocolate bottoms are set, add about a tablespoon of the peanut butter mixture on top of each chocolate layer. Spread it out a bit, but don’t worry if it’s not perfect.
6. Top It Off with More Chocolate:
Cover the peanut butter layer with more melted dark chocolate until each cup is fully covered. Make sure you seal the edges well so the peanut butter doesn’t peek out!
7. Sprinkle on the Sea Salt:
Sprinkle some sea salt flakes on top of each cup. This adds a lovely flavor contrast and makes them extra tasty.
8. Chill to Set:
Return the tray to the freezer and chill for at least 30 minutes or until the peanut butter cups are firm to the touch. This step is crucial for perfecting their texture!
9. Enjoy Your Treat:
Once they are ready, remove the cups from the freezer and let them sit for a few minutes at room temperature before serving. This will make them easier to bite into. Now you can enjoy your rich and creamy Dark Chocolate Peanut Butter Cups!
Happy indulging! These little delights are sure to become a favorite.
Can I Use Milk Chocolate Instead of Dark Chocolate?
Absolutely! If you prefer milk chocolate, feel free to substitute it. Keep in mind that it will be sweeter than using dark chocolate, which can change the overall flavor balance of your cups.
How Should I Store Leftover Peanut Butter Cups?
Store any leftover Dark Chocolate Peanut Butter Cups in an airtight container in the fridge for up to a week. If you prefer them cold, they can also be stored in the freezer for up to a month—just let them thaw for a few minutes at room temperature before enjoying!
Can I Make These Peanut Butter Cups Vegan?
Yes! To make them vegan, use dark chocolate that is dairy-free and substitute the creamy peanut butter with any nut or seed butter that you prefer. Always check the ingredient labels to ensure they align with your dietary preferences.
What If My Chocolate Hardened Too Quickly?
If your melted chocolate starts to harden while you’re working, you can gently reheat it in the microwave in 10-second intervals, stirring in between until it’s smooth again. Just be careful not to overheat it, as that can cause the chocolate to seize!