
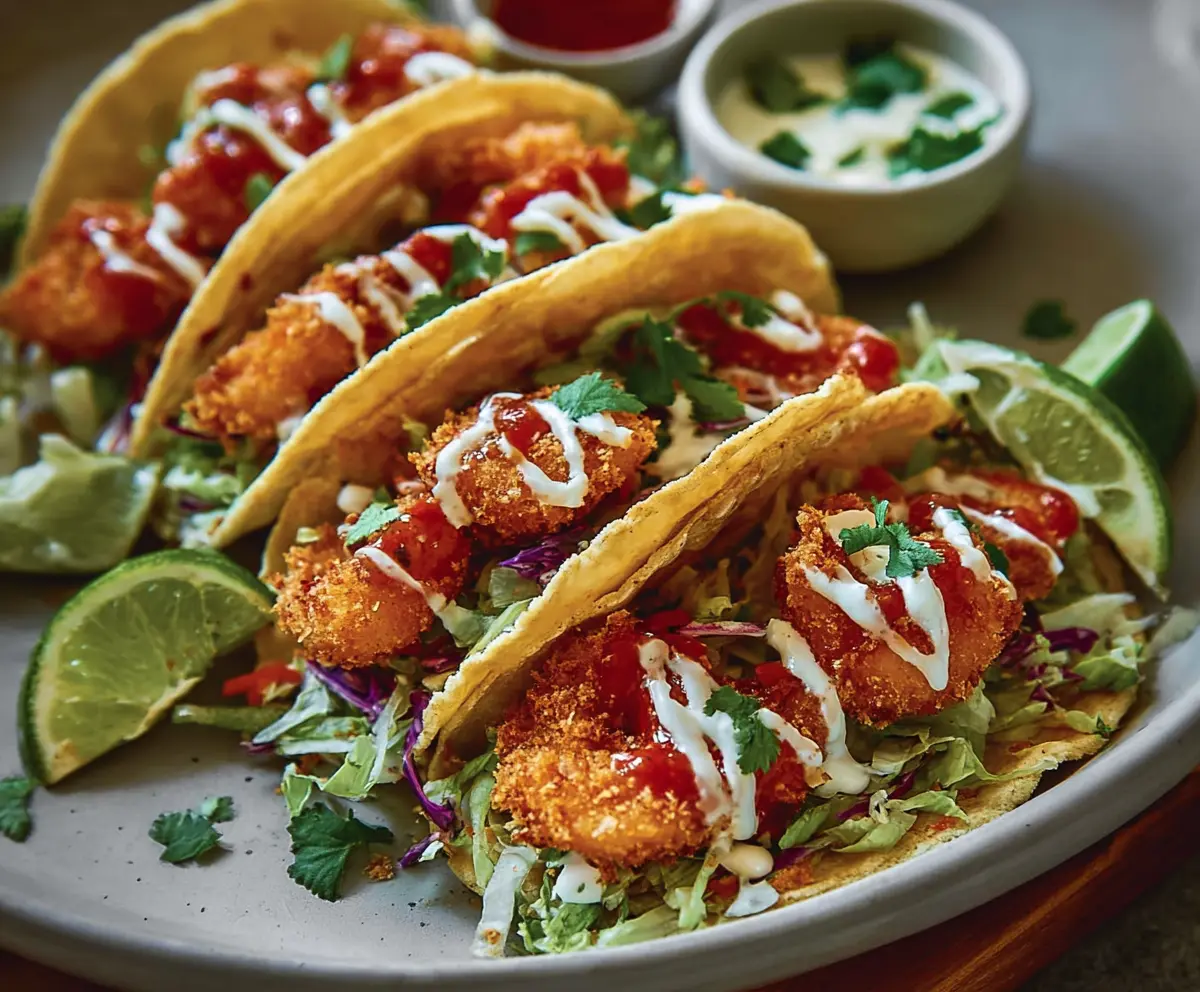
These crispy coconut shrimp tacos are a fun twist on taco night! The shrimp are coated in crunchy coconut flakes, giving them a sweet and tasty flavor that’s hard to resist.
Top them with fresh veggies and a zesty sauce, and you’ve got a meal that feels like a beach getaway. I love adding a squeeze of lime for that extra zing! 🌮🍤
Key Ingredients & Substitutions
Shrimp: Large shrimp are the star here, but you can use smaller ones too! If shrimp isn’t your thing, consider swapping with chicken strips or even tofu for a vegetarian twist.
Panko Breadcrumbs: These give the shrimp a fantastic crunch. If you can’t find panko, regular breadcrumbs work, though the texture won’t be as light and crispy. You can also use crushed cornflakes for a fun alternative!
Sweetened Shredded Coconut: This adds sweetness and texture. If you’re looking to reduce sugar, unsweetened coconut is a great choice. You can also omit coconut entirely if you prefer a more traditional flavor.
Taco Shells: Crunchy taco shells are classic, but feel free to use soft tortillas or lettuce wraps for a low-carb option. It’s all about what you enjoy!
Mayonnaise: I recommend using regular mayo for creaminess, but you can substitute Greek yogurt for a healthier alternative. It gives a nice tangy flavor, too!
How Do I Achieve Perfectly Crispy Shrimp?
Getting that crispy coating around your shrimp is essential! Here’s how to ensure success:
- Make sure your shrimp are completely dry before breading. Moisture can prevent the coating from sticking properly.
- Set up a good breading station. Keep the bowls fairly close together for easy dipping. It’s a bit of a mess, but worth it!
- Heat the oil properly. It should be around 350°F. If it’s too cold, your shrimp will absorb oil and turn soggy. Too hot and they’ll burn quickly.
- Fry in small batches to avoid overcrowding. This keeps the oil temperature steady and helps achieve a golden brown color.
Follow these tips, and you’ll have deliciously crispy coconut shrimp every time!
How to Make Crispy Coconut Shrimp Tacos
Ingredients You’ll Need:
For the Shrimp:
- 1 lb large shrimp, peeled and deveined
- 1/2 cup all-purpose flour
- 1/2 tsp salt
- 1/4 tsp black pepper
- 2 large eggs
- 1 cup panko breadcrumbs
- 1/2 cup sweetened shredded coconut
- Vegetable oil, for frying
For the Tacos:
- 6 small crunchy taco shells
- 2 cups shredded iceberg lettuce
- 1/2 cup shredded purple cabbage (optional, for color)
- 1/4 cup fresh cilantro, chopped
- Lime wedges, for serving
For the Sauce:
- 1/2 cup mayonnaise
- 1 tbsp lime juice
- 1 tsp honey
- 1/2 tsp garlic powder
- Salt and pepper, to taste
How Much Time Will You Need?
You’ll need about 30 minutes to get these delicious tacos ready. This includes 10 minutes for preparation and around 15-20 minutes for cooking. The best part is that they’ll be ready to serve hot and crispy for your family or guests!
Step-by-Step Instructions:
1. Prepare the Shrimp:
Start by patting the shrimp dry with a paper towel. This helps the breading stick better. Set up a coating station with three shallow bowls: in one, combine flour with salt and pepper; in the second, beat the eggs; and in the third, mix panko breadcrumbs with shredded coconut.
2. Coat the Shrimp:
Next, take each shrimp and dip it first into the flour mixture, shaking off any excess flour. Then, dunk it into the beaten eggs, followed by pressing it into the panko and coconut mix to coat fully. This triple-dipping gives the shrimp a tasty crunchy outer layer!
3. Cook the Shrimp:
Heat about 1 inch of vegetable oil in a large skillet over medium-high heat. Once the oil is hot (you can test this by dropping in a small breadcrumb to see if it sizzles), carefully add a few shrimp at a time. Fry them for 2-3 minutes on each side until they turn golden brown and crispy. Once done, transfer the shrimp to a plate lined with paper towels to absorb any excess oil.
4. Make the Sauce:
While the shrimp are cooking, prepare the sauce by whisking together mayonnaise, lime juice, honey, garlic powder, salt, and pepper in a small bowl until everything is well blended and smooth. This zesty sauce will complement your shrimp perfectly!
5. Assemble the Tacos:
Time to build your tacos! Take the crunchy taco shells and load them with a generous layer of shredded iceberg lettuce and, if using, some purple cabbage for a pop of color. Place 3-4 crispy coconut shrimp inside each shell, then drizzle the tangy lime mayo sauce on top. Finish with a sprinkle of fresh chopped cilantro.
6. Serve:
Garnish your tacos with lime wedges on the side for an extra squeeze of freshness. They are best enjoyed immediately while the shrimp are still hot and crispy. Enjoy your delightful Crispy Coconut Shrimp Tacos!
Can I Use Frozen Shrimp for This Recipe?
Yes, you can use frozen shrimp! Just make sure to thaw them completely before cooking. The best method is to place them in the refrigerator overnight, or you can run cold water over them in a sealed bag for a quicker option.
How Can I Make These Tacos Spicier?
If you’re looking for a kick, you can add some cayenne pepper or chili powder to the flour mixture for coating the shrimp. Additionally, consider adding sliced jalapeños or a spicy salsa to the tacos for a zesty finish!
Can I Prepare the Sauce in Advance?
Absolutely! You can prepare the lime mayo sauce a day ahead and store it in the refrigerator in an airtight container. Just give it a good stir before using, as it may thicken a bit when chilled.
How Do I Store Leftover Tacos?
Leftover tacos are best stored separately to maintain the crispiness. Store the cooked shrimp in an airtight container in the refrigerator for up to 2 days. Keep the taco shells and toppings in separate containers. Reheat the shrimp in an oven for a few minutes to restore crispness before assembling the tacos again.