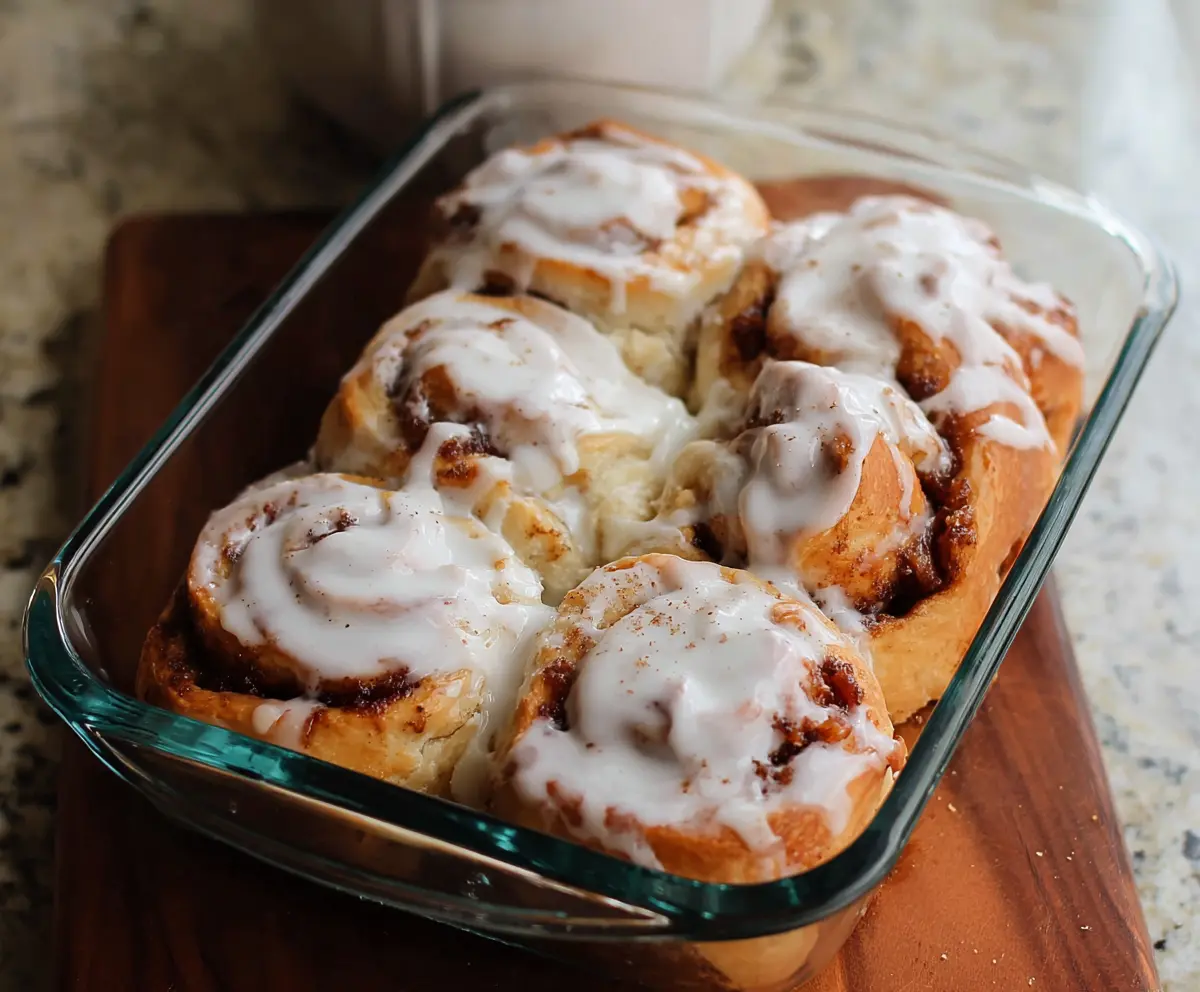
These Cottage Cheese Cinnamon Rolls are fluffy treats filled with sweet cinnamon goodness. The cottage cheese adds a nice touch, making them soft and delicious!
I love how easy they are to whip up, and they smell amazing while baking! Enjoy them warm with a drizzle of icing—perfect for breakfast or a snack! ☕️🍩
Key Ingredients & Substitutions
Cottage Cheese: This is what makes the filling special. For a smoother texture, you can use ricotta cheese instead, but keep it well-drained to avoid sogginess. If you want to skip dairy, try a nut-based cheese blend.
Brown Sugar: This gives the filling a lovely caramel flavor. If you’re out of brown sugar, you can mix white sugar with a bit of molasses (1 tablespoon molasses per cup of sugar) for a similar taste.
Ground Cinnamon: Essential for that classic cinnamon roll flavor! If you’re a fan of a spice kick, consider adding a bit of nutmeg or allspice for extra warmth.
Unsalted Butter: You need this for both the dough and the filling. If you’re looking for a healthier option, using coconut oil or a dairy-free butter substitute can work well.
How Do I Get My Dough to Rise Perfectly?
Getting the dough to rise properly is crucial for fluffy rolls. Start by making sure your yeast is fresh; if it doesn’t froth in warm milk, it won’t rise your dough. Here’s how to help it along:
- Use warm milk, not hot, as too much heat can kill the yeast.
- Leave the dough to rise in a warm, draft-free area. An oven with the light on works well.
- Cover the dough with a cloth to keep it warm and moist, preventing a crust from forming.
- Don’t rush the rising process; let it double in size for the best texture.
How to Make Cottage Cheese Cinnamon Rolls
Ingredients You’ll Need:
For the Dough:
- 2 cups all-purpose flour
- 2 1/4 tsp active dry yeast (1 packet)
- 1/2 cup warm milk (about 110°F/43°C)
- 1/4 cup granulated sugar
- 1/4 cup unsalted butter, melted
- 1 large egg
- 1/2 tsp salt
For the Filling:
- 1/2 cup cottage cheese (well drained, slightly dry consistency)
- 1/2 cup brown sugar, packed
- 1 tbsp ground cinnamon
- 1/4 cup unsalted butter, softened
For the Icing:
- 1 cup powdered sugar
- 2 tbsp cream cheese, softened (optional for richer frosting)
- 1-2 tbsp milk
- 1/2 tsp vanilla extract
How Much Time Will You Need?
This recipe requires about 15 minutes for preparation and around 2 hours for the dough to rise, plus 20-25 minutes for baking. In total, you should plan for about 2.5 to 3 hours to enjoy your delicious Cottage Cheese Cinnamon Rolls.
Step-by-Step Instructions:
1. Preparing the Dough:
In a small bowl, dissolve the yeast in warm milk. Let it stand for 5-10 minutes until it becomes frothy; this shows that the yeast is activated. In a large mixing bowl, combine the flour, granulated sugar, and salt. Add the melted butter, egg, and the activated yeast mixture. Stir everything together until a dough begins to form.
2. Kneading the Dough:
Lightly flour your surface and knead the dough by hand for about 6-8 minutes until it feels smooth and elastic. Once kneaded, place the dough in a greased bowl, cover it with a clean cloth, and let it rise in a warm place for 1 to 1.5 hours, or until it has doubled in size.
3. Preparing the Filling:
While the dough is rising, prepare the filling. In a bowl, mix together the well-drained cottage cheese, brown sugar, and ground cinnamon until it forms a spreadable filling. Set aside, and let the flavors blend.
4. Shaping the Rolls:
Once your dough has risen, gently punch it down to release the air. Roll it out on a floured surface into a rectangle about 12×16 inches. Spread the softened butter evenly over the dough. Then, spread the cottage cheese cinnamon filling on top of the buttered dough.
5. Rolling and Cutting:
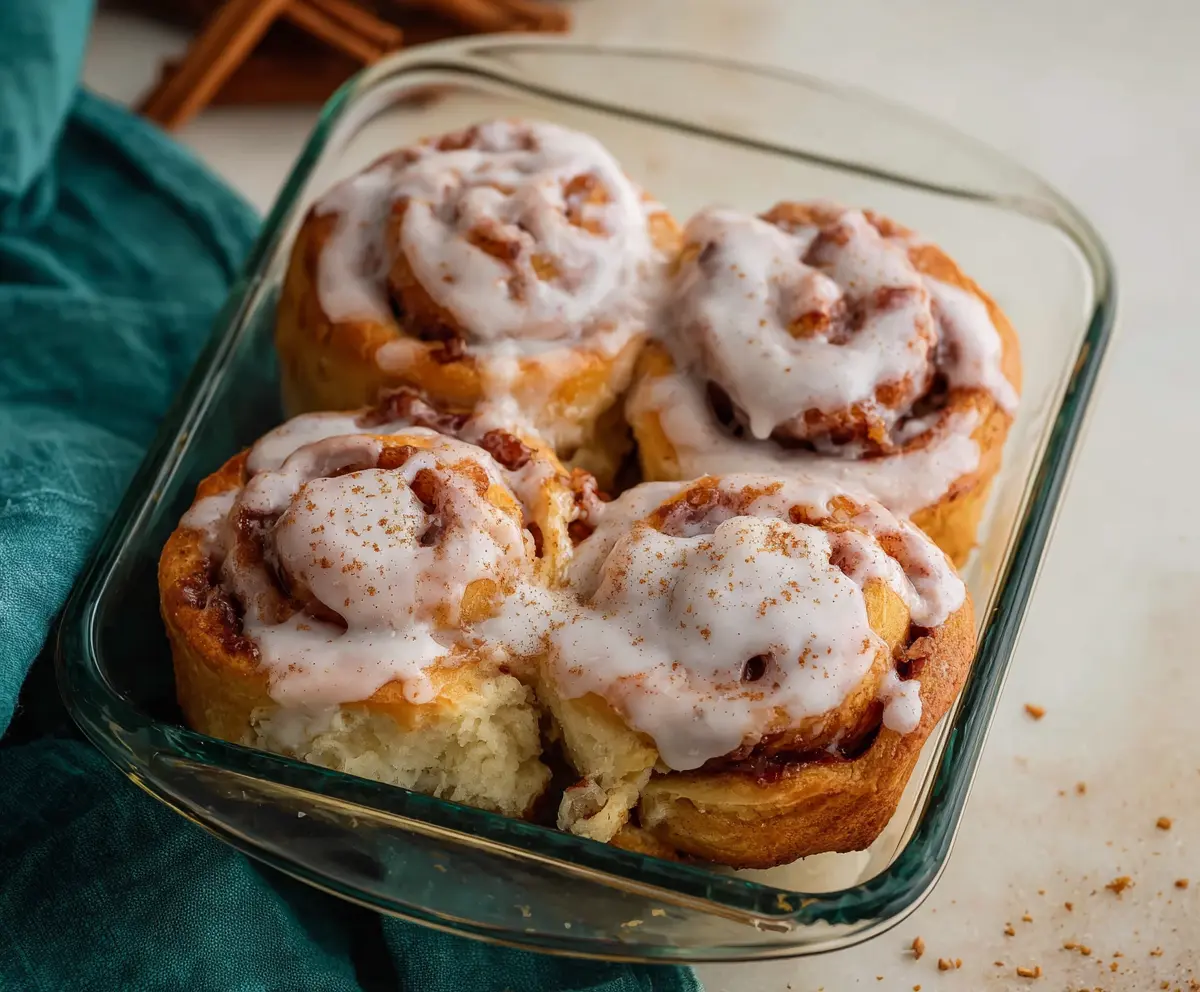
Starting from one of the longer edges, tightly roll the dough into a log shape. Cut the log into 6 evenly sized rolls. Place the rolls in a greased 9×13 inch baking dish, leaving some space between each roll so they can rise. Cover the dish and let them rise again in a warm spot for about 30-45 minutes until puffy.
6. Baking the Rolls:
Preheat the oven to 350°F (175°C). Once preheated, bake the rolls for 20-25 minutes, or until they’re golden brown and cooked through. You’ll love the smell as they bake!
7. Preparing the Icing:
While the rolls are baking, mix together the powdered sugar, cream cheese (if using), vanilla extract, and just enough milk to achieve your desired icing consistency. Set it aside until the rolls are out of the oven.
8. Final Touches:
When the rolls are done baking, remove them from the oven and let them cool slightly. Drizzle the icing generously over the warm rolls for a delicious finish.
9. Serve and Enjoy:
These Cottage Cheese Cinnamon Rolls are best enjoyed warm. Serve them fresh and savor the unique blend of flavors with every bite!
Can I Use Low-Fat Cottage Cheese?
Yes, you can use low-fat cottage cheese, but make sure it’s well-drained to avoid extra moisture in the filling. This might slightly affect the texture, but the overall flavor will still be great!
What If My Dough Doesn’t Rise?
If your dough doesn’t rise, check to ensure your yeast was fresh and dissolved properly in warm milk. You can also try moving it to a warmer spot or considering whether it’s too cold in the room. If all else fails, you can try a new batch of dough with fresh yeast.
How to Store Leftover Cinnamon Rolls?
Store any leftover rolls in an airtight container at room temperature for up to 2 days. If you’d like to keep them longer, refrigerate them for about a week. For best results, reheat them in the microwave for a few seconds or in the oven at a low temperature.
Can I Freeze These Rolls?
Absolutely! You can freeze the uncooked rolls before the second rise or after they’ve been baked. Just make sure to wrap them tightly in plastic wrap and then foil. When you’re ready to enjoy, thaw overnight in the fridge and allow to rise before baking, or heat them directly from the freezer, though they may need a few extra minutes in the oven.