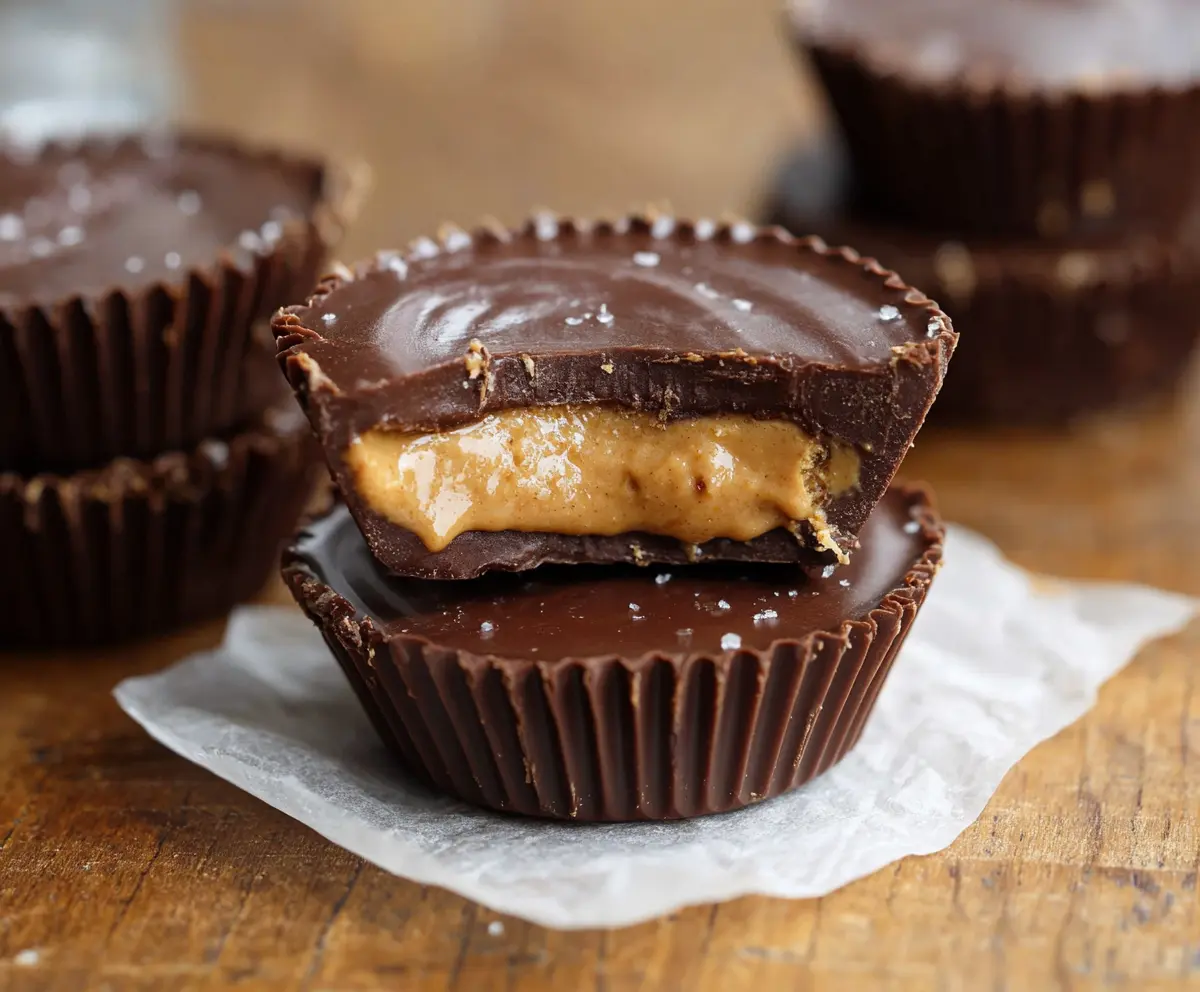
These Chocolate Peanut Butter Cups are the perfect treat for anyone who loves sweet and salty! With a smooth peanut butter filling surrounded by rich chocolate, they are simply delicious.
Let’s be real, who doesn’t enjoy a little chocolate and peanut butter combo? They are super easy to make, and I love sharing them with friends. Just try not to eat them all yourself! 😄
Key Ingredients & Substitutions
Peanut Butter: I recommend using smooth peanut butter for a creamy filling. If you’re looking for something healthier, natural peanut butter works well too. Just make sure it’s not too oily.
Butter: Unsalted butter is best for control over the sweetness. If you’re dairy-free, for a substitute, you can use coconut oil or a plant-based buttery spread to keep a similar texture.
Powdered Sugar: This helps sweeten the filling without any graininess. If you’re watching sugar intake, you might consider using a powdered sugar alternative like Stevia or Erythritol.
Chocolate: Semi-sweet chocolate delivers that classic flavor. Milk chocolate is sweeter, while dark chocolate gives a richer taste. You can also use dairy-free chocolate for a vegan option.
Graham Cracker Crumbs: These add texture but can be omitted if you prefer a smoother filling. If you don’t have graham crackers, crushed digestive biscuits or vanilla wafers make good substitutes.
How Can I Achieve Smooth, Melted Chocolate?
Melted chocolate is crucial for a perfect shell, but it can seize if overheated. Here’s how to do it right:
- Use a microwave-safe bowl or a double boiler.
- If microwaving, heat chocolate in 30-second intervals, stirring after each until just melted—it should be glossy, not hot!
- For double boiling, fill a pot with a few inches of water, bring to a simmer, and place a heat-safe bowl on top with the chocolate. Stir gently until smooth.
- If adding oil, it helps to keep the chocolate smooth and shiny; just mix it in after melting.
Keeping the chocolate at a low temperature while melting will help you avoid lumps and ensure a silky consistency! Good luck, and enjoy your chocolate-peanut butter goodness!

How to Make Chocolate Peanut Butter Cups
Ingredients You’ll Need:
For the Peanut Butter Filling:
- 1 cup smooth peanut butter (natural or creamy)
- 1/4 cup unsalted butter, softened
- 1/4 cup powdered sugar
- 1/2 cup graham cracker crumbs (optional, for texture)
For the Chocolate Coating:
- 2 cups semi-sweet chocolate chips or chopped chocolate
- 1 tablespoon coconut oil or vegetable oil (optional, for smoother chocolate)
For Topping:
- A pinch of sea salt (for sprinkling on top)
How Much Time Will You Need?
This delightful recipe takes about 20 minutes of prep time. Then, you’ll need about 1 hour in the refrigerator to let the chocolate set perfectly. It’s a fun and quick treat to make for yourself or friends!
Step-by-Step Instructions:
1. Prepare the Muffin Tin:
Start by lining a muffin tin or small cupcake mold tray with paper liners. This will make it easy to remove the peanut butter cups later.
2. Make the Peanut Butter Filling:
In a medium bowl, mix together the peanut butter, softened butter, powdered sugar, and graham cracker crumbs (if you’re using them). Stir until everything is smooth and well combined—this will be your delicious filling!
3. Melt the Chocolate:
In a separate bowl, melt the chocolate along with coconut oil (if using) gently in the microwave. Do this in 30-second intervals, stirring after each to prevent burning. You can also use a double boiler if you prefer. Aim for a smooth and glossy consistency.
4. Create the Chocolate Base:
Spoon about 1 tablespoon of the melted chocolate into each paper liner. Use the back of a spoon to spread it slightly up the sides, forming a base layer. Then, pop the tray into the freezer for about 10 minutes to let the chocolate set.
5. Add the Peanut Butter Filling:
Take the tray out of the freezer, and place about 1 tablespoon of the peanut butter filling in the center of each chocolate base. Press it down gently, making sure to leave some space around the edges for the top layer of chocolate.
6. Seal with More Chocolate:
Now, spoon another 1 to 1.5 tablespoons of melted chocolate over the peanut butter filling. Make sure to cover it completely and seal the edges to prevent any filling from escaping.
7. Add the Finishing Touch:
Sprinkle a small pinch of sea salt on top of each chocolate cup for that delightful sweet-and-salty flavor!
8. Chill and Set:
Finally, place the tray in the refrigerator for at least 1 hour, or until the chocolate has hardened completely. This step is crucial for the perfect bite!
9. Enjoy!
Once the chocolate has set, carefully remove the peanut butter cups from the paper liners. Enjoy your homemade treats! Store any leftovers in an airtight container in the fridge—but they probably won’t last long!
Can I Use Natural Peanut Butter Instead of Regular Peanut Butter?
Yes, you can! Just keep in mind that natural peanut butter can be more oily, so make sure to stir it well before measuring. It may slightly change the texture of the filling, but it’s still delicious!
How Can I Make This Recipe Dairy-Free?
To make the peanut butter cups dairy-free, use a dairy-free butter substitute (like a plant-based buttery spread) and select dairy-free chocolate chips. You can also use coconut oil for melting!
What Should I Do If My Chocolate Seizes Up While Melting?
If your chocolate seizes, it typically means it was overheated or moisture got in. Try adding a small amount of coconut oil or vegetable oil to the seized chocolate and stir gently to help smooth it out. If it doesn’t work, you may need to start over with new chocolate.
Can I Freeze These Peanut Butter Cups?
Absolutely! You can freeze the finished peanut butter cups for up to 2 months. Just make sure they are in an airtight container or tightly wrapped. When you’re ready to enjoy, let them thaw in the fridge for a couple of hours before eating.