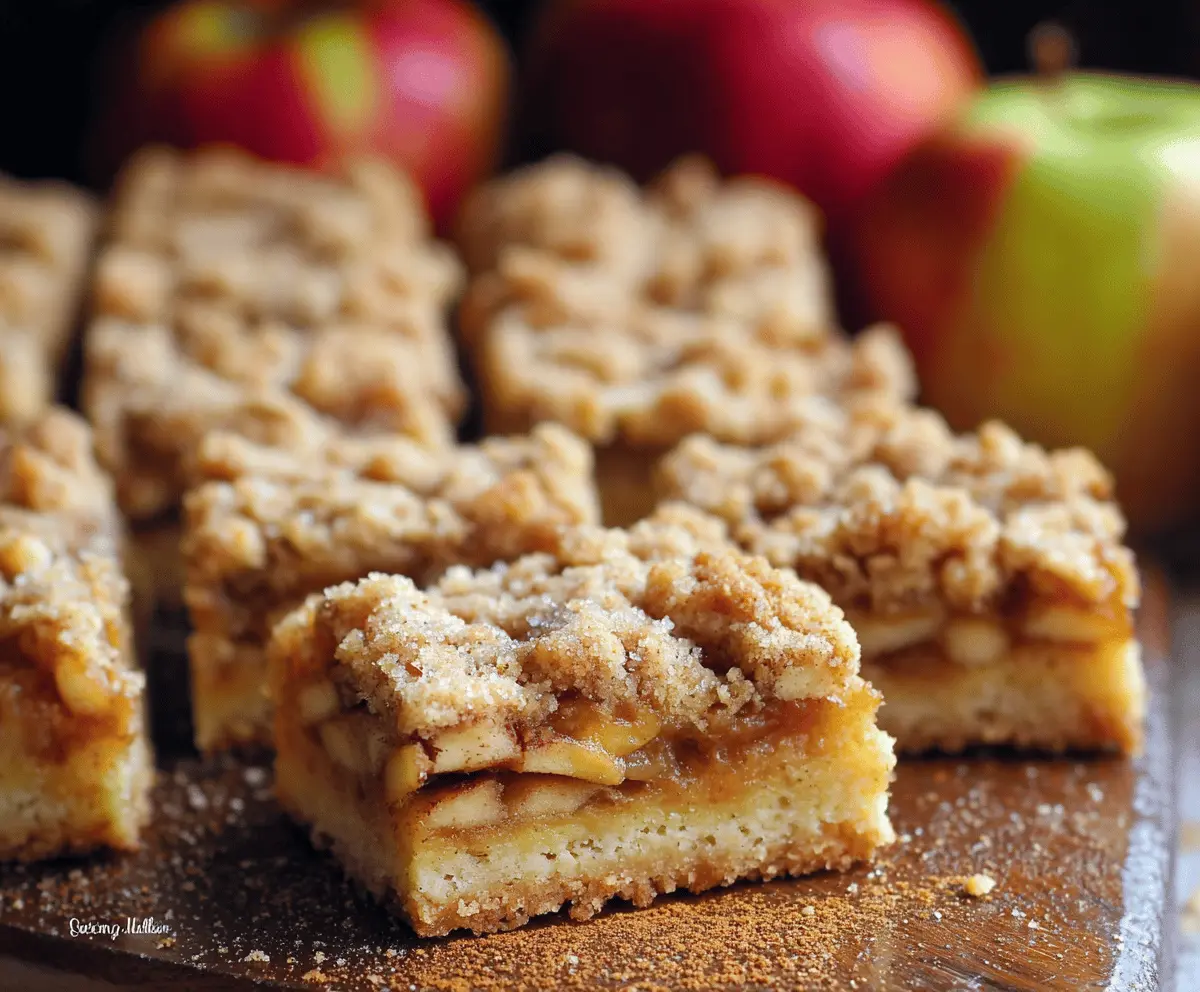
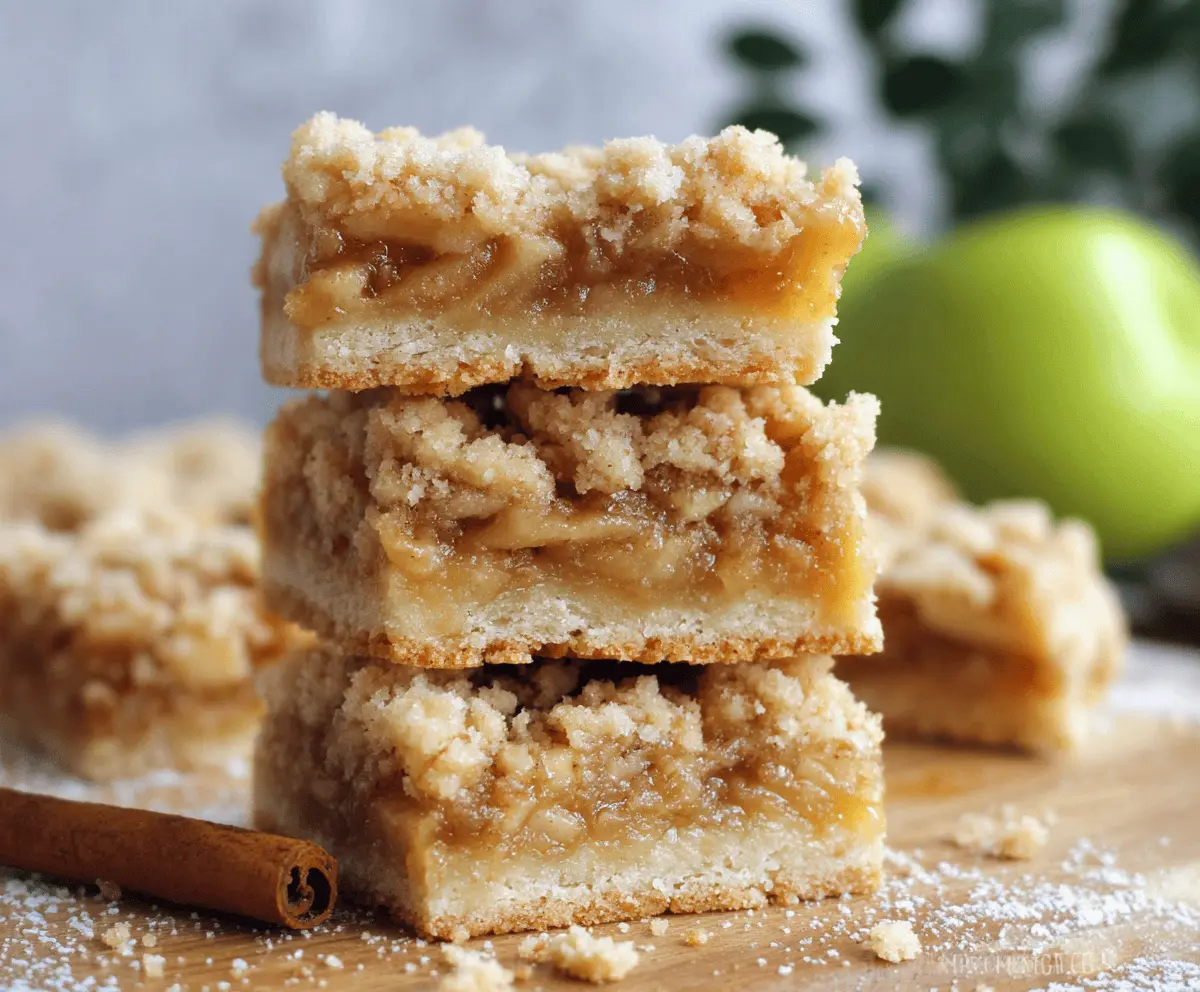
These Apple Crisp Shortbread Bars are a tasty treat! They have a crumbly shortbread base and are topped with sweet apple filling and a crunchy topping, making them a delight.
Baking these bars fills the kitchen with a warm, yummy smell that makes you want to eat them right away! I love to serve them warm with a scoop of ice cream on top—perfection!
Key Ingredients & Substitutions
Unsalted Butter: This is key for the shortbread crust’s richness. You can use salted butter but skip adding more salt to the recipe. Some also prefer using coconut oil for a dairy-free option.
Granulated Sugar: Typical for sweetness in both the crust and the apple filling. If you want a less processed option, try using coconut sugar or honey (just reduce the liquid slightly).
Granny Smith Apples: These tangy apples are perfect for baking. If you can’t find them, feel free to use Honeycrisp or Fuji apples for a sweeter flavor, or mix different types for added depth.
Rolled Oats: Used in the crumb topping for crunch. Quick oats can be a substitute if you prefer smaller pieces, but stick with rolled oats for texture.
How Do I Make the Perfect Shortbread Crust?
The shortbread crust sets the stage for these bars, so getting it right is important. It should be buttery and firm, ready to hold those juicy apples.
- Use room temperature butter for easy mixing. Cream it well with sugar until fluffy.
- Don’t overwork your dough after adding flour; mix just until combined to keep it tender.
- Press the dough evenly into the pan, making sure to reach all corners for even baking.
- It’s okay if the edges are a little thicker; just check around the 10-minute mark to avoid overbaking.
How to Make Apple Crisp Shortbread Bars
Ingredients You’ll Need:
For the Shortbread Crust:
- 1 cup unsalted butter, softened
- 1/2 cup granulated sugar
- 2 cups all-purpose flour
- 1/4 teaspoon salt
For the Apple Filling:
- 4 cups peeled and thinly sliced apples (Granny Smith preferred)
- 1/3 cup granulated sugar
- 1 teaspoon ground cinnamon
- 2 teaspoons lemon juice
- 2 teaspoons cornstarch
For the Crumb Topping:
- 1/4 cup unsalted butter, softened
- 1/4 cup brown sugar, packed
- 1/2 cup all-purpose flour
- 1/2 cup rolled oats
- 1/2 teaspoon ground cinnamon
Optional Garnish:
- Powdered sugar for dusting
- Cinnamon stick for decoration
How Much Time Will You Need?
This recipe takes about 20 minutes to prepare and around 55 minutes to bake. After baking, let the bars cool completely before slicing them into squares. So, set aside about 1 hour and 15 minutes in total for making this delicious treat!
Step-by-Step Instructions:
1. Preheat the Oven:
Start by preheating your oven to 350°F (175°C). Prepare a 9×13 inch baking pan by lining it with parchment paper, allowing some overhang. This will make it super easy to lift the bars out later!
2. Making the Shortbread Crust:
In a large mixing bowl, cream together the softened butter and granulated sugar until the mixture is light and fluffy. Next, add the flour and salt, mixing until just combined—don’t overmix! Press this dough evenly into the bottom of your prepared pan to create a solid crust layer.
3. Baking the Crust:
Place the shortbread crust in the oven and bake for about 15 minutes. You want it to be set and just starting to turn a light golden color. Once baked, remove it from the oven and set aside to cool slightly.
4. Preparing the Apple Filling:
While the crust cools, grab a medium bowl and combine the sliced apples with granulated sugar, ground cinnamon, lemon juice, and cornstarch. Toss everything together to ensure the apples are well-coated with the mixture.
5. Adding the Apple Filling:
Evenly spread the apple mixture over the warm shortbread crust, making sure to distribute it well for even flavor in every bite.
6. Making the Crumb Topping:
In another bowl, mix together the softened butter, brown sugar, flour, oats, and cinnamon until the mixture resembles crumbs. This will create a delicious topping for your Apple Crisp Bars.
7. Topping the Bars:
Sprinkle the crumb topping over the apple layer evenly. Don’t worry if it doesn’t cover everything perfectly; it will bake up beautifully!
8. Baking the Assembled Bars:
Return your assembled creation to the oven and bake for about 40-45 minutes. You’ll want the topping to be golden brown and the filling to bubble nicely.
9. Cooling and Serving:
Once baked, remove the bars from the oven and allow them to cool completely in the pan before cutting them into squares. If you’d like, dust the top with some powdered sugar right before serving for a lovely touch. Optionally, you can garnish with a cinnamon stick for extra flair!
10. Enjoy:
Serve these bars warm or at room temperature, and for an extra treat, try them with a scoop of vanilla ice cream or a dollop of whipped cream. Enjoy your delicious Apple Crisp Shortbread Bars!
Can I Use Different Types of Apples?
Absolutely! While Granny Smith apples are recommended for their tartness and baking quality, you can use other varieties like Honeycrisp or Fuji. A mix of apples also adds great flavor and texture!
How Can I Store Leftovers?
Store any leftover bars in an airtight container at room temperature for up to 3 days. For longer storage, you can refrigerate them for up to a week. If you want to keep them for an even longer time, they freeze well for up to 3 months—just wrap them tightly in plastic wrap and then in foil!
Can I Make These Bars Gluten-Free?
Yes! You can substitute all-purpose flour with a gluten-free blend that’s suitable for baking. Just ensure that all other ingredients, like oats, are gluten-free as well!
What Should I Serve with the Bars?
These Apple Crisp Shortbread Bars are delicious on their own, but they pair wonderfully with a scoop of vanilla ice cream or a dollop of whipped cream. Drizzling some caramel sauce on top can also elevate the flavor!