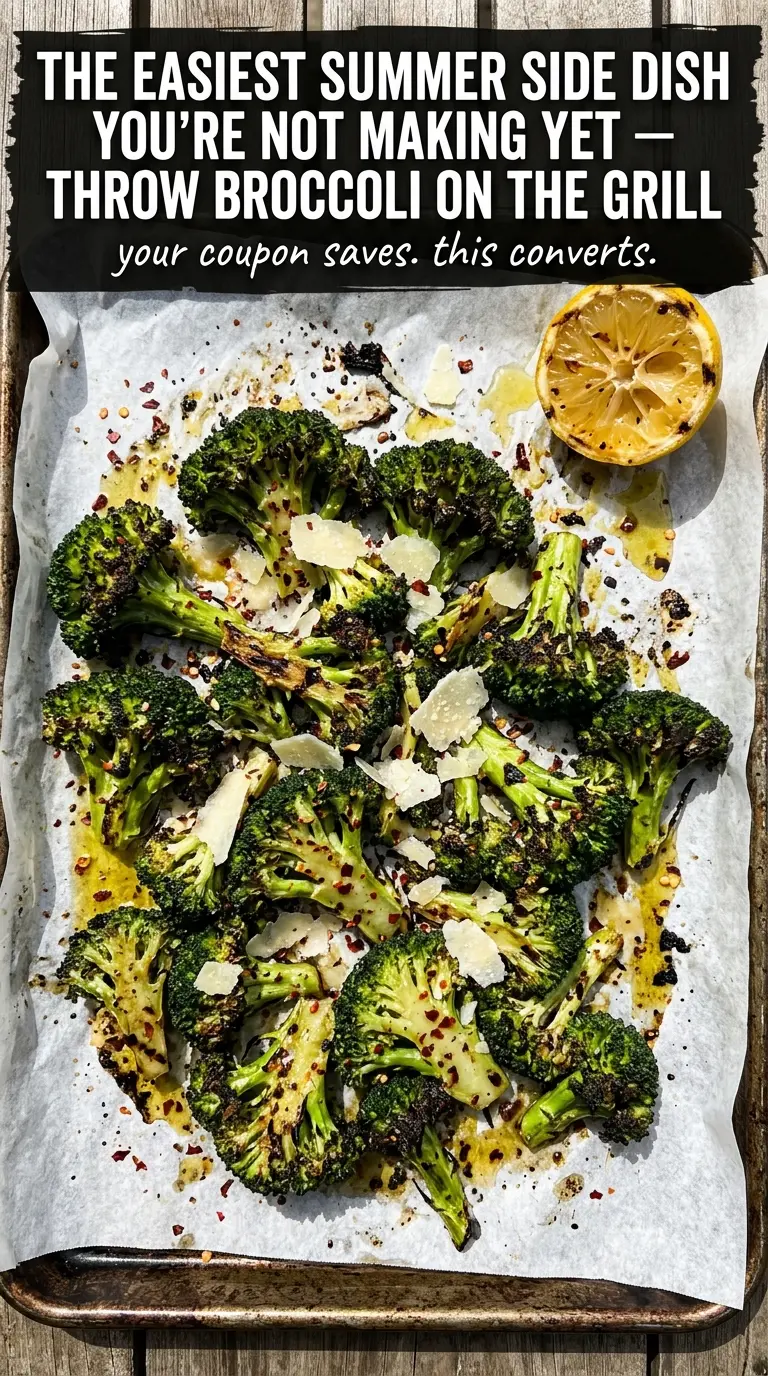
Charred broccoli with crisp, browned edges and a tender bite is the kind of side dish that disappears before the main course gets half the attention. Grilling broccoli gives it a deep, smoky flavor you just can’t get from steaming or roasting alone, and the lemon-garlic finish keeps it bright instead of heavy.
The trick is giving the florets a short blanch first so they cook through before the outside scorches. That little head start matters. It keeps the stems tender, helps the florets char instead of just drying out, and gives you broccoli that tastes grilled on purpose, not accidentally burnt.
Below, I’ve included the small details that make this work: how dry the broccoli needs to be before it hits the grill, why the lemon goes on before and after cooking, and what to do if you want extra crisp edges without losing the fresh snap in the stems.
The florets got those perfect charred edges without turning mushy, and the lemon-garlic coating tasted fresh even after grilling. I served it with chicken and my husband kept picking at the leftovers straight from the pan.
Save this grilled broccoli for the nights when you want crisp char, lemon, and garlic on one simple side dish.
The Secret to Broccoli That Charred, Not Soggy
The biggest mistake with grilled broccoli is putting raw florets straight onto the grate and hoping for the best. Broccoli cooks unevenly: the stems stay stubborn while the tops dry out and scorch. A quick blanch solves that by starting the interior cooking before the grill adds color and smoke.
Drying the broccoli after blanching matters just as much. If the florets go on wet, they steam first and the grill marks suffer. You want the broccoli lightly coated in oil, not dripping, so the edges can blister and the garlic can toast instead of burning into bitterness.
- Blanching first — This gives the stems a head start and keeps the finished broccoli tender all the way through.
- Olive oil — It helps conduct heat, prevents sticking, and carries the garlic and lemon zest across every floret.
- Garlic — Fresh minced garlic gives the best punch here, but it needs the oil coating and the blanching step to keep it from scorching.
- Lemon juice and zest — Zest goes in before grilling for aroma; juice adds brightness at the end and keeps the broccoli tasting fresh.
What Each Ingredient Is Actually Doing in This Dish
- Broccoli — Large florets hold up better on the grill than tiny pieces. If the florets are too small, they’ll slip through the grate or cook before they get any char.
- Olive oil — Use enough to coat the broccoli evenly. This isn’t the place for a heavy hand, but skimping leaves you with dry, uneven browning.
- Garlic — Fresh garlic brings the dish to life, but it can burn fast over direct heat. The blanching step and the oil both protect it.
- Lemon zest and juice — Zest gives you the bright citrus aroma that survives the grill. Juice wakes everything up at the end, especially after the broccoli has taken on some smoke.
- Parmesan — Optional, but it adds salt and a nutty finish. If you use it, add it after grilling so it melts lightly instead of disappearing into the flames.
Getting the Char Right Without Overcooking the Florets
Blanching for a Head Start
Drop the broccoli into boiling water for just 2 minutes, then drain it well. You’re not cooking it through here; you’re loosening the stems enough that the grill only has to finish the job. If you skip this step, the outside will darken before the inside is tender. Let the florets sit long enough to steam off excess water before seasoning.
Coating for the Grill
Toss the broccoli with olive oil, garlic, lemon zest, lemon juice, salt, and pepper until every floret looks lightly coated. The broccoli should glisten, not pool. If there’s too much liquid in the bowl, the vegetables will steam on the grill instead of sear, so give them a quick shake in a colander if needed before they go over the heat.
Grilling to Build the Edge
Lay the florets directly on a medium-high grill and leave them alone long enough to take on color. After 4 to 5 minutes, they should release more easily and show deep brown spots before you turn them. If they stick hard, they’re not ready yet. Turn them once and let the second side char until the stems are tender and the tips are crisp.
Finishing While It’s Hot
Move the broccoli to a platter right away and finish with red pepper flakes and Parmesan if you’re using it. The last squeeze of lemon goes on best after grilling, when the heat can carry the scent without flattening it. Serve it immediately while the edges are crisp. Grilled broccoli loses that snap as it sits.
Three Ways to Work This Grilled Broccoli Into Your Dinner Plan
Dairy-Free Finish
Skip the Parmesan and finish with extra lemon zest and a pinch of flaky salt. You’ll lose the salty, nutty edge, but the broccoli stays clean, bright, and fully dairy-free.
No Grill, Same Flavor
Use a very hot grill pan or cast-iron skillet on the stove and cook the florets in a single layer. You’ll still get browned edges and garlic-lemon flavor, just with a little less smoke and a little more control.
Make It Spicier
Add the red pepper flakes before grilling instead of at the end if you want the heat to mingle with the oil and garlic. That gives the broccoli a deeper, warmer spice instead of just a sharp finish on top.
Storage and Reheating
- Refrigerator: Store leftovers in an airtight container for up to 3 days. The char softens a bit, but the flavor stays good.
- Freezer: It doesn’t freeze well. The broccoli turns soft and watery after thawing, so this is best made fresh.
- Reheating: Reheat in a hot skillet or under the broiler for a few minutes until warmed through. The common mistake is microwaving it too long, which wipes out the char and turns the florets limp.
Answers to the Questions Worth Asking

Grilled Broccoli
Ingredients
Equipment
Method
- Bring a pot of water to a boil and blanch the broccoli florets for 2 minutes to loosen the edges for better charring.
- Drain the florets well and let them steam-dry briefly so they grill instead of steam.
- Toss the broccoli with olive oil, minced garlic, lemon zest, lemon juice, salt, and black pepper until evenly coated and glossy.
- Arrange the seasoned florets in a single layer on a sheet pan to prevent clumping before grilling.
- Preheat the grill over medium-high heat, then grill the broccoli for 4-5 minutes per side until charred and tender with visible dark grill marks.
- Flip only once during cooking so the edges develop crisp char rather than steaming.
- Transfer the charred broccoli to a serving platter and sprinkle with red pepper flakes for heat.
- Finish with Parmesan cheese to add a salty, nutty topping right before serving.