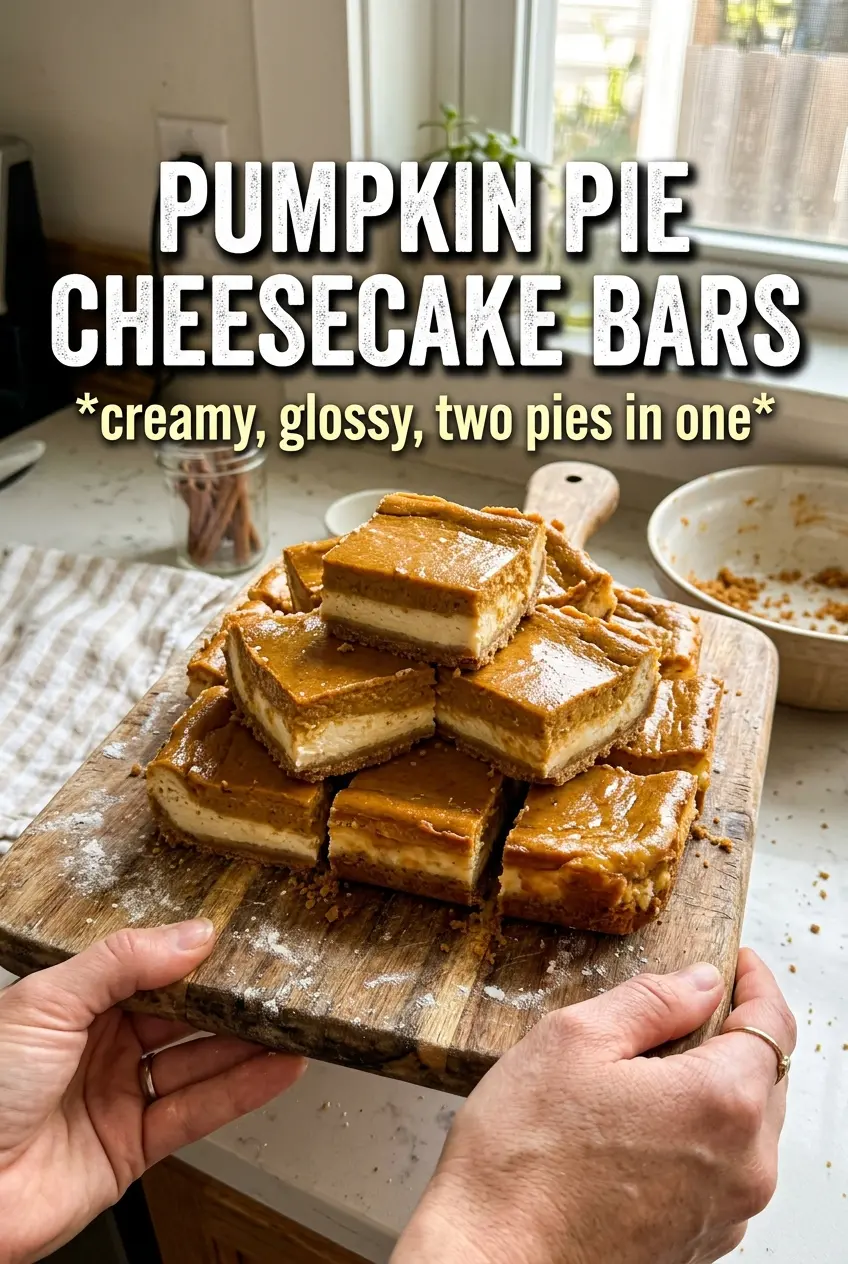
Pumpkin pie cheesecake bars hit the sweet spot between two desserts that already know how to work a crowd. You get a buttery gingersnap crust, a thick cheesecake layer, and that warm pumpkin swirl running through the middle so every bite lands with a little tang, a little spice, and a clean creamy finish. Cut into neat bars, they hold together beautifully and still taste like the kind of dessert people keep sneaking back to for “just one more sliver.”
The part that makes this version worth making is the texture contrast. The crust gets a short bake before the filling goes in, which keeps it from turning soft under the cheesecake. The filling itself stays smooth because the cream cheese gets beaten with the sugars first, then the eggs go in one at a time. That order matters. If you rush the mixing or use cream cheese that’s still cold in the center, you’ll end up with little lumps that never quite disappear.
Below you’ll find the swirl method that gives these bars their marbled look without muddying the layers, plus the chilling time you really need for clean slices. If you’ve ever had cheesecake bars fall apart on the plate, the notes here will help with that too.
The gingersnap crust stayed crisp even after chilling, and the pumpkin swirl baked up creamy instead of dense. I cut them after four hours and the squares held their shape perfectly.
Pumpkin pie cheesecake bars with that crisp gingersnap base are the kind of dessert worth keeping on hand for holidays, potlucks, and the quiet slice you cut for yourself later.
The Crust Needs a Head Start, or It Turns Soft
The biggest mistake with cheesecake bars is treating the crust like it can survive under raw filling and still keep its snap. It can’t. Gingersnap crumbs are buttery and absorbent, so that first 10-minute bake is what sets the base and keeps the bars from eating like pudding on a soggy cookie layer. You want the crust to look slightly darker and smell toasted before the filling goes in.
The filling bakes more evenly when the pan is lined well and the crust is packed into a firm, level layer. Uneven pressure makes thin spots that get too dark at the edges while the center is still soft. Press it firmly with the bottom of a measuring cup, not your fingertips, so the layer stays compact all the way across.
- Gingersnap crumbs — These bring the spice and a dry, sandy texture that holds up under cheesecake better than a softer cookie crumb. If you swap in graham crackers, the bars will still work, but the flavor turns milder and less autumn-spiced.
- Melted butter — This is what binds the crust and helps it set after baking. Use the full amount so the crust slices cleanly; too little butter leaves it crumbly and loose.
- Cream cheese — Full-fat brick cream cheese is the backbone here. Tub-style cream cheese stays too soft and can make the filling loose, so stick with blocks and let them soften at room temperature before mixing.
- Pumpkin puree — Use plain pumpkin puree, not pumpkin pie filling. Pie filling already has sugar and spice mixed in, which throws off the balance and can make the bars too sweet and too loose.
What Each Ingredient Is Actually Doing in This Recipe
- Primary ingredient (the star) — Quality matters most. Choose the best you can find.
- Cooking medium (oil, butter, or broth) — This carries flavors and prevents dryness.
- Seasonings (salt, pepper, spices, herbs) — Layer flavors so nothing overpowers. Build depth gradually.
- Aromatics (garlic, onion, herbs) — Cook with fat to bloom flavors. Become the foundation.
- Supporting ingredients — Complement the main ingredient without overpowering it.
- Sauce or liquid (if applicable) — Brings flavors together. Balance richness with acid.
- Acid (lemon, vinegar, wine, or other) — Brightens and prevents flat-tasting results.
- Final finish (garnish, glaze, or sauce) — Prevents one-dimensional taste and adds visual appeal.
Building the Swirl Without Blending the Two Fillings Together
Getting the base batter smooth first
Beat the cream cheese with both sugars until the mixture looks completely smooth and a little glossy, with no visible grain from the sugar. That’s the point where the structure is ready for the eggs. Add them one at a time and mix just until each one disappears; overmixing at this stage pulls in too much air and can cause the bars to puff and crack as they bake.
Splitting the batter cleanly
Once the sour cream and vanilla go in, divide the batter in half before adding the pumpkin mixture. That keeps the pumpkin flavor concentrated in one portion instead of tinting the whole pan an even beige. Stir the pumpkin, spice, and cinnamon into one half just until combined. If you keep mixing after it looks even, the batter loosens and the swirl gets muddy instead of marbled.
Baking to the just-set stage
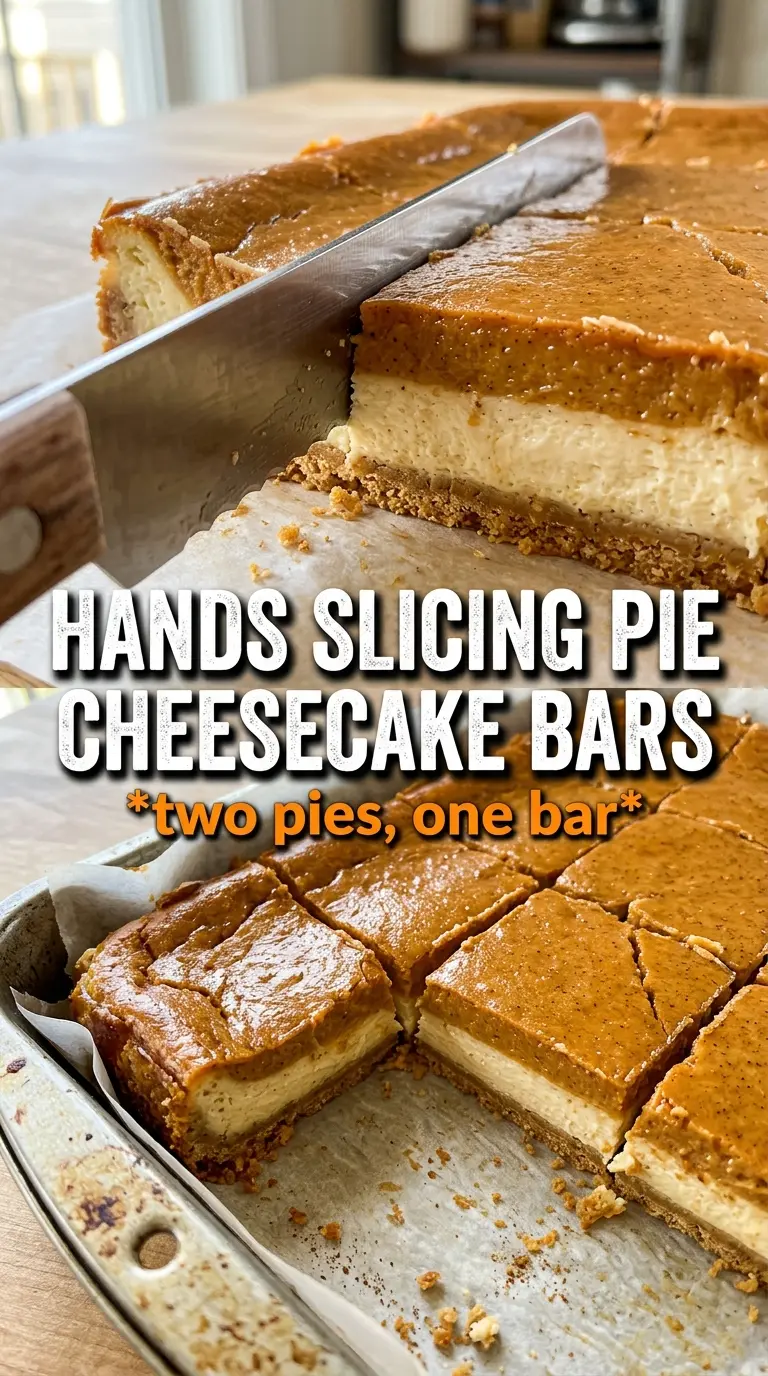
Alternate spoonfuls of each batter over the crust, then drag a knife through the top in broad, shallow sweeps. Don’t over-swirl or the layers blend into one color. Bake until the edges look set and the center still has the faintest wobble when you nudge the pan. If the center looks completely firm in the oven, it’s already overbaked and the texture will be dry once chilled.
Make them gluten-free with a crunchy cookie crumb
Use gluten-free gingersnap-style cookies or a gluten-free graham cracker substitute for the crust. The texture stays crisp as long as the crumbs are finely ground and packed tightly, though the flavor will be a little less warm and peppery if your cookie base is milder.
Swap the dairy without losing the cheesecake feel
Use plant-based cream cheese and a thick dairy-free sour cream for a dairy-free version. The bars will still chill into neat squares, but the tang is usually a little softer, so taste the filling before baking and add a pinch more spice if needed.
Turn them into a more traditional pumpkin cheesecake bar
Instead of swirling, mix all the pumpkin into the full batter and pour it over the crust in one layer. The result is smoother and more uniform, with less visual contrast but a slightly richer pumpkin flavor in every bite.
Storage and Reheating
- Refrigerator: Store covered for up to 5 days. The crust stays best in the first 2 to 3 days, while the filling gets even firmer as it chills.
- Freezer: These freeze well. Wrap the cut bars individually, then place them in a sealed container for up to 2 months. Thaw in the refrigerator so the filling doesn’t weep.
- Reheating: Serve chilled or let a bar sit at room temperature for 10 to 15 minutes. Don’t microwave cheesecake bars unless you want the filling to turn soft and the crust to lose its texture.