Overnight cider pumpkin waffles come out with crisp edges, a tender center, and that deep bakery-style flavor that makes plain waffles feel flat by comparison. The batter does its best work while you sleep, which means the next morning starts with a bowl of something already developed, lightly tangy, and ready to puff up in the waffle iron.
The trick is in the yeast batter. Apple cider brings a mellow fruitiness that you don’t get from milk alone, and the pumpkin puree gives the waffles body without making them heavy. The overnight rest builds flavor and takes the rush out of breakfast, while the baking soda added in the morning gives the batter a fresh lift right before it hits the heat.
Below you’ll find the small details that matter most: how warm the cider should be, why the batter looks looser than a standard waffle mix, and how to get that cider caramel thick enough to drizzle without turning grainy.
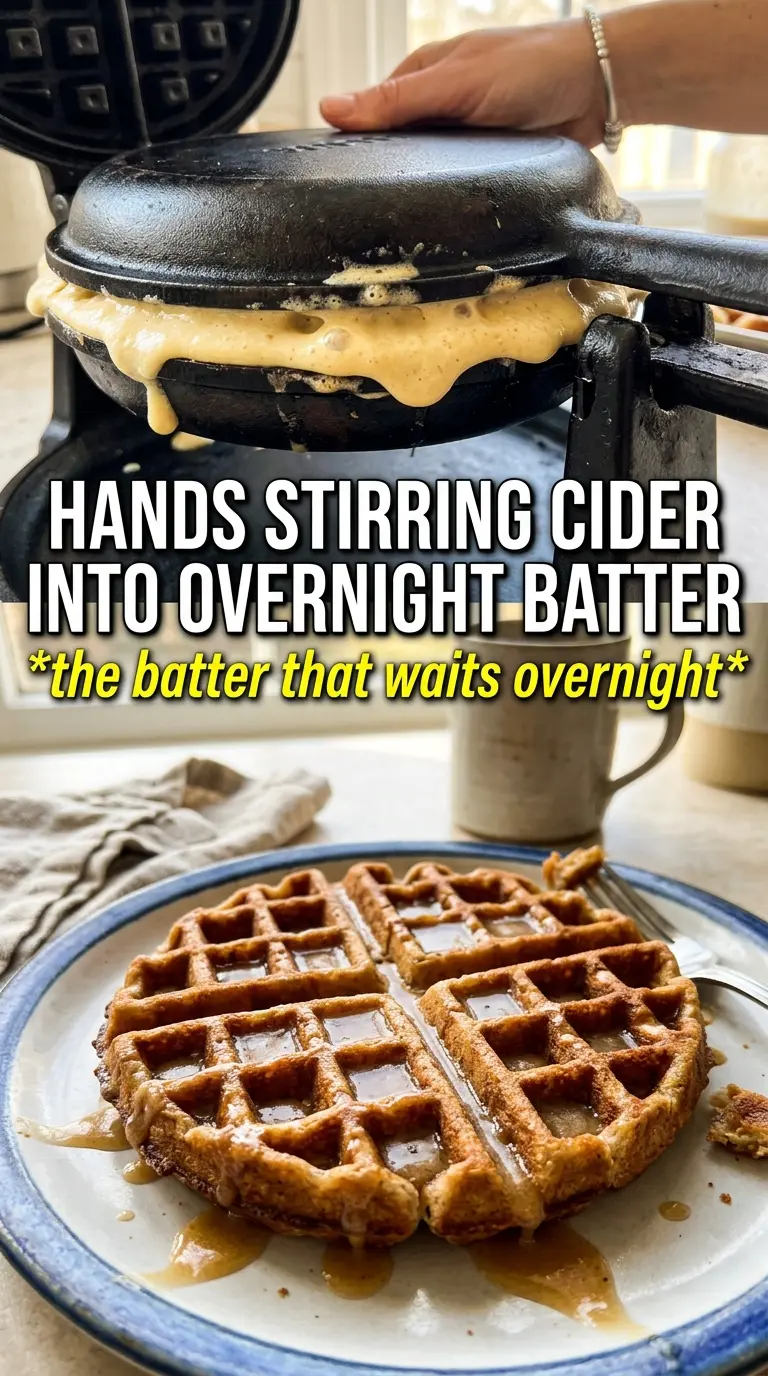
The waffles came out crisp on the outside and fluffy inside, and the apple cider caramel thickened up perfectly after about 5 minutes. My kids kept asking for “the pumpkin ones with the sauce” all weekend.
Save these overnight cider pumpkin waffles for a make-ahead breakfast with crisp edges, pumpkin spice warmth, and a cider caramel drizzle.
The Overnight Rest Is What Gives These Waffles Their Lift
Yeasted waffle batter behaves differently from the quick-batter version most people know. The overnight rest gives the flour time to hydrate and the yeast time to build flavor, which is why these waffles taste deeper and less one-note than a standard pumpkin waffle. If you rush that step, you’ll still get breakfast, but you won’t get the airy interior and lightly tangy finish that make this recipe worth the extra planning.
The batter should look loose and a little puffy the next morning. That’s what you want. If it seems thick enough to stand up in peaks, the waffles usually bake up dense instead of crisp, because the batter can’t spread evenly in the iron. The baking soda goes in at the end to wake up the batter right before cooking, so the waffles rise fast and brown well.
- Instant yeast — This gives the batter its overnight rise without the fuss of blooming separate yeast in water. Active dry yeast can work, but it may need a few extra minutes to get going.
- Warm cider and milk — Warm, not hot. If the liquid feels steaming, it can kill the yeast. You want it comfortably warm to the touch, like a mug you’d drink right away.
- Pumpkin puree — Use pure pumpkin, not pumpkin pie filling. The puree adds body and moisture without extra sugar or spices throwing off the balance.
- Melted butter — This brings richness and helps the waffles brown. If you swap in oil, the waffles will still work, but they’ll lose some of that warm, buttery finish.
What Each Ingredient Is Actually Doing in This Recipe
- Primary ingredient (the star) — Quality matters most. Choose the best you can find.
- Cooking medium (oil, butter, or broth) — This carries flavors and prevents dryness.
- Seasonings (salt, pepper, spices, herbs) — Layer flavors so nothing overpowers. Build depth gradually.
- Aromatics (garlic, onion, herbs) — Cook with fat to bloom flavors. Become the foundation.
- Supporting ingredients — Complement the main ingredient without overpowering it.
- Sauce or liquid (if applicable) — Brings flavors together. Balance richness with acid.
- Acid (lemon, vinegar, wine, or other) — Brightens and prevents flat-tasting results.
- Final finish (garnish, glaze, or sauce) — Prevents one-dimensional taste and adds visual appeal.
How to Wake Up the Batter and Get a Deep Golden Waffle
Building the Overnight Batter
Whisk the flour, sugar, yeast, spices, and salt first so the yeast is evenly scattered through the dry mix. Stir in the warm cider, warm milk, pumpkin puree, and melted butter until the batter is smooth, but don’t beat it aggressively. A few small lumps are fine; overmixing tightens the batter and makes the finished waffles less tender. Cover the bowl loosely and refrigerate it overnight so the yeast can work slowly without overflowing.
Finishing the Batter in the Morning
When you open the bowl, the batter should look expanded and a little bubbly. Stir in the eggs, vanilla, and baking soda just until combined. The batter may foam a bit when the soda hits the acidic cider and pumpkin mixture, and that’s a good sign. If you wait too long after adding the baking soda, you’ll lose that lift, so get the waffle iron hot before you stir it in.
Cooking Until the Edges Crisp
Grease the waffle iron well and use enough batter to fill the grid without flooding it. Cook until the waffles are deeply golden and release cleanly; that usually takes 4 to 5 minutes, but the visual cue matters more than the clock. If the waffle tears when you open the iron, it needs another minute. Set finished waffles on a wire rack instead of stacking them, or the steam will soften the crust you just worked for.
Reducing the Cider Caramel
Simmer the cider, brown sugar, cream, and butter until the mixture thickens and coats a spoon. Keep the heat at a steady simmer, not a hard boil, or the sugar can tighten too fast and turn grainy. You want a pourable caramel that clings to the waffles without running straight off the plate. It will thicken a little more as it cools, so pull it from the heat when it still looks slightly loose.
How to Adapt These Waffles for Different Mornings
Dairy-Free Version
Use unsweetened non-dairy milk and swap the butter for melted refined coconut oil or a neutral vegan butter. The waffles will still rise well, but the flavor will be a little cleaner and less rich, so the cider caramel matters even more for the final finish.
Make Them Gluten-Free
A good 1:1 gluten-free flour blend can replace the all-purpose flour here, but the batter may need a slightly longer rest to hydrate fully. The waffles will be a little more delicate, so let them cook until they’re deeply set before opening the iron.
Skip the Caramel When You Want Simpler Breakfast
The waffles stand on their own with a pat of butter and warm maple syrup. Without the cider caramel, the pumpkin spice flavor reads more clearly and the breakfast feels lighter, though you lose the glossy, dessert-like finish.
Storage and Reheating
- Refrigerator: Store cooked waffles for up to 3 days in an airtight container. They’ll soften a bit in the fridge, but they crisp back up well.
- Freezer: These freeze well. Cool completely, freeze in a single layer, then stack with parchment between layers and seal tightly for up to 2 months.
- Reheating: Reheat in a toaster or 375°F oven until the edges are crisp again. The mistake most people make is microwaving them, which turns the exterior rubbery and wipes out the texture you worked for.
Answers to the Questions Worth Asking

Overnight Cider Pumpkin Waffles
Ingredients
Equipment
Method
- Whisk all-purpose flour, sugar, instant yeast, pumpkin pie spice, cinnamon, and salt in a large bowl until evenly combined, with no dry spice pockets visible.
- Stir in warmed apple cider, warmed milk, pumpkin puree, and melted unsalted butter until smooth and thick, then scrape down the sides so the batter looks uniform.
- Cover the bowl loosely and refrigerate overnight for about 8 hours so the batter rises and thickens.
- Stir eggs, vanilla, and baking soda into the risen batter until smooth and slightly puffed.
- Preheat waffle iron thoroughly, then grease well so the waffles release cleanly without sticking.
- Cook waffles for 4-5 minutes until deeply golden, pulling one to confirm the edges look crisp before finishing the batch.
- Simmer apple cider caramel ingredients—apple cider, brown sugar, cream, and butter—for 5 minutes, stirring until the sauce looks glossy and thick enough to coat a spoon.
- Pour apple cider caramel over the warm waffles and serve immediately for best crispness.