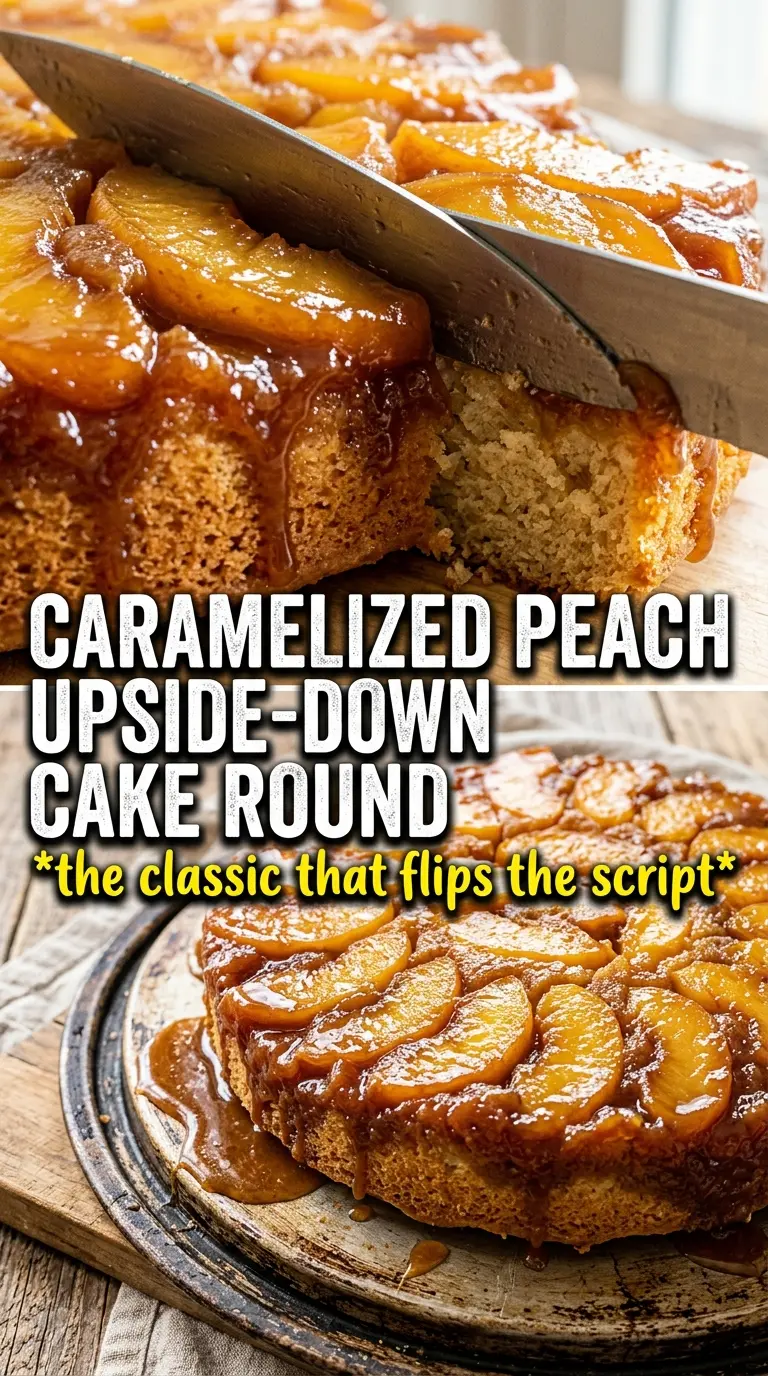
Caramelized peaches, a buttery brown sugar glaze, and a tender vanilla cake make this peach upside-down cake one of those desserts that disappears fast. The fruit bakes right into the topping, so when you flip the cake, you get glossy peach slices on top and a moist crumb underneath that holds together without feeling heavy. It looks special, but the method is straightforward enough for a weeknight bake when peaches are at their best.
The trick is building the topping before the batter goes in and giving the cake its full 10 minutes of rest after baking. That rest lets the caramel settle just enough so the peaches release cleanly instead of sticking to the pan. I also like using a mix of milk or sour cream in the batter depending on what’s in the fridge; sour cream gives a slightly richer crumb, while milk keeps it a little lighter.
Below, I’ll walk through the part that matters most: how to get the inversion right so the peach pattern stays intact, plus a few swaps if your peaches are extra juicy or you need to adjust the dairy.
The peach topping came out glossy and the brown sugar layer set up perfectly once I waited the full 10 minutes. It flipped cleanly, and the cake stayed so moist under all those caramelized peaches.
Save this caramelized peach upside-down cake for the day you want a dessert that flips out with glossy peaches and a soft vanilla crumb.
The part that keeps the peaches from sticking to the pan
Most upside-down cakes fail at the flip, not the bake. The fruit looks beautiful going in, then half the topping stays welded to the pan because the caramel hardened too long or the cake cooled too much before turning it out. This version works because the butter-brown sugar layer stays thin enough to melt into a glaze, and the 10-minute rest gives the caramel time to loosen without setting solid.
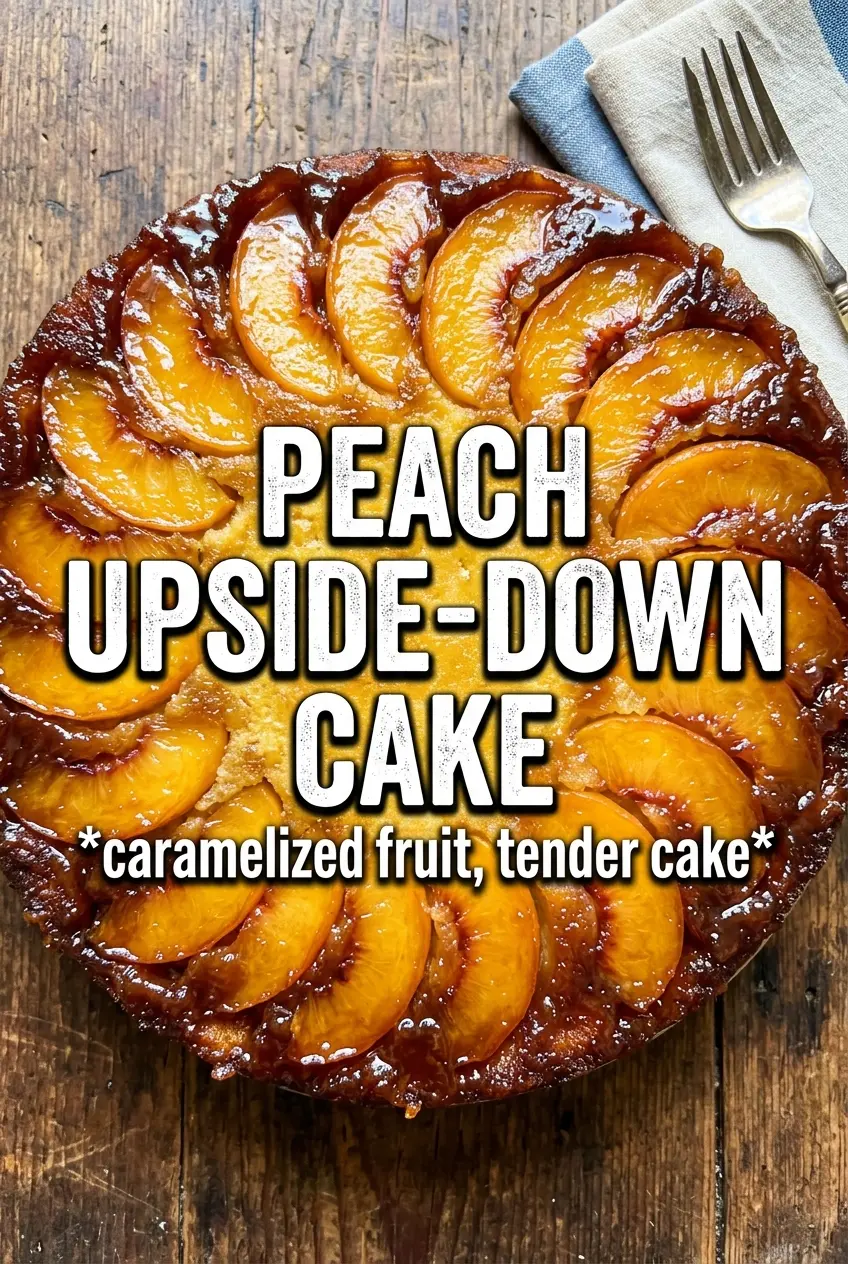
Peach slices also matter more than people think. If they’re cut too thick, the cake can look lumpy and the fruit won’t settle into that smooth ring pattern. If they’re too thin, they can collapse and disappear into the topping. Aim for even slices that overlap slightly, and arrange them snugly so they hold their shape once the batter bakes around them.
- Brown sugar — This is what turns the topping into caramel, not just a sweet layer. Packed brown sugar gives the deepest glaze, and light or dark both work; dark brown sugar just pushes the flavor a little more molasses-rich.
- Butter — Melted butter coats the pan and melts the sugar into a glossy base. There isn’t a real substitute here if you want that classic upside-down finish, though a good plant butter will work in a pinch for a dairy-free version.
- Ripe peaches — You want peaches that smell fragrant and give slightly when pressed. Hard peaches bake up bland and firm, while overripe peaches can collapse into mush. If yours are very juicy, pat the slices dry so the topping doesn’t turn watery.
- Sour cream or whole milk — Sour cream makes the crumb richer and a little tighter, which helps support the fruit topping. Whole milk gives a softer, lighter cake. Both work, but don’t swap in low-fat milk if you want the same tenderness.
What Each Ingredient Is Actually Doing in This Recipe
- Primary ingredient (the star) — Quality matters most. Choose the best you can find.
- Cooking medium (oil, butter, or broth) — This carries flavors and prevents dryness.
- Seasonings (salt, pepper, spices, herbs) — Layer flavors so nothing overpowers. Build depth gradually.
- Aromatics (garlic, onion, herbs) — Cook with fat to bloom flavors. Become the foundation.
- Supporting ingredients — Complement the main ingredient without overpowering it.
- Sauce or liquid (if applicable) — Brings flavors together. Balance richness with acid.
- Acid (lemon, vinegar, wine, or other) — Brightens and prevents flat-tasting results.
- Final finish (garnish, glaze, or sauce) — Prevents one-dimensional taste and adds visual appeal.
How to build the cake so the top becomes the bottom
Melting the topping in the pan
Put the butter straight into the cake pan or cast iron skillet and let the oven melt it completely. Swirl it up the sides so the whole surface is coated, then sprinkle the brown sugar and cinnamon over the melted butter in an even layer. If you leave dry patches, the topping can bake unevenly and stick when you invert the cake.
Laying in the peaches
Arrange the peach slices in overlapping circles over the sugar mixture, starting at the outer edge and working inward. Press them lightly so they sit flat and make good contact with the caramel layer. This is the moment that creates the finished look, so keep the pattern tight and even rather than piling slices on top of each other.
Mixing the batter without beating it tough
Cream the butter and sugar until it looks pale and fluffy, then add the eggs one at a time with the vanilla. When you add the dry ingredients and milk, alternate them and stop as soon as the flour disappears. Overmixing here makes the cake dense and can squeeze out the soft crumb that balances the sticky peaches.
Flipping while the caramel is still warm
Once the cake is done, let it rest for exactly 10 minutes. Less than that and the topping can slide; much longer and the caramel starts to set hard in the pan. Run a thin knife around the edge, place a plate over the pan, and invert in one confident motion. If a peach slice sticks, lift it off the pan and set it back on top while the cake is still warm.
How to adapt this peach upside-down cake without losing the caramelized top
Dairy-free version with plant butter
Use a high-quality plant butter in place of both the pan butter and the cake butter, then keep the rest the same. You’ll still get a glossy topping and a tender crumb, though the caramel will taste a little less rich than the dairy version.
Sour cream for a denser, richer crumb
Swap the milk for sour cream if you want a tighter, more velvety cake that holds up especially well under the fruit. The cake bakes up a little richer and less airy, which is a good trade if your peaches are very juicy.
Frozen peaches when fresh aren’t at their peak
Thaw frozen peach slices completely and drain them well before arranging them in the pan. They won’t hold quite as clean a shape as fresh peaches, but they’ll still give you a sweet fruit layer if you dry them off first.
Turning this into a gluten-free cake
A good 1:1 gluten-free baking flour works here because the cake batter is simple and doesn’t rely on a lot of structure from eggs alone. Expect a slightly more delicate crumb, and let the cake cool the full 10 minutes so it doesn’t break when you invert it.
Storage and Reheating
- Refrigerator: Store covered for up to 4 days. The peaches will soften a little more, but the cake stays moist.
- Freezer: Freeze slices tightly wrapped for up to 2 months. The texture is best if you freeze individual pieces instead of the whole cake.
- Reheating: Warm slices in a 300°F oven for 10 to 12 minutes. The microwave works in a pinch, but it can turn the caramel tacky and make the crumb gummy.
Answers to the questions worth asking
Peach Upside-Down Cake
Ingredients
Equipment
Method
- Preheat oven to 350°F. Place a 9-inch round cake pan or cast iron skillet in the oven to heat.
- Melt the butter in the hot pan or skillet, then swirl to coat the bottom. Sprinkle the brown sugar and cinnamon evenly over the butter as a thin, even layer.
- Arrange peach slices in overlapping concentric circles over the brown sugar layer. Spread them out so the pattern covers the pan bottom, then set aside.
- Beat the softened butter and granulated sugar until fluffy. Stop and scrape the sides so no dry sugar remains.
- Add eggs one at a time, then mix until smooth. Mix in vanilla extract until incorporated.
- Alternately mix in the flour mixture and the milk (or sour cream), starting and ending with flour. Mix just until the batter is combined and no streaks of flour show.
- Pour the batter gently over the peach arrangement and smooth the top. Keep the peaches centered so the rings stay visible after flipping.
- Bake at 350°F for 38-42 minutes until a toothpick comes out clean. Watch for a golden top and a cake that pulls slightly away from the sides.
- Cool in the pan for exactly 10 minutes. This rest sets the caramel so it releases cleanly.
- Invert the cake onto a plate in one smooth motion, then lift the pan off. Serve warm so the amber glaze looks glossy and the peach rings are clearly defined.
- Serve warm with vanilla ice cream. Add it immediately so the caramelized peaches taste best with chilled contrast.