Golden-crispy baked taquitos with a creamy chicken filling hit that sweet spot between snack food and a real dinner. The tortillas blister at the edges, the filling stays rich and savory, and the whole pan disappears fast once it comes out of the oven. Baking them hot gives you the crunch people want from taquitos without the mess of frying.
The key is starting with softened cream cheese and warm tortillas. That filling needs to be smooth enough to spread and firm enough to stay put, and the tortillas need a little heat so they roll tightly without cracking. A generous brush or spray of oil on top is what gives the shells that deep golden finish instead of a dry, pale bake.
Below you’ll find the small details that keep these taquitos from unrolling or drying out, plus the swaps that work when you need to use what’s already in the kitchen.
The filling held together perfectly and the tortillas came out crisp all the way around, even on the seam side. I baked mine for 20 minutes and they were golden with no soggy bottoms.
Save these baked cream cheese chicken taquitos for the nights when you want a crispy, crowd-pleasing pan of Tex-Mex finger food with almost no cleanup.
The Step People Skip That Keeps Taquitos From Unrolling
The biggest reason taquitos fail in the oven is a filling that’s too loose or tortillas that were rolled cold. Once the cream cheese is soft and the chicken is mixed all the way through, the filling clings together instead of sliding out the end as it bakes. Warm tortillas matter just as much, because a cold tortilla cracks when you try to roll it tightly and that crack turns into a split in the oven.
Seam-side down is non-negotiable. It gives the roll a chance to seal while the bottom heats up, and it keeps the shape tight enough that the taquitos crisp instead of opening into little chicken logs. If you’ve ever had the ends burst, the tortilla was probably overfilled. Two to three tablespoons is the range that works here, not heaping spoonfuls.
- Softened cream cheese — This is what makes the filling creamy enough to hold together. Cold cream cheese leaves little lumps that never fully blend and make rolling harder.
- Green chiles — They add brightness and a little heat without turning the filling watery. Drain them well so they don’t loosen the mixture.
- Mexican cheese blend — It helps the filling set as it bakes and gives you those stretchy pockets when the taquitos are hot. Pre-shredded is fine here.
- Small flour or corn tortillas — Flour tortillas roll with less cracking, while corn gives a more classic taquito bite. If using corn, warm them a little longer so they stay flexible.
What Each Ingredient Is Doing Inside the Roll
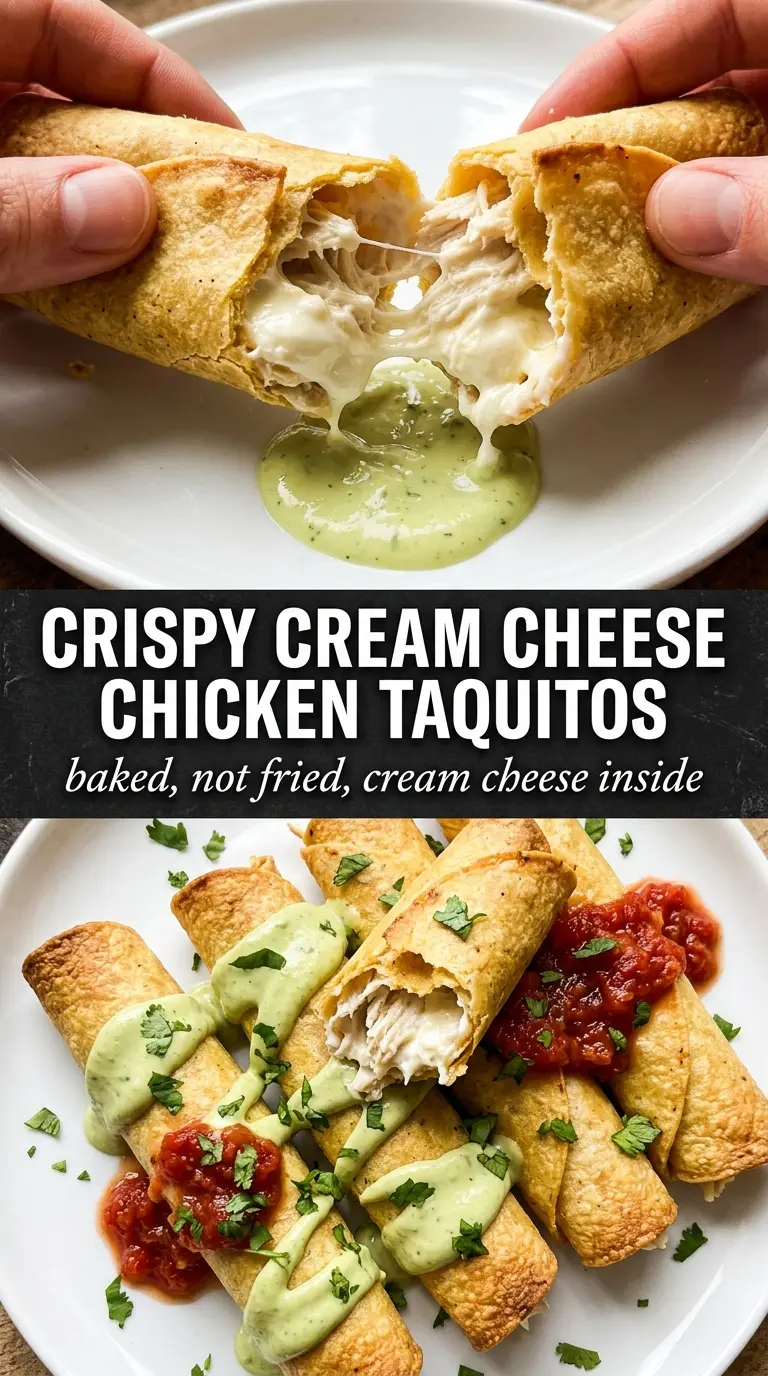
- Cooked shredded chicken — Rotisserie chicken works well here because it’s already tender and easy to shred. Chop or shred it finely so the filling packs neatly and doesn’t poke through the tortilla.
- Cream cheese — This is the binder that keeps everything rich and scoopable. Full-fat cream cheese gives the smoothest texture and the best hold.
- Mexican cheese blend — It melts into the filling and adds saltiness. If you swap in cheddar, the flavor gets sharper and the filling can turn a little less stretchy.
- Chile powder, cumin, and garlic powder — These season the filling from the inside so every bite tastes finished, not just the dipping sauce. They also keep the chicken from tasting flat once baked.
- Olive oil or cooking spray — This is what creates the crisp exterior. Without it, the tortillas dry out instead of browning.
Rolling, Brushing, and Baking Until the Edges Go Crisp
Mixing the Filling Evenly
Stir the chicken, cream cheese, shredded cheese, green chiles, and spices until every shred is coated. You want a filling that holds together when scooped, not one with pockets of plain cream cheese or clumps of chicken. If it seems stiff, let it sit for a minute; the warmth from the chicken and room-temperature cream cheese will help it loosen just enough.
Warming the Tortillas
Warm the tortillas in the microwave just until they bend without tearing. Thirty seconds is usually enough for a stack, but if they start to feel dry, cover them with a damp paper towel before heating. Cold tortillas crack as soon as you roll them, and once they crack, they leak filling onto the pan.
Rolling and Sealing the Pan
Spoon the filling down the center, roll it up snugly, and set each taquito seam-side down on the parchment. Don’t overstuff them; the tortilla should wrap around the filling in one clean turn or two, not bulge open at the ends. Give them a little space on the pan so the hot air can move around them and crisp all sides.
Finishing to a Deep Golden Color
Brush or spray the tops generously with oil before baking. That thin layer is what turns the surface crisp and gives the tortilla those browned, blistered spots. Bake until the taquitos are deeply golden and the edges feel firm when nudged with tongs. If they still look pale in the center, give them a few more minutes; pale taquitos usually taste soft, not crunchy.
How to Adapt These Taquitos for Different Kitchens
Use Corn Tortillas for a More Traditional Taquito Bite
Corn tortillas give you a more classic taquito flavor and a slightly sturdier bite once baked, but they crack more easily than flour. Warm them well and keep them covered while you roll so they stay flexible. The result is a little less soft and a little more toasty, which works beautifully with the creamy filling.
Make Them Gluten-Free With Corn Tortillas
This is an easy gluten-free swap as long as the corn tortillas are soft enough to roll. Heat them a little longer than you think you need, and stack them under a towel so they don’t dry out. The texture turns a bit more rustic and crisp at the edges, which is a good trade here.
Swap in Pepper Jack for More Heat
Pepper Jack melts smoothly and adds a gentle kick without changing the structure of the filling. Use it in place of the Mexican cheese blend if you want the taquitos to taste sharper and a little spicier. The filling will still hold together, but the flavor lands hotter and more savory.
Make the Filling Ahead for Faster Assembly
The filling can be mixed up to a day ahead and kept covered in the refrigerator. In fact, a chilled filling is often easier to roll because it’s thicker and less sticky. Let it sit at room temperature for a few minutes before assembling so it spreads without tearing the tortillas.
Storage and Reheating
- Refrigerator: Store leftovers in an airtight container for up to 4 days. The tortillas soften, but the filling stays flavorful.
- Freezer: Freeze baked taquitos on a sheet pan first, then transfer them to a bag. They freeze well for up to 2 months, though the shell won’t be quite as crisp after thawing.
- Reheating: Reheat in a 400°F oven or air fryer until the outside crisps back up. The common mistake is microwaving them, which makes the tortillas chewy and soft instead of crunchy.
Questions I Get Asked About This Recipe
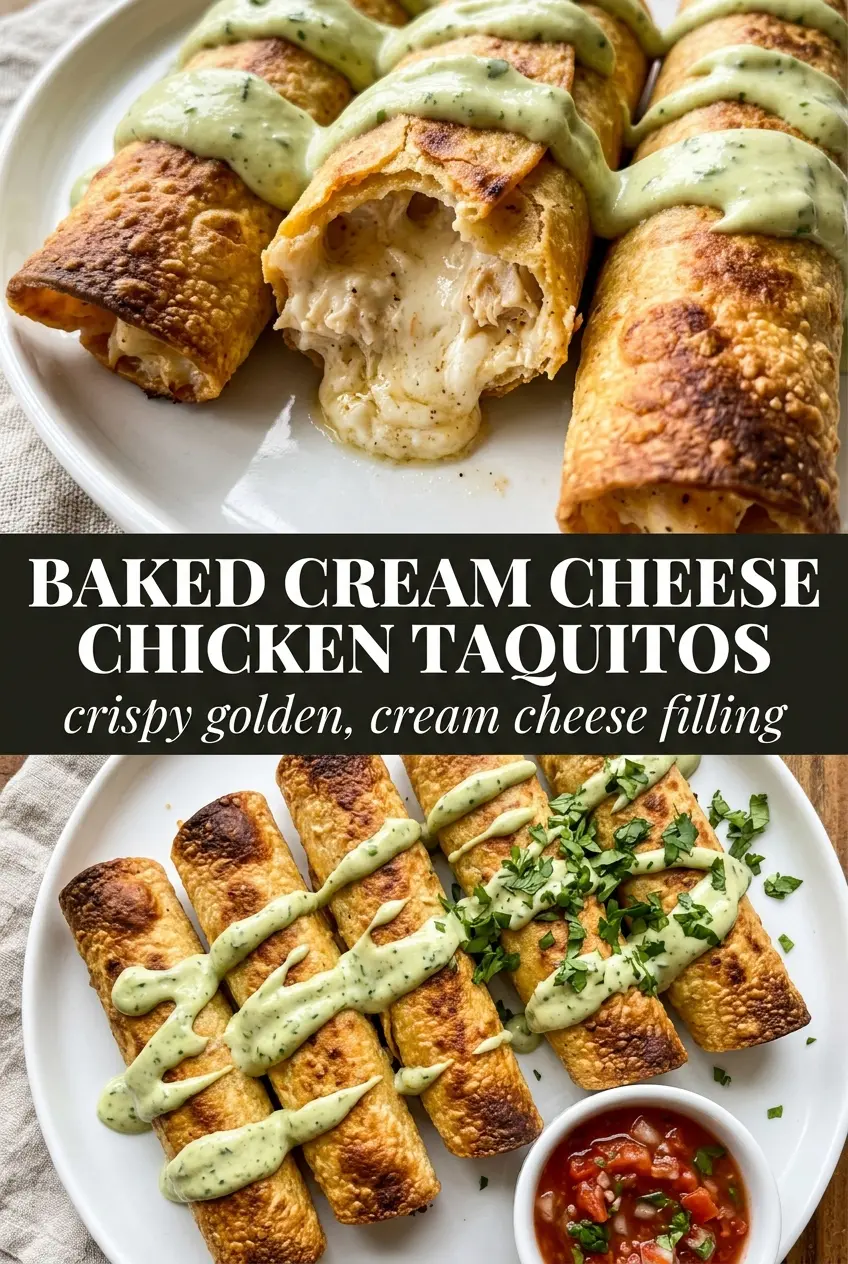
Baked Cream Cheese Chicken Taquitos
Ingredients
Equipment
Method
- Preheat oven to 425°F and line a sheet pan with parchment paper for easy release.
- Mix softened cream cheese, shredded cooked chicken, Mexican cheese blend, diced green chiles, cumin, chili powder, garlic powder, salt, and black pepper until fully combined.
- Warm tortillas in the microwave for 30 seconds to make them pliable, watching for soft, foldable texture without drying out.
- Place 2–3 tablespoons of filling along the center of each tortilla and roll tightly, placing seam-side down on the sheet pan.
- Brush or spray the tops generously with olive oil for browning and crisp edges.
- Bake for 18–22 minutes at 425°F until deeply golden and crispy, with bubbly melted cheese visible at the openings.
- Serve immediately with salsa verde, sour cream, and guacamole.