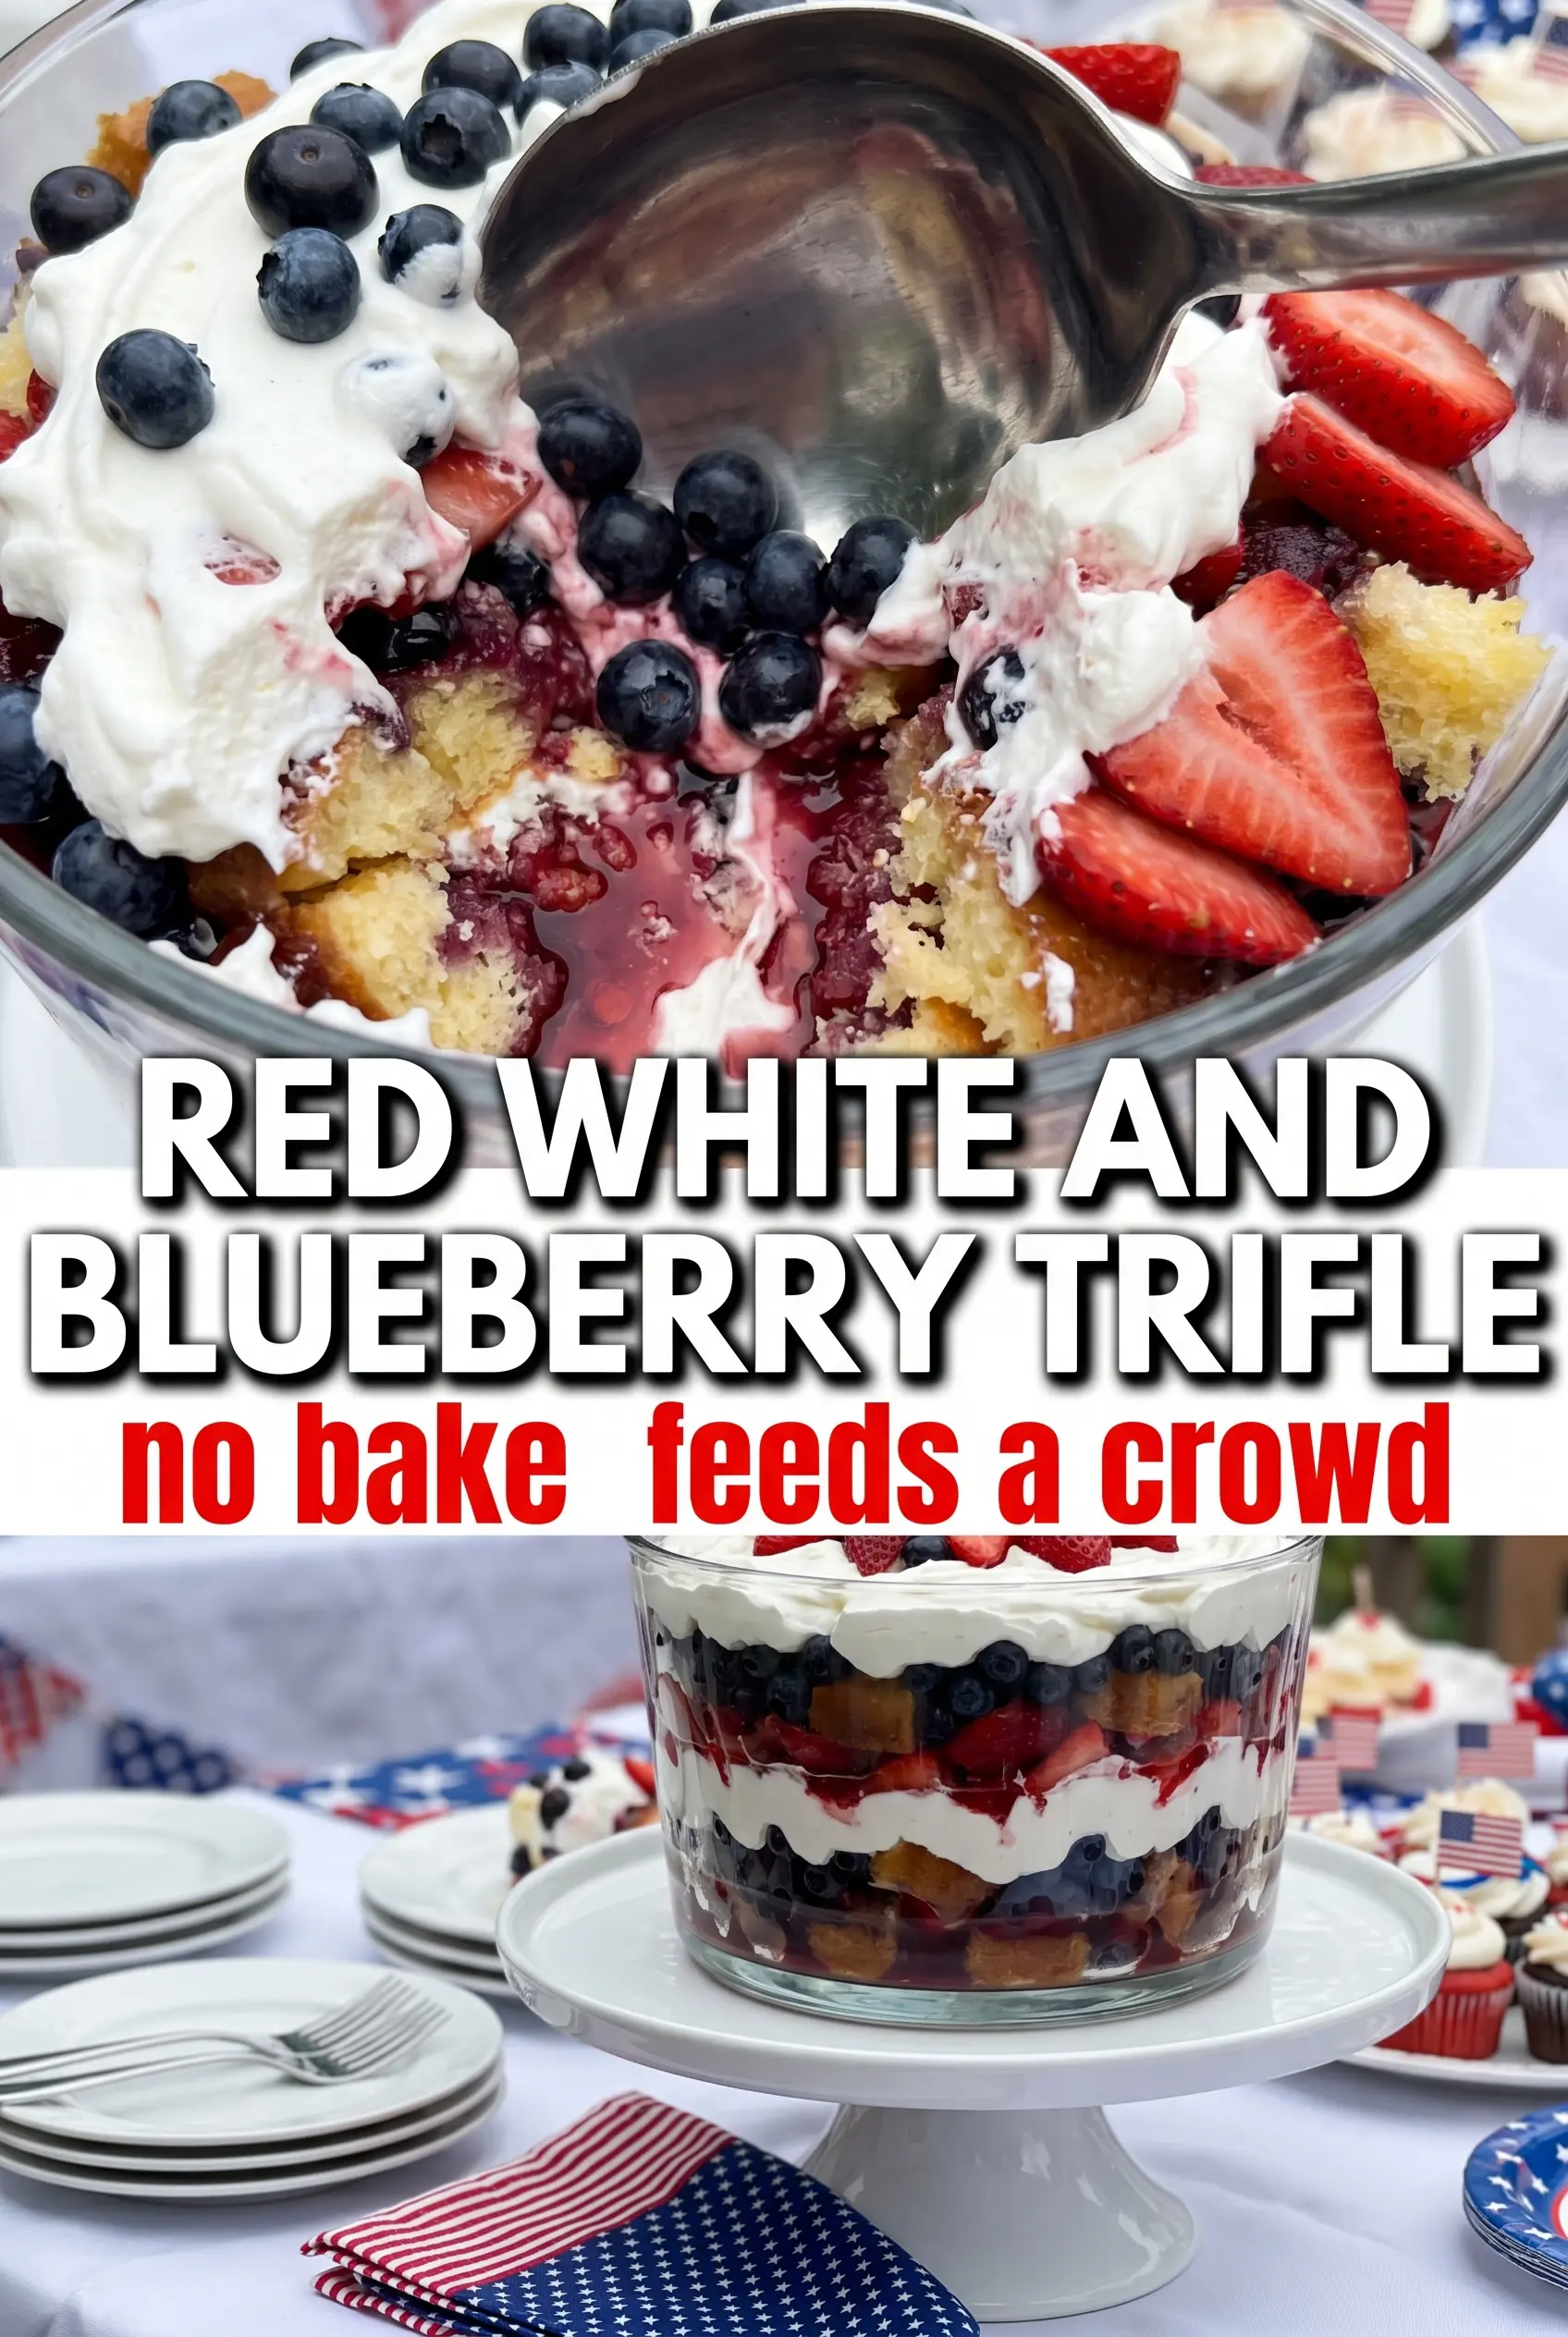
Layers of fluffy whipped cream, tender cake, and fresh berries make this red, white, and blueberry trifle one of those desserts that disappears fast at the table. It looks festive in a glass bowl, but the appeal goes deeper than the colors: every spoonful gives you soft cake, cool cream, and a bright pop of fruit in a single bite.
The trick is balancing the cream layers so they stay airy without turning loose. A little cream cheese gives the filling enough structure to hold the trifle together after chilling, while the whipped cream keeps it light. Using store-bought pound cake or angel food cake keeps the dessert easy, and fresh strawberries and blueberries bring the flavor that makes the whole bowl taste clean instead of heavy.
Below, you’ll find the layering order that keeps the colors sharp and the texture balanced, plus a few smart swaps if you want to make it a little lighter or prep it ahead for a crowd.
The cream cheese layer held its shape after chilling, and the berries kept the whole trifle from tasting too sweet. I loved how the cake softened just enough without getting soggy.
Love this red, white, and blueberry trifle? Save it for the next backyard cookout when you want a no-bake dessert with bold layers and clean berry flavor.
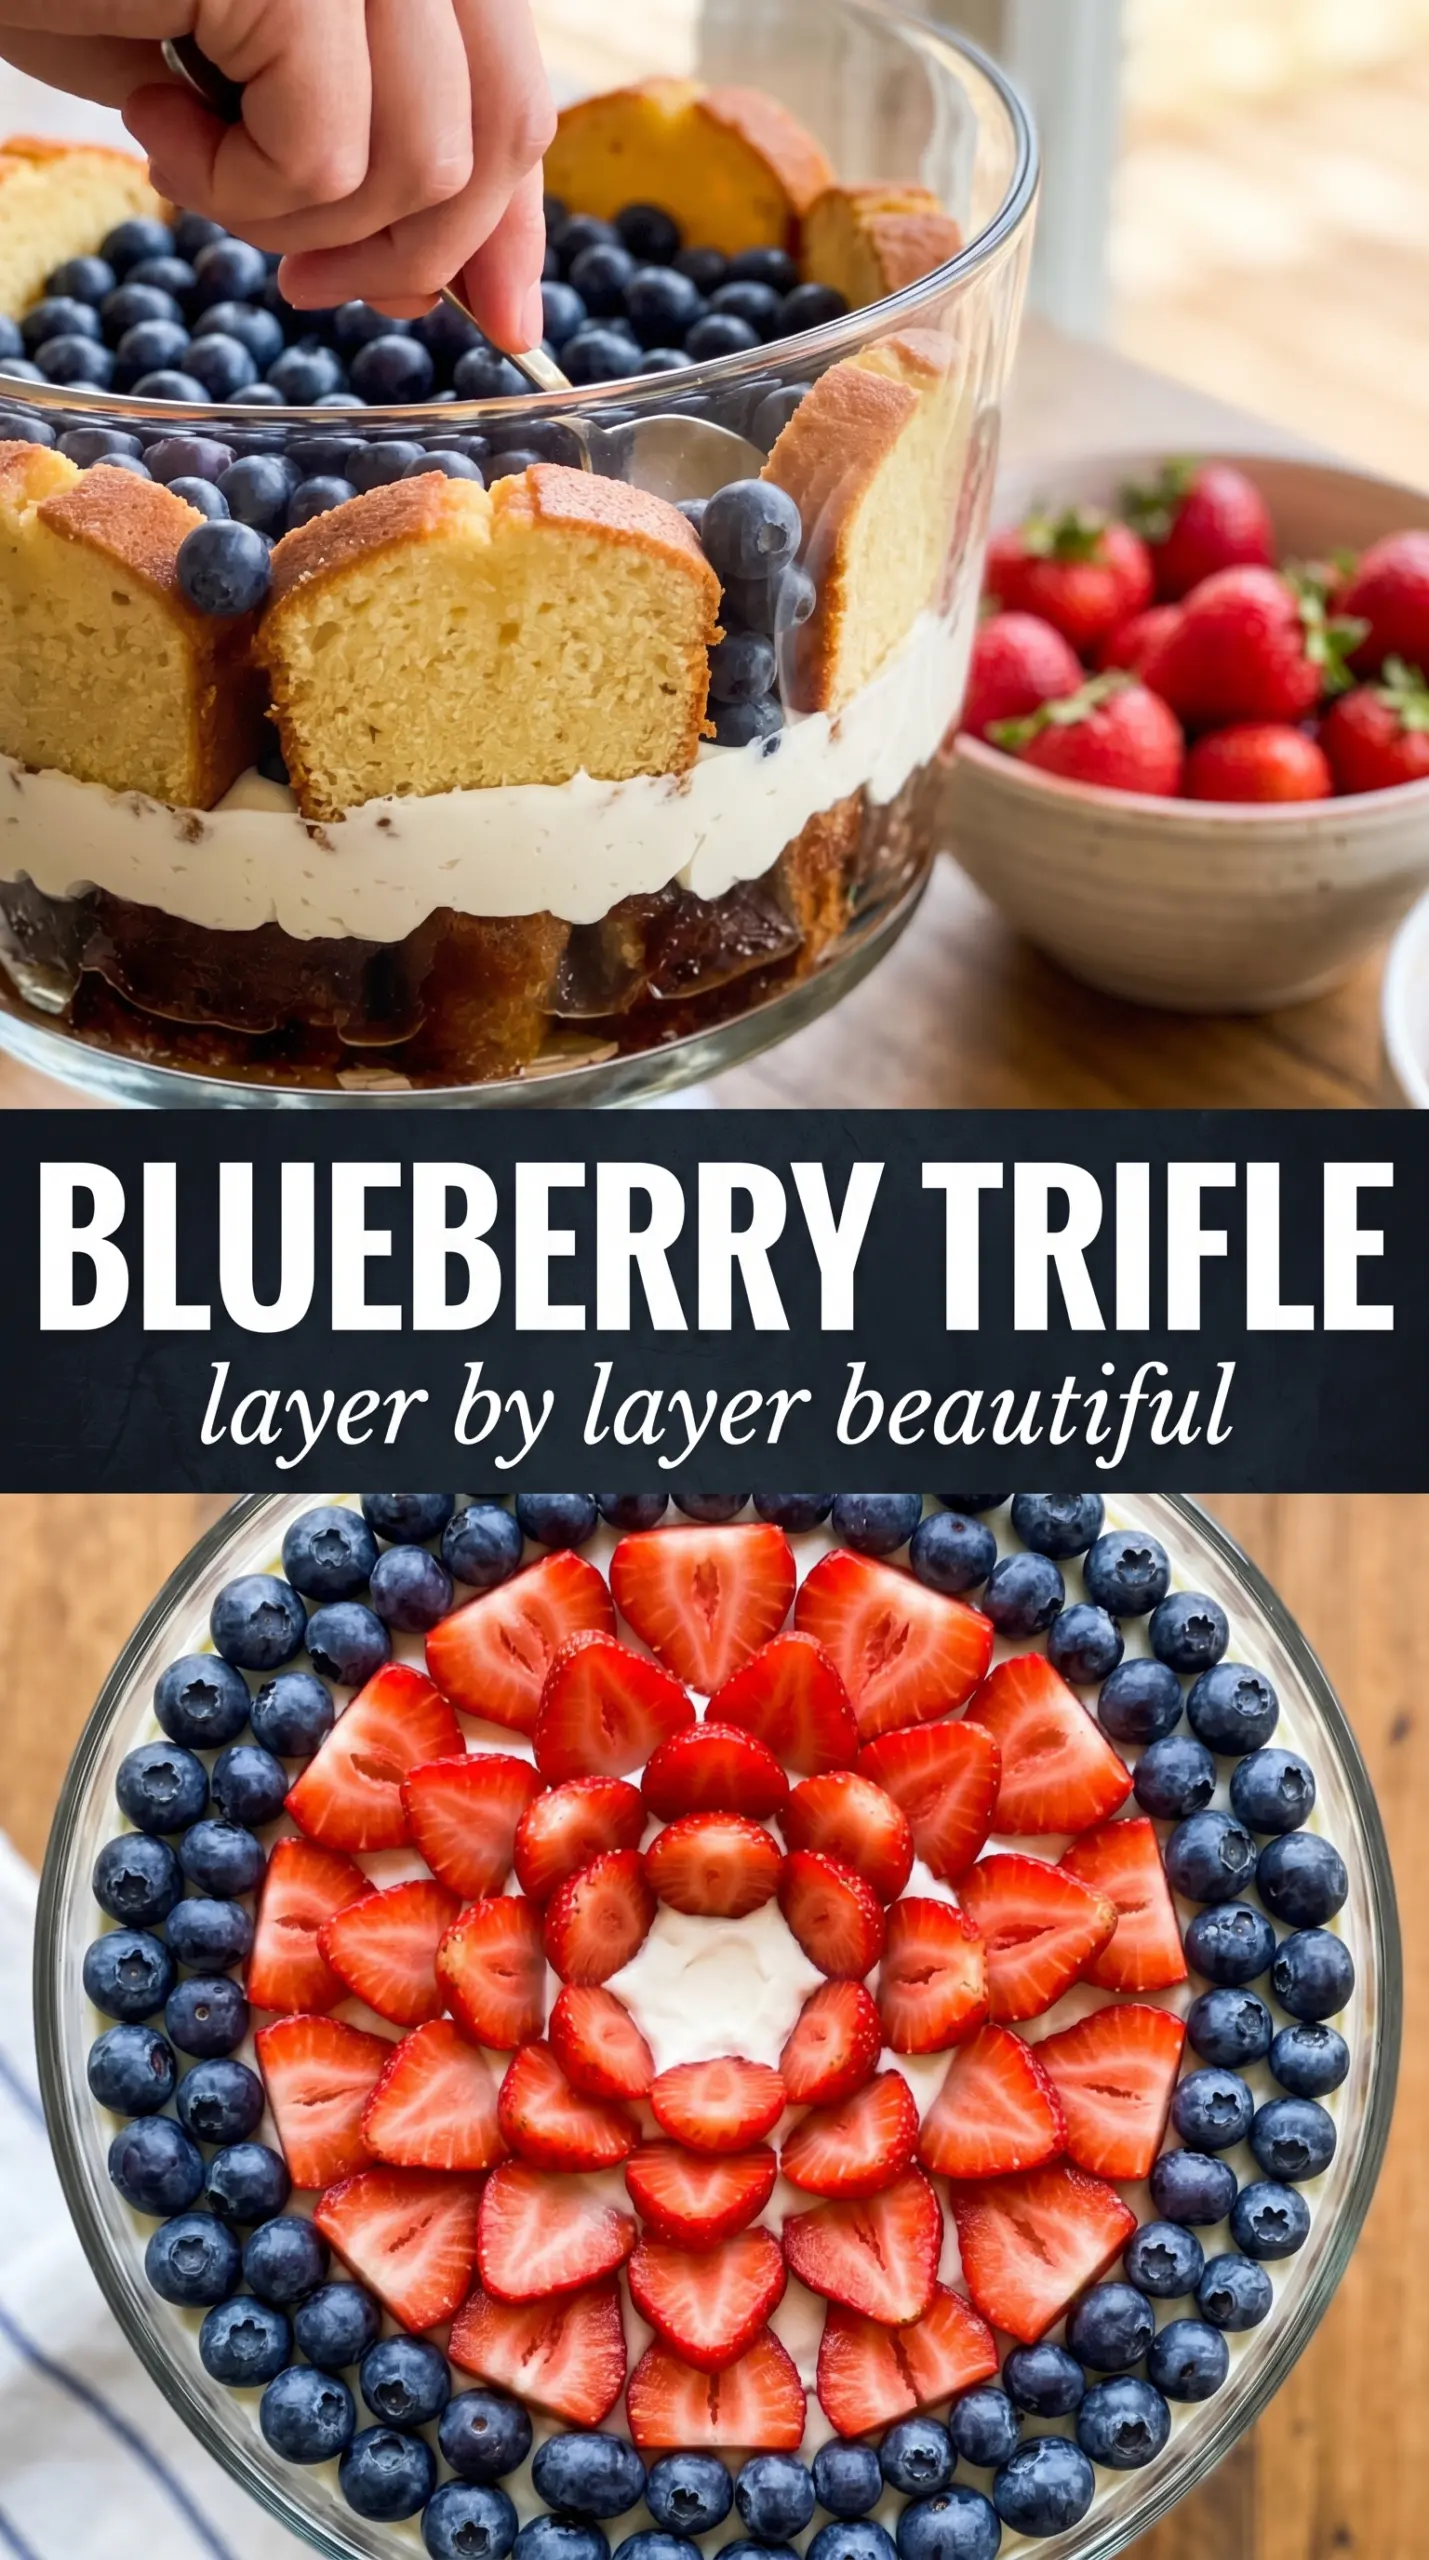
The Layer Order That Keeps This Trifle Tall, Not Sloppy
The biggest mistake with trifle is building it too fast and expecting the layers to hold themselves. If the whipped cream is loose or the cake is cut too small, the dessert settles into a soft pile instead of those distinct stripes you want in the bowl. This version stays defined because the cream cheese layer gives the filling backbone, and the cake cubes are big enough to keep their shape after chilling.
Use a large clear trifle bowl if you have one. The visual payoff matters here, and it also helps you see whether the layers are even as you build. If your strawberries are very juicy, let them sit in a bowl for a few minutes after slicing so the excess juice doesn’t bleed into the cream.
- Pound cake or angel food cake — Pound cake gives a richer, sturdier bite, while angel food cake makes the dessert lighter and a little more delicate. Either one works, but both should be cut into generous cubes so they don’t collapse under the cream.
- Cream cheese — This is what keeps the filling from running. It needs to be fully softened before beating, or you’ll end up with little lumps that never smooth out.
- Fresh berries — Fresh strawberries and blueberries matter here because frozen berries release too much liquid as they thaw. If you must use frozen, thaw them completely and drain them well first, then expect a softer, juicier trifle.
What the Cream Cheese Layer Is Doing for You
Whipped cream brings the light texture, but cream cheese is what gives this trifle its shape. When you beat it with powdered sugar until smooth, then fold in part of the whipped cream, you get a filling that’s airy enough to spoon but stable enough to stack. That combo is what keeps the dessert from turning watery after a couple hours in the fridge.
Powdered sugar matters more than granulated sugar in this filling because it dissolves cleanly and doesn’t leave any grit. Vanilla doesn’t just add sweetness; it rounds out the dairy and makes the berries taste brighter. If you want a lighter result, you can swap the pound cake for angel food cake, but don’t skip the cream cheese unless you’re okay with a softer, less structured dessert.
- Pound cake — Use this when you want a richer, sturdier base that can sit under the cream without falling apart. Angel food cake is the best swap if you want something lighter, but it will compress more once chilled.
- Heavy whipping cream — Whip it to stiff peaks, not soft peaks, so the layers stay fluffy and don’t slide. Stop as soon as the cream holds its shape; overwhipped cream turns grainy fast.
- Cream cheese — Full-fat cream cheese gives the best texture and the cleanest set. Low-fat versions can work in a pinch, but the filling will be softer and less stable.
- Powdered sugar — This sweetens without making the cream layer sandy. If you reduce it, the filling will taste more tangy and less dessert-like.
Building the Bowl So the Berries Stay Bright
Whipping the Cream to the Right Point
Start by beating the heavy cream with powdered sugar and vanilla until stiff peaks form. You want the cream to hold a point when the whisk lifts, but it should still look smooth and glossy. If it turns dull or starts to look clumpy, it’s gone too far and won’t fold well into the cream cheese.
Making the Cream Cheese Layer
Beat the softened cream cheese with powdered sugar until it’s completely smooth, with no visible lumps. Fold in half the whipped cream using a spatula and a gentle motion from the bottom of the bowl up through the center. If you stir hard, you’ll knock out the air and end up with a dense layer that won’t sit nicely between the fruit.
Layering for Clean Edges
Spread a layer of cake cubes in the bottom of the bowl, then spoon on the cream cheese mixture before adding strawberries. Continue with cake, plain whipped cream, and blueberries, repeating until the bowl is full. Keep the fruit close to the glass for visible color, and press down only lightly so the layers stay distinct instead of compacted.
Chilling Before Serving
Cover the trifle and chill it for at least 2 hours before serving. That resting time softens the cake just enough and lets the cream set up, which is why the dessert slices and spoons more cleanly after a proper chill. If you serve it too soon, the layers look pretty but taste loose and unfinished.
Three Smart Ways to Adjust This Trifle Without Losing the Look
Make it lighter with angel food cake
Angel food cake gives you a softer, airier trifle with less richness in each bite. It’s the easiest way to lighten the dessert, but the layers will settle a little more than they do with pound cake, so build it gently and chill it fully before serving.
Make it gluten-free with a certified gluten-free cake
Swap in a gluten-free pound cake or sponge cake with a sturdy crumb. The rest of the recipe doesn’t need to change, but give the cake a little extra time to absorb the cream because gluten-free cakes can dry out faster than standard ones.
Use raspberries for a sharper berry bite
Replacing some of the strawberries with raspberries gives the trifle a brighter, tart finish and a more dramatic color contrast. Raspberries are softer and juicier, so add them as a middle or top layer rather than burying them under heavy fruit if you want them to keep their shape.
Make the cream dairy-free
Use a dairy-free whipping topping and a plant-based cream cheese alternative, but expect a slightly softer set and a sweeter finish. Whip the topping cold and chill the assembled trifle longer so the layers have time to firm up before serving.
Storage and Reheating
- Refrigerator: Store covered for up to 2 days. The cake will soften more over time, and the berries will release a little juice into the cream, but the flavor stays great.
- Freezer: I don’t recommend freezing this trifle. The whipped cream and berries both lose their texture after thawing, and the whole dessert turns watery.
- Reheating: No reheating needed. Serve it cold straight from the refrigerator, and if it sits out for more than an hour, the cream will start to loosen.
Questions I Get Asked About This Recipe
Red, White and Blueberry Trifle
Ingredients
Equipment
Method
- Beat heavy whipping cream, 1/4 cup powdered sugar, and vanilla extract together at medium-high speed until stiff peaks form, then set the bowl aside.
- Beat cream cheese with 1/2 cup powdered sugar until smooth, then fold in half the whipped cream to create a fluffy cream cheese layer.
- Place a layer of pound cake cubes in the bottom of a large trifle bowl.
- Spoon a generous layer of cream cheese mixture over the cake, then add a layer of sliced strawberries.
- Add another layer of cake cubes, top with plain whipped cream, then add a layer of blueberries.
- Repeat layers until the bowl is full, finishing with whipped cream on top.
- Decorate the top with whole strawberries and blueberries, cover, and refrigerate for at least 2 hours before serving.